Discover how a bimodal integration strategy can address the major data management challenges facing your organization today.
Get the Report →DataBind Wijmo Grid to Sage Cloud Accounting Data
Provide real-time Sage Cloud Accounting data to interactive controls.
The Connect Server enables you to use Web services to connect to and query Sage Cloud Accounting data. This article details how to import an OData feed of Sage Cloud Accounting data into Wijmo Grid.
Configuring Connect Server
To work with live Sage Cloud Accounting data in Wijmo Grid, we need to connect to Sage Cloud Accounting from Connect Server, provide user access to the new virtual database, and create OData endpoints for the Sage Cloud Accounting data.
Add a Connect Server User
Create a User to connect to Sage Cloud Accounting from Wijmo Grid through Connect Server.
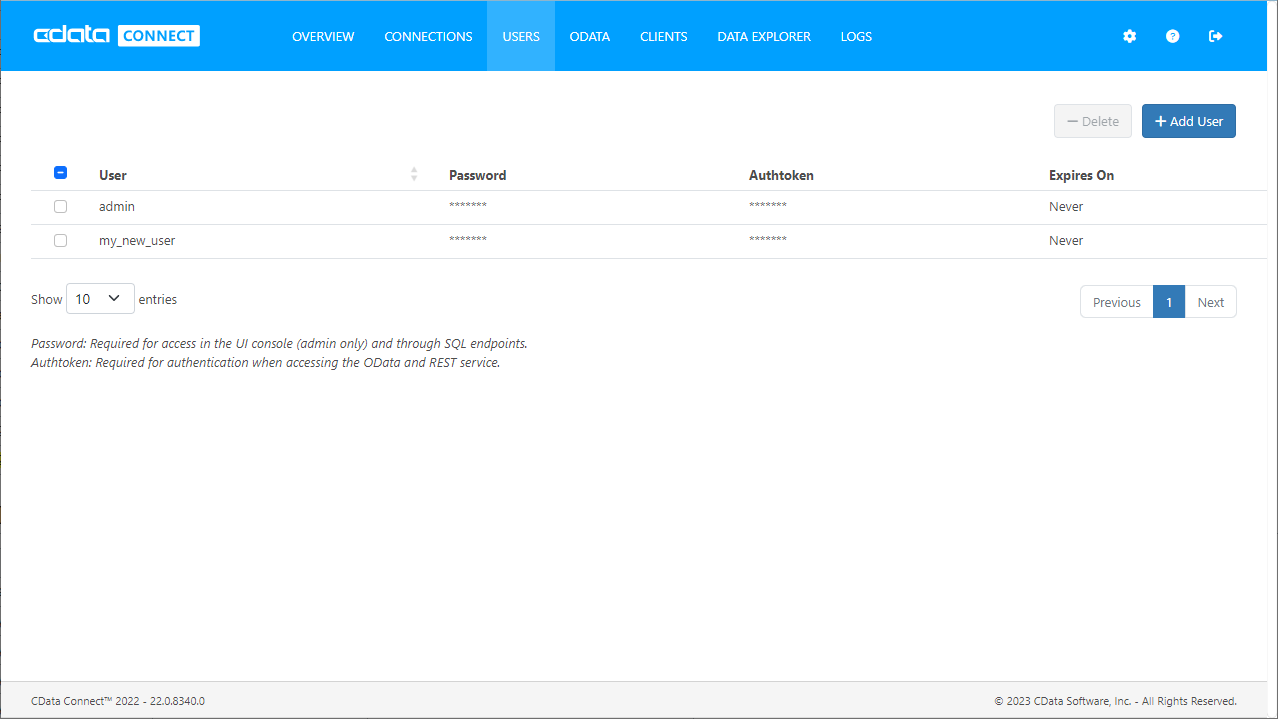
- Click Users -> Add
-
Configure a User
![Creating a new user]()
-
Click Save Changes and make note of the Authtoken for the new user
![Connect Server users]()
Connect to Sage Cloud Accounting from Connect Server
CData Connect Server uses a straightforward, point-and-click interface to connect to data sources and generate APIs.
-
Open Connect Server and click Connections
![Adding a connection]()
- Select "Sage Cloud Accounting" from Available Data Sources
-
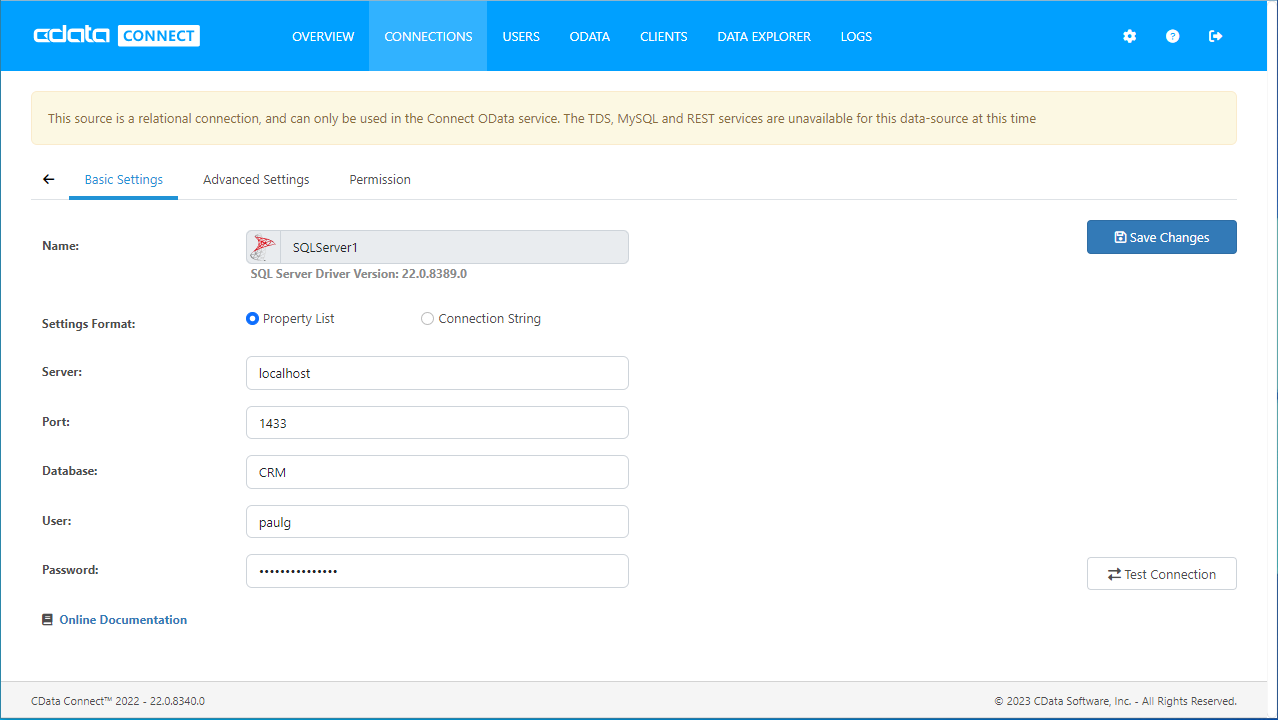
Enter the necessary authentication properties to connect to Sage Cloud Accounting.
You can connect to Sage Business Cloud Accounting using the embedded OAuth connectivity. When you connect, the OAuth endpoint opens in your browser. Log in and grant permissions to complete the OAuth process. See the OAuth section in the online Help documentation for more information on other OAuth authentication flows.
![Configuring a connection (SQL Server is shown).]()
- Click Save Changes
- Click Privileges -> Add and add the new user (or an existing user) with the appropriate permissions (SELECT is all that is required for Reveal).
Add Sage Cloud Accounting OData Endpoints in Connect Server
After connecting to Sage Cloud Accounting, create OData Endpoints for the desired table(s).
- Click OData -> Tables -> Add Tables
- Select the Sage Cloud Accounting database
-
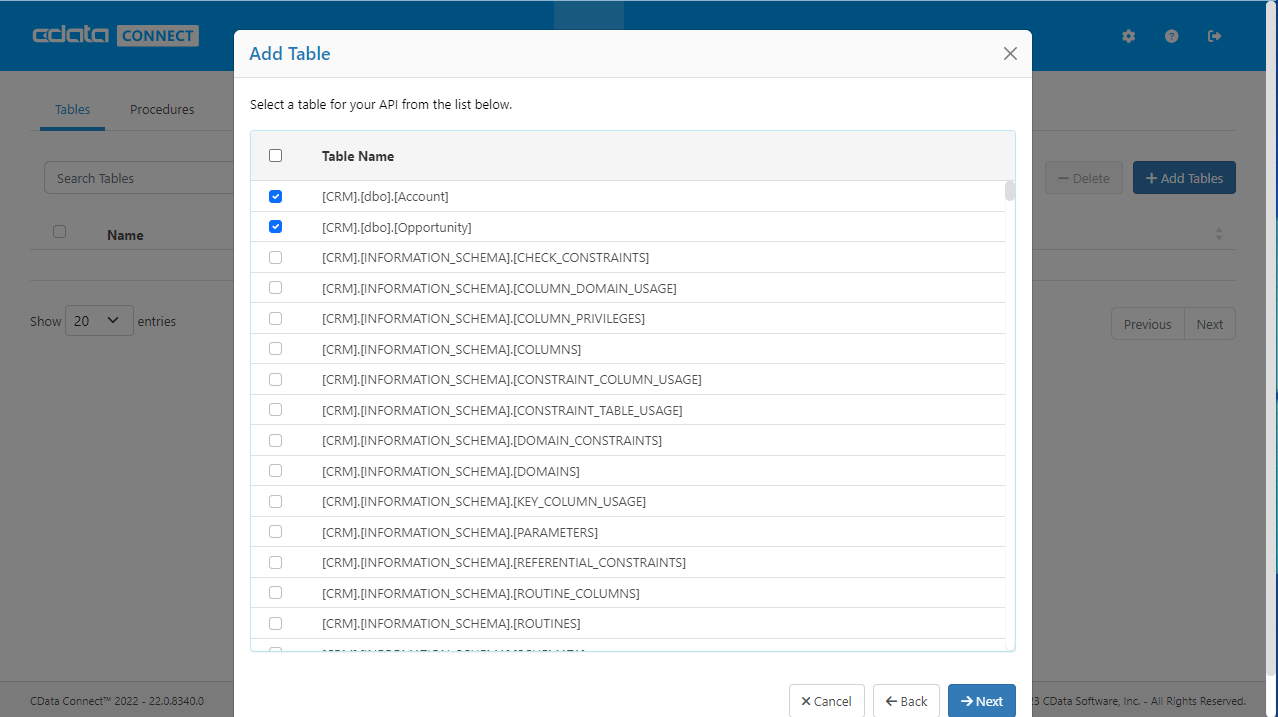
Select the table(s) you wish to work with and click Next
![Selecting a Table (SQL Server is shown)]()
- (Optional) Edit the resource to select specific fields and more
- Save the settings
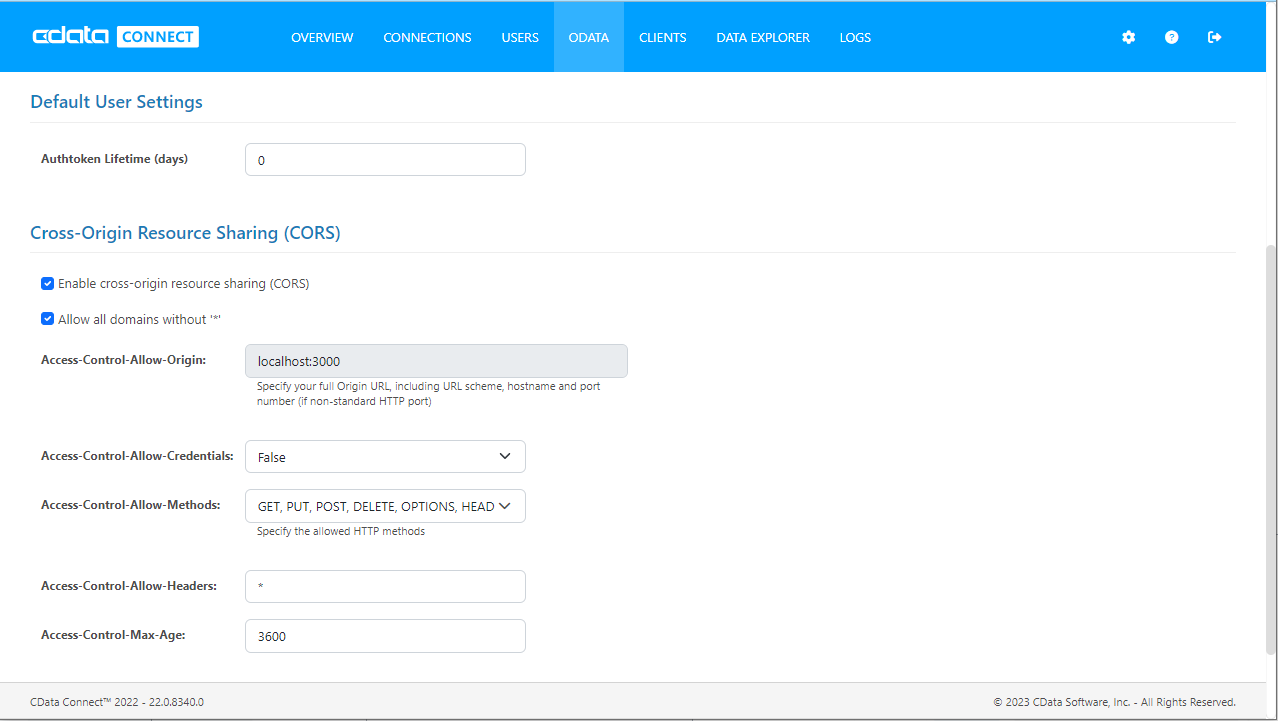
(Optional) Configure Cross-Origin Resource Sharing (CORS)
When accessing and connecting to multiple domains from an application such as Ajax, there is a possibility of violating the limitations of cross-site scripting. In that case, configure the CORS settings in OData -> Settings.
- Enable cross-origin resource sharing (CORS): ON
- Allow all domains without '*': ON
- Access-Control-Allow-Methods: GET, PUT, POST, OPTIONS
- Access-Control-Allow-Headers: Authorization
Save the changes to the settings.
Connect to Sage Cloud Accounting Data using Wijmo Grid
Create a Real-Time Grid
Follow the steps below to consume Sage Cloud Accounting data from the Wijmo JavaScript controls:
-
Load the required Wijmo, jQuery, and Knockout libraries:
			<script src="http://code.jquery.com/jquery-1.11.1.min.js"></script>
			<script src="http://code.jquery.com/ui/1.11.0/jquery-ui.min.js"></script>

			<!--Theme-->
			<link href="http://cdn.wijmo.com/themes/aristo/jquery-wijmo.css" rel="stylesheet" type="text/css">

				<!--Wijmo Widgets CSS-->
				<link href="http://cdn.wijmo.com/jquery.wijmo-pro.all.3.20161.90.min.css" rel="stylesheet" type="text/css">

					<!--Wijmo Widgets JavaScript-->
					<script src="http://cdn.wijmo.com/jquery.wijmo-open.all.3.20161.90.min.js"></script>
					<script src="http://cdn.wijmo.com/jquery.wijmo-pro.all.3.20161.90.min.js"></script>
					<script src="http://cdn.wijmo.com/interop/wijmo.data.ajax.3.20161.90.js"></script>

					<!--Knockout JS Library-->
					<!-- Both of the links below can work -->
					<script src="http://cdn.wijmo.com/wijmo/external/knockout-2.2.0.js"></script>
					<!--<script src="http://cdn.wijmo.com/amd-js/3.20161.90/knockout-3.1.0.js"></script>-->

					<!--Wijmo Knockout Integration Library-->
					<script src="http://cdn.wijmo.com/interop/knockout.wijmo.3.20161.90.js"></script>
-
Create a ViewModel and connect to it using the ODataView. You will need to replace the placeholder values for
the URL of the API Server, an API Server user, and the authtoken for that user.
<script id="scriptInit"> $.support.cors = true; var viewModel; function ViewModel() { var salesinvoicesView = new wijmo.data.ODataView("http://MyServer:MyPort/api.rsc/SalesInvoices", { ajax: { dataType: "jsonp", username: "MyUser", password: "MyAuthtoken", data: { "$inlinecount": null } }, pageSize: 10 }); salesinvoicesView.refresh(); salesinvoicesView.nextPage(); this.salesinvoices = salesinvoicesView; this.prevPage = function () {salesinvoicesView.prevPage();}; this.nextPage = function () {salesinvoicesView.nextPage();}; } $(document).ready(function () { viewModel = new ViewModel(); ko.applyBindings(viewModel, $(".container").get(0)); }); </script> -
DataBind: Below is a simple table with some paging buttons, which you can paste into the body section of your markup.
			<h2>Connect to Live Sage Cloud Accounting Data in Real Time</h2>

			<h3>SalesInvoices</h3>
			<div>
				<button title="previous page" class="pagebuttons" data-bind="click: prevPage, button: {}">
					<span class="ui-icon ui-icon-seek-prev" />
				</button>
				<button title="next page" class="pagebuttons" data-bind="click: nextPage, button: {}">
					<span class="ui-icon ui-icon-seek-next" />
				</button>
			</div>
			<table id="demo-grid" data-bind="wijgrid: {
      data: salesinvoices,
      showFilter: true,
      allowPaging: true,
      pagerSettings: { position: 'none'},
      columnsAutogenerationMode: 'append',
    }" >
			</table>
At this point, you may be prompted to re-enter the username and authtoken. After doing so, a resulting table
or grid should appear, as seen below. You can filter and sort through pages of Sage Cloud Accounting data.

Free Trial & More Information
If you are interested in connecting to your Sage Cloud Accounting data (or data from any of our other supported data sources) from Wijmo Grid, sign up for a free trial of CData Connect Server today! For more information on Connect Server and to see what other data sources we support, refer to our CData Connect page.


