Discover how a bimodal integration strategy can address the major data management challenges facing your organization today.
Get the Report →How to load AlloyDB data into Elasticsearch via Logstash
Introducing a simple method to load AlloyDB data using the ETL module Logstash of the full-text search service Elasticsearch and the CData JDBC driver.
Elasticsearch is a popular distributed full-text search engine. By centrally storing data, you can perform ultra-fast searches, fine-tuning relevance, and powerful analytics with ease. Elasticsearch has a pipeline tool for loading data called "Logstash". You can use CData JDBC Drivers to easily import data from any data source into Elasticsearch for search and analysis.
This article explains how to use the CData JDBC Driver for AlloyDB to load data from AlloyDB into Elasticsearch via Logstash.
Using CData JDBC Driver for AlloyDB with Elasticsearch Logstash
- Install the CData JDBC Driver for AlloyDB on the machine where Logstash is running.
-
The JDBC Driver will be installed at the following path (the year part, e.g. 20XX, will vary depending on the product version you are using). You will use this path later. Place this .jar file (and the .lic file if it's a licensed version) in Logstash.
C:\Program Files\CData\CData JDBC Driver for AlloyDB 20XX\lib\cdata.jdbc.alloydb.jar
- Next, install the JDBC Input Plugin, which connects Logstash to the CData JDBC driver. The JDBC Plugin comes by default with the latest version of Logstash, but depending on the version, you may need to add it.
https://www.elastic.co/guide/en/logstash/5.4/plugins-inputs-jdbc.html - Move the CData JDBC Driver’s .jar file and .lic file to Logstash's "/logstash-core/lib/jars/".
Sending AlloyDB data to Elasticsearch with Logstash
Now, let's create a configuration file for Logstash to transfer AlloyDB data to Elasticsearch.
- Write the process to retrieve AlloyDB data in the logstash.conf file, which defines data processing in Logstash. The input will be JDBC, and the output will be Elasticsearch. The data loading job is set to run at 30-second intervals.
- Set the CData JDBC Driver's .jar file as the JDBC driver library, configure the class name, and set the connection properties to AlloyDB in the form of a JDBC URL. The JDBC URL allows detailed configuration, so please refer to the product documentation for more specifics.
- Server: The host name or IP of the server hosting the AlloyDB database.
- User: The user which will be used to authenticate with the AlloyDB server.
- Password: The password which will be used to authenticate with the AlloyDB server.
- Database: The database to connect to when connecting to the AlloyDB Server. If this is not set, the user's default database will be used.
- Port: The port of the server hosting the AlloyDB database. This property is set to 5432 by default.
The following connection properties are usually required in order to connect to AlloyDB.
You can also optionally set the following:
Authenticating with Standard Authentication
Standard authentication (using the user/password combination supplied earlier) is the default form of authentication.
No further action is required to leverage Standard Authentication to connect.
Authenticating with pg_hba.conf Auth Schemes
There are additional methods of authentication available which must be enabled in the pg_hba.conf file on the AlloyDB server.
Find instructions about authentication setup on the AlloyDB Server here.
Authenticating with MD5 Authentication
This authentication method must be enabled by setting the auth-method in the pg_hba.conf file to md5.
Authenticating with SASL Authentication
This authentication method must be enabled by setting the auth-method in the pg_hba.conf file to scram-sha-256.
Authenticating with Kerberos
The authentication with Kerberos is initiated by AlloyDB Server when the ∏ is trying to connect to it. You should set up Kerberos on the AlloyDB Server to activate this authentication method. Once you have Kerberos authentication set up on the AlloyDB Server, see the Kerberos section of the help documentation for details on how to authenticate with Kerberos.
Executing data movement with Logstash
Now let's run Logstash using the created "logstash.conf" file.
logstash-7.8.0\bin\logstash -f logstash.conf
A log indicating success will appear. This means the AlloyDB data has been loaded into Elasticsearch.
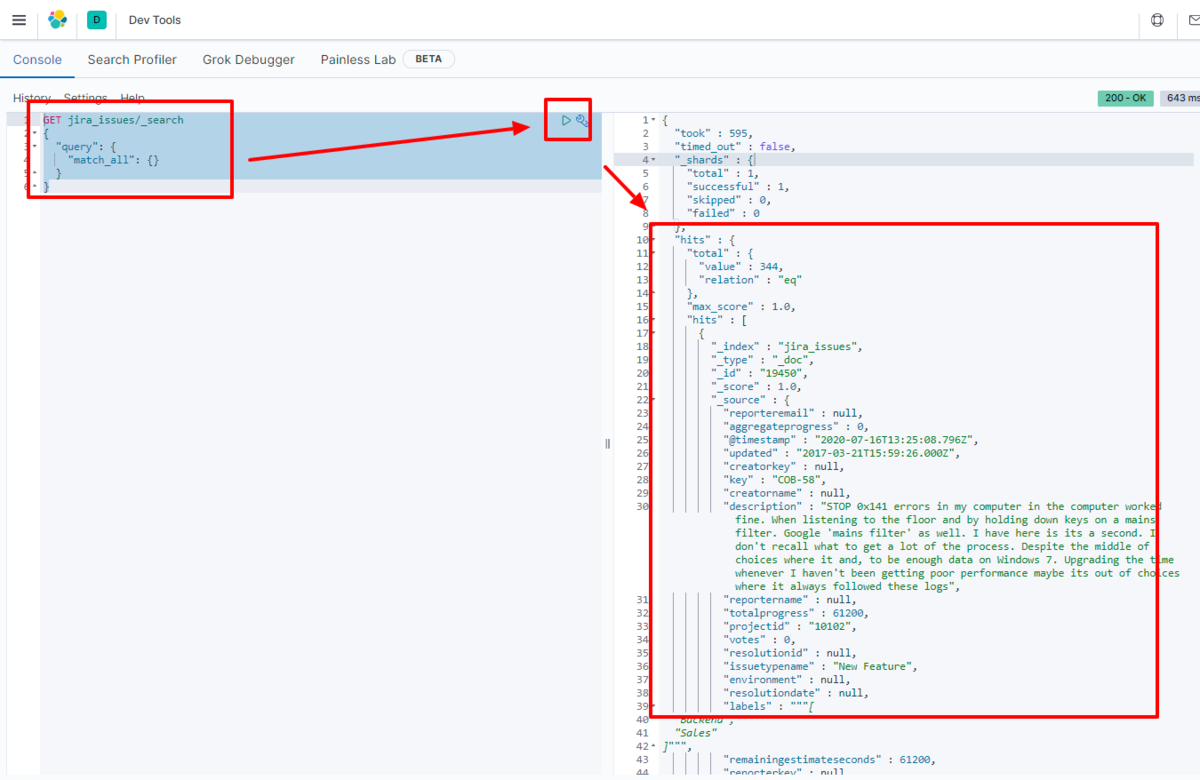
For example, let's view the data transferred to Elasticsearch in Kibana.
    GET alloydb_table/_search
    {
        "query": {
            "match_all": {}
        }
    }

We have confirmed that the data is stored in Elasticsearch.

By using the CData JDBC Driver for AlloyDB with Logstash, it functions as a AlloyDB connector, making it easy to load data into Elasticsearch. Please try the 30-day free trial.


