Discover how a bimodal integration strategy can address the major data management challenges facing your organization today.
Get the Report →Integrate Real-Time Access to Slack in SAPUI5 MVC Apps
Use the built-in ODataModel class in SAPUI5 to create Web apps that reflect changes to Slack data in real time.
In this article we show how to use the CData Connect Server and with the ADO.NET Provider for Slack (or any of 200+ other ADO.NET Providers) to write SAPUI5 apps that leverage the capabilities of the Slack API, without writing to a back-end database. The Connect Server is a lightweight Web application that runs on your server and produces OData feeds of Slack data. OData is the standard for real-time data access over the Web and has built-in support in SAPUI5 and OpenUI5.
Configuring Connect Server
To work with live Slack data in our SAPUI5 app, we need to connect to Slack from Connect Server, provide user access to the new virtual database, and create OData endpoints for the Slack data.
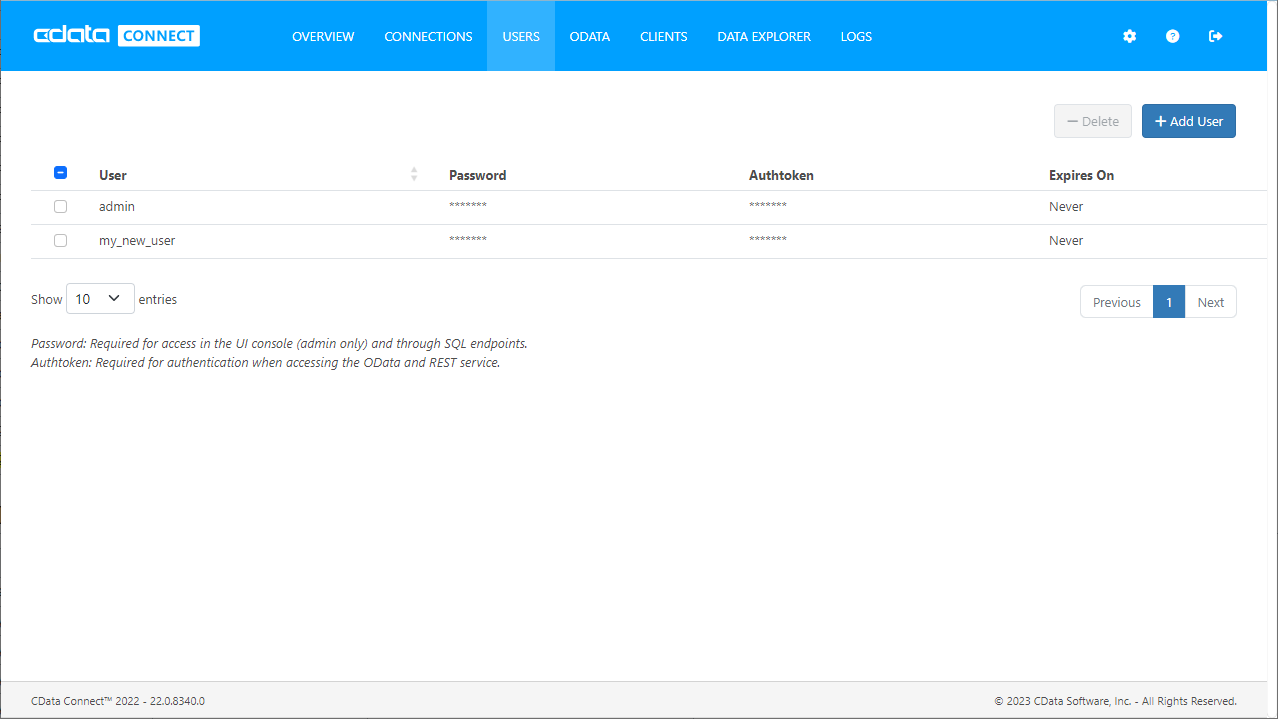
Add a Connect Server User
Create a User to connect to Slack from SAPUI5 through Connect Server.
- Click Users -> Add
- Configure a User
![Creating a new user]()
- Click Save Changes and make note of the Authtoken for the new user
![Connect Server users]()
Connect to Slack from Connect Server
CData Connect Server uses a straightforward, point-and-click interface to connect to data sources and generate APIs.
- Open Connect Server and click Connections
![Adding a connection]()
- Select "Slack" from Available Data Sources
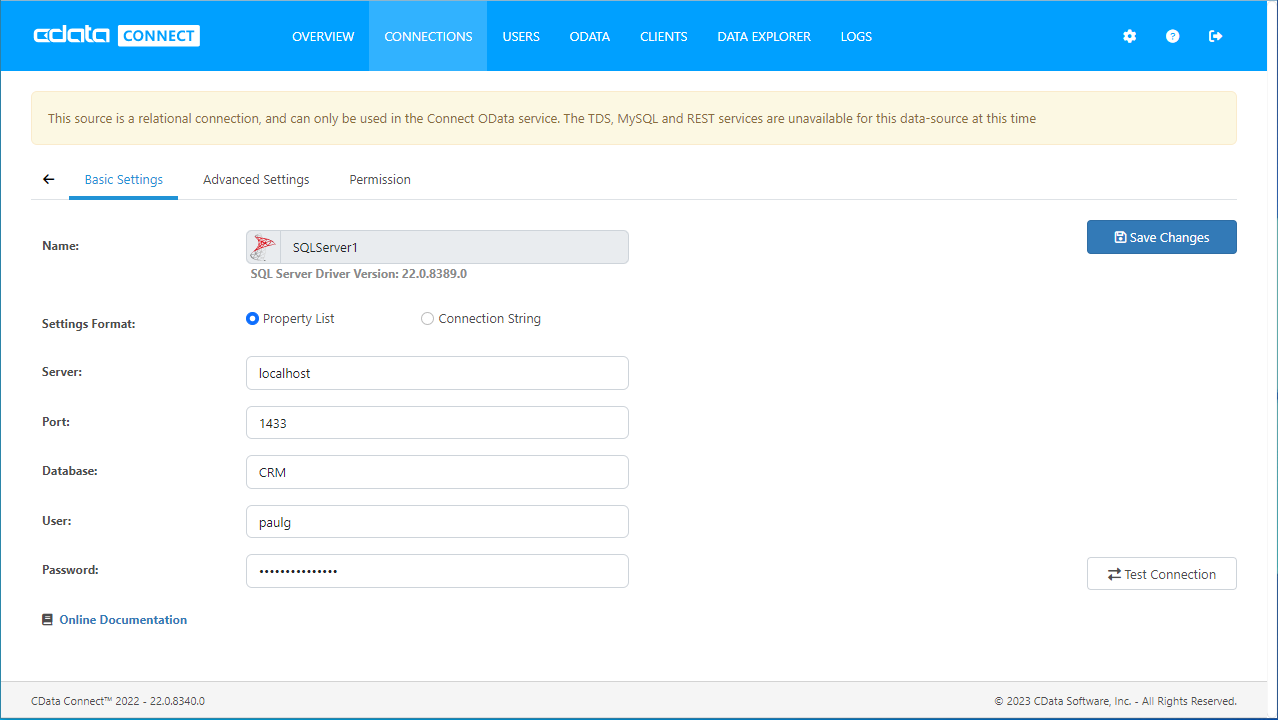
- Enter the necessary authentication properties to connect to Slack.
Slack uses the OAuth authentication standard. To authenticate using OAuth, you will need to create an app to obtain the OAuthClientId, OAuthClientSecret, and CallbackURL connection properties. See the Getting Started section of the help documentation for an authentication guide.
![Configuring a connection (SQL Server is shown).]()
- Click Save Changes
- Click Privileges -> Add and add the new user (or an existing user) with the appropriate permissions (SELECT is all that is required for Reveal).
Add Slack OData Endpoints in Connect Server
After connecting to Slack, create OData Endpoints for the desired table(s).
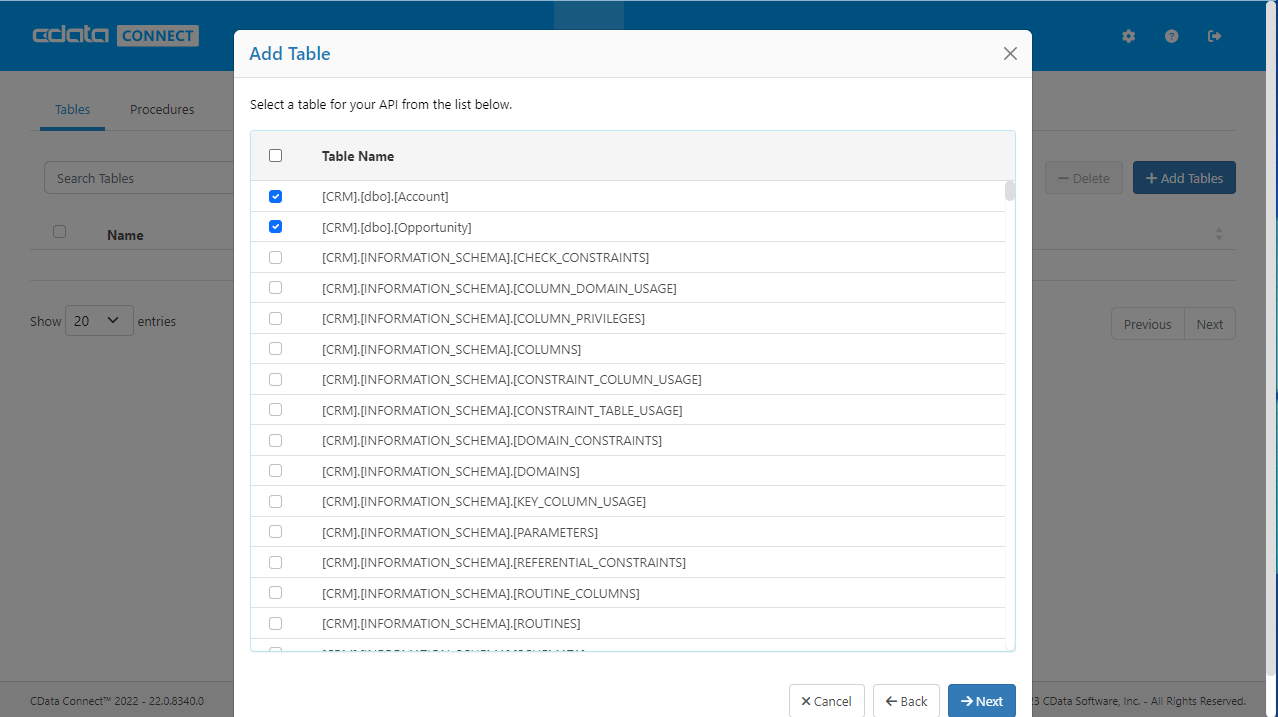
- Click OData -> Tables -> Add Tables
- Select the Slack database
- Select the table(s) you wish to work with and click Next
![Selecting a Table (SQL Server is shown)]()
- (Optional) Edit the resource to select specific fields and more
- Save the settings
(Optional) Configure Cross-Origin Resource Sharing (CORS)
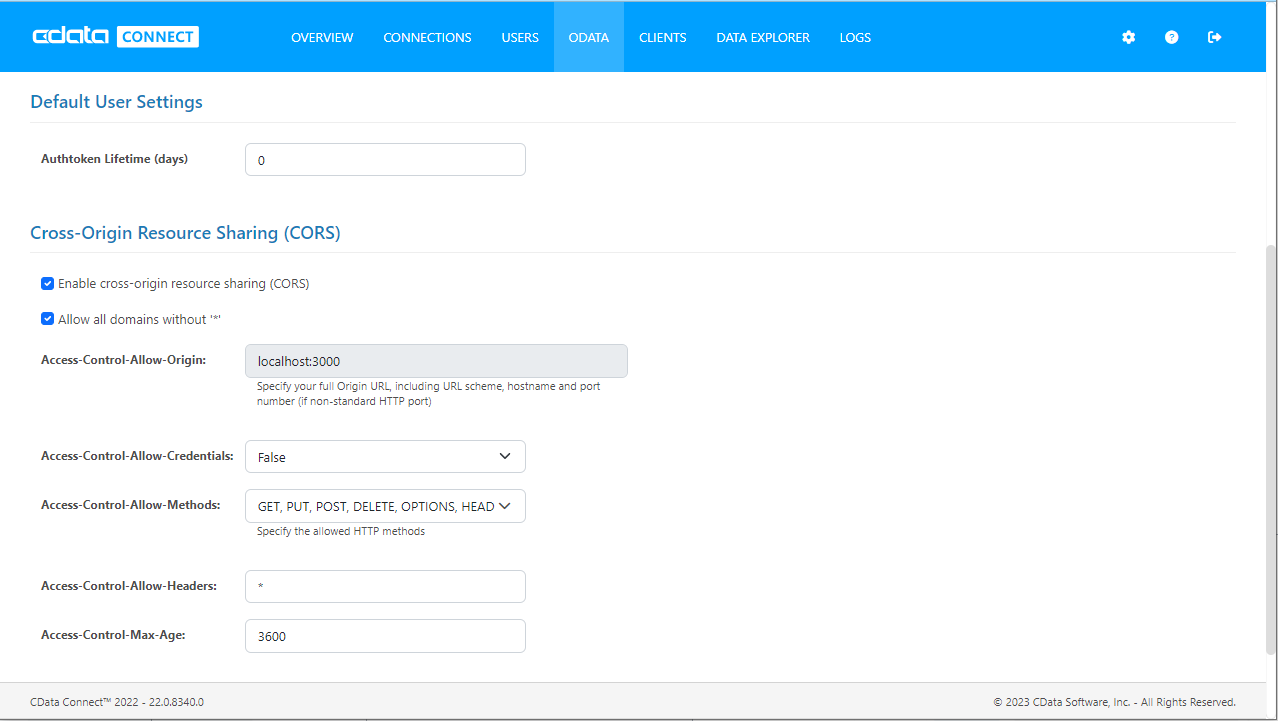
When accessing and connecting to multiple domains from an application such as Ajax, there is a possibility of violating the limitations of cross-site scripting. In that case, configure the CORS settings in OData -> Settings.
- Enable cross-origin resource sharing (CORS): ON
- Allow all domains without '*': ON
- Access-Control-Allow-Methods: GET, PUT, POST, OPTIONS
- Access-Control-Allow-Headers: Authorization
Save the changes to the settings.

Create the View
In this article the user views and interacts with Slack data through an SAPUI5 table control. Table columns will be automatically detected from the metadata retrieved from the Connect Server's API endpoint. We define the following table in a separate View.view.xml file:
<mvc:View
  controllerName="sap.ui.table.sample.OData2.Controller"
  xmlns="sap.ui.table"
  xmlns:mvc="sap.ui.core.mvc"
  xmlns:u="sap.ui.unified"
  xmlns:c="sap.ui.core"
  xmlns:m="sap.m">
  <m:Page
    showHeader="false"
    enableScrolling="true"
    class="sapUiContentPadding">
    <m:content>
      <Table
        id="table"
        selectionMode="MultiToggle"
        visibleRowCount="10"
        enableSelectAll="false"
        rows="{/Channels}"
        threshold="15"
        enableBusyIndicator="true"
        columns="{
          path: 'meta>/dataServices/schema/[${namespace}===\'CData\']/entityType/[${name}===\'Channels\']/property',
          factory: '.columnFactory'
        }">
        <toolbar>
          <m:Toolbar>
            <m:Title text="Slack Channels"></m:Title>
          </m:Toolbar>
        </toolbar>
        <noData>
          <m:BusyIndicator class="sapUiMediumMargin"/>
        </noData>
      </Table>
    </m:content>
  </m:Page>
</mvc:View>
Create the Model and Controller
In SAPUI5, you do not need to write any OData queries; an ODataModel instance handles the application's data access commands. The Connect Server then translates the queries into Slack API calls.
The controller processes user input and represents information to the user through a view. Define the controller in a new file, Controller.controller.js. Instantiate the model in the onInit function -- you will need to replace the placeholder values for the serviceUrl to the Connect Server as well as the Authorization header.
For the Authorization header, you will keep the "Basic" as shown and then use a Base64 encoder (such as this one) to generate a token to fill in the second part. You will use the login information for Connect Server in the following format to generate your encoded token -> User:Authtoken
sap.ui.define([
  "sap/ui/core/mvc/Controller",
  "sap/ui/model/odata/v2/ODataModel",
  "sap/ui/model/json/JSONModel",
  "sap/ui/table/Column",
  "sap/m/Text",
], function(Controller, ODataModel, JSONModel, Column, Text ) {
  "use strict";


  return Controller.extend("sap.ui.table.sample.OData2.Controller", {

    onInit : function () {

      var oView = this.getView();
      var oDataModel = new ODataModel({
        serviceUrl: "http://localhost:8080/odata.rsc/",
        headers: {
            "Authorization":"Basic your-token-here>"
        }
    });

      oDataModel.setUseBatch(false);
      oDataModel.getMetaModel().loaded().then(function(){
        oView.setModel(oDataModel.getMetaModel(), "meta");
      });
      oView.setModel(oDataModel);

      var oTable = oView.byId("table");
      var oBinding = oTable.getBinding("rows");
      var oBusyIndicator = oTable.getNoData();
      oBinding.attachDataRequested(function(){
      oTable.setNoData(oBusyIndicator);
      });
      oBinding.attachDataReceived(function(){
        oTable.setNoData(null); //use default again ("no data" in case no data is available)
      });
    },

    onExit : function () {
    },

    columnFactory : function(sId, oContext) {
      var oModel = this.getView().getModel();
      var sName = oContext.getProperty("name");
      var sType = oContext.getProperty("type");
      var iLen = oContext.getProperty("maxLength");
      iLen = iLen ? parseInt(iLen, 10) : 10;

      return new Column(sId, {
        sortProperty: sName,
        filterProperty: sName,
        width: (iLen > 9 ? (iLen > 50 ? 15 : 10) : 5) + "rem",
        label: new sap.m.Label({text: "{/#Channels/" + sName + "/@name}"}),
        hAlign: sType && sType.indexOf("Decimal") >= 0 ? "End" : "Begin",
        template: new Text({text: {path: sName}})
      });
    }

  });

});
Describe Application Logic
Create a component that contains the resources of your application. Define the following in Component.js:
sap.ui.define([
  'sap/ui/core/UIComponent'
], function(UIComponent) {
  "use strict";

  return UIComponent.extend("sap.ui.table.sample.OData2.Component", {
    metadata : {
      rootView : "sap.ui.table.sample.OData2.View",
      dependencies : {
        libs : [
          "sap.ui.table",
          "sap.ui.unified",
          "sap.m"
        ]
      },

      config : {
        sample : {
          stretch : true,
          files : [
            "View.view.xml",
            "Controller.controller.js"
          ]
        }
      }
    }
  });

});
Bootstrap OpenUI5 and Launch
To complete the MVC application, simply add the bootstrap and initialization code. Add these directly to index.html:
<!DOCTYPE HTML>

<html>
<head>
  <meta http-equiv="x-ua-compatible" content="ie=edge">
  <meta charset="utf-8">
  <title>Slack Channels</title>

  <script id="sap-ui-bootstrap"
    src="https://openui5.hana.ondemand.com/resources/sap-ui-core.js"
    data-sap-ui-libs="sap.m"
    data-sap-ui-theme="sap_bluecrystal"
    data-sap-ui-xx-bindingSyntax="complex"
    data-sap-ui-preload="async"
    data-sap-ui-compatVersion="edge"
    data-sap-ui-resourceroots='{"sap.ui.table.sample.OData2": "./", "sap.ui.demo.mock": "mockdata"}'>
  </script>

  <!-- application launch configuration -->
  <script>

      sap.ui.getCore().attachInit(function() {
        new sap.m.App ({
          pages: [
                new sap.m.Page({
                    title: "Slack Channels",
                    enableScrolling : false,
                  content: [ new sap.ui.core.ComponentContainer({
                  height : "100%", name : "sap.ui.table.sample.OData2"
                })]
            })
          ]
      }).placeAt("content");
    });

  </script>
</head>
  <!-- UI Content -->
<body class="sapUiBody" id="content" role="application">
</body>
</html>
Setting Up A Web Server
To test the project, we can set up a web server. SAPUI5 has its own mock server, and the documentation for setting it up can be found here: https://sapui5.hana.ondemand.com/sdk/#/topic/50897decc9504b2a875fb41d89fd254a
Alternatively, we can use a NodeJS server, like so:
    var fs = require('fs'), http = require('http');

    http.createServer(function (req, res) {
      fs.readFile(__dirname + req.url, function (err,data) {
        if (err) {
          res.writeHead(404);
          res.end(JSON.stringify(err));
          return;
        }
        res.writeHead(200);
        res.end(data);
      });
    }).listen(3000); //we're using port 3000, but you may use a different one
The resulting SAPUI5 table control reflects any changes to a table in the remote Slack data. You can now browse and search current Slack data.

Free Trial & More Information
If you are interested in connecting to your Slack data (or data from any of our other supported data sources), sign up for a free trial of CData Connect Server today! For more information on Connect Server and to see what other data sources we support, refer to our CData Connect page.


