Discover how a bimodal integration strategy can address the major data management challenges facing your organization today.
Get the Report →Import Procore Data into Microsoft Power Query
The CData Connect Server offers standards-based Web service endpoints that allow a variety of applications to access Procore data. In this article, you will use the OData format to import Procore data into Microsoft Power Query.
The Connect Server enables you to use Web services to connect to and query Procore data. This article details how to import an OData feed of Procore data into Microsoft Power Query.
Connect to Procore from Power Query
To work with live Procore data in Microsoft Power Query, we need to connect to Procore from Connect Server, provide user access to the new virtual database, and create OData endpoints for the Procore data.
Add a Connect Server User
Create a User to connect to Procore from Microsoft Power Query through Connect Server.
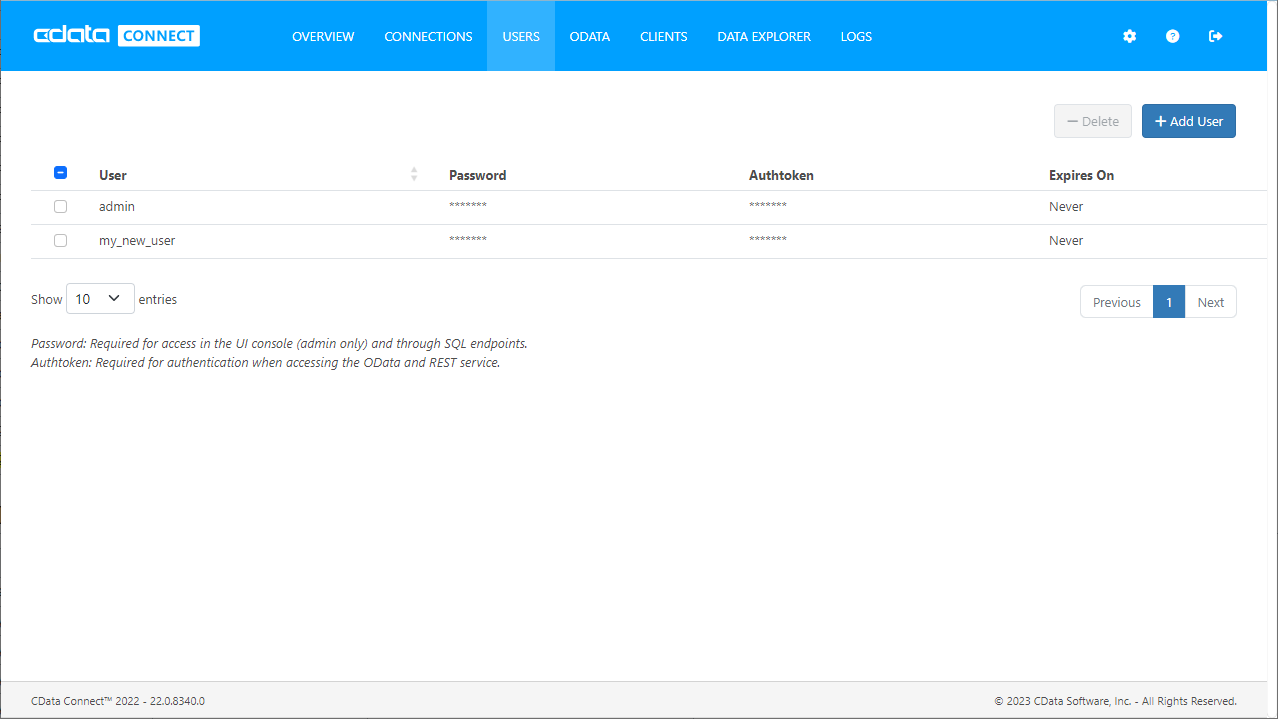
- Click Users -> Add
- Configure a User
![Creating a new user]()
- Click Save Changes and make note of the Authtoken for the new user
![Connect Server users]()
Connect to Procore from Connect Server
CData Connect Server uses a straightforward, point-and-click interface to connect to data sources and generate APIs.
- Open Connect Server and click Connections
![Adding a connection]()
- Select "Procore" from Available Data Sources
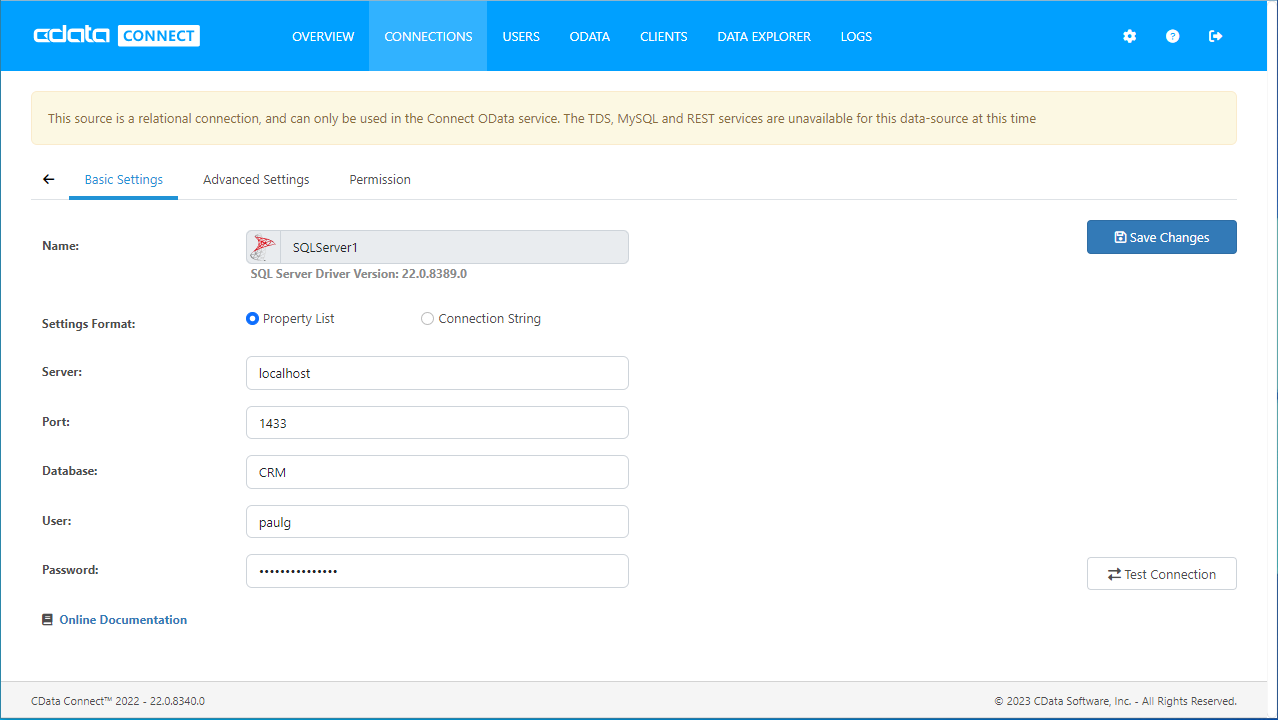
- Enter the necessary authentication properties to connect to Procore.
Start by setting the Profile connection property to the location of the Procore Profile on disk (e.g. C:\profiles\Procore.apip). Next, set the ProfileSettings connection property to the connection string for Procore (see below).
Procore API Profile Settings
To authenticate to Procore, and connect to your own data or to allow other users to connect to their data, you can use the OAuth standard.
First, you will need to register an OAuth application with Procore. You can do so by logging to your Developer Account and going to Create New App. Follow all necessary steps to register your app. First you will need to create a new version of Sandbox Manifest and then promote it to Production in order to get your Production Crendentials. Your Oauth application will be assigned a client id and a client secret.
After setting the following connection properties, you are ready to connect:
- AuthScheme: Set this to OAuth.
- InitiateOAuth: Set this to GETANDREFRESH. You can use InitiateOAuth to manage the process to obtain the OAuthAccessToken.
- OAuthClientId: Set this to the client_id that is specified in you app settings.
- OAuthClientSecret: Set this to the client_secret that is specified in you app settings.
- CallbackURL: Set this to the Redirect URI that is specified in your app settings
![Configuring a connection (SQL Server is shown).]()
- Click Save Changes
- Click Privileges -> Add and add the new user (or an existing user) with the appropriate permissions (SELECT is all that is required for Reveal).
Add Procore OData Endpoints in Connect Server
After connecting to Procore, create OData Endpoints for the desired table(s).
- Click OData -> Tables -> Add Tables
- Select the Procore database
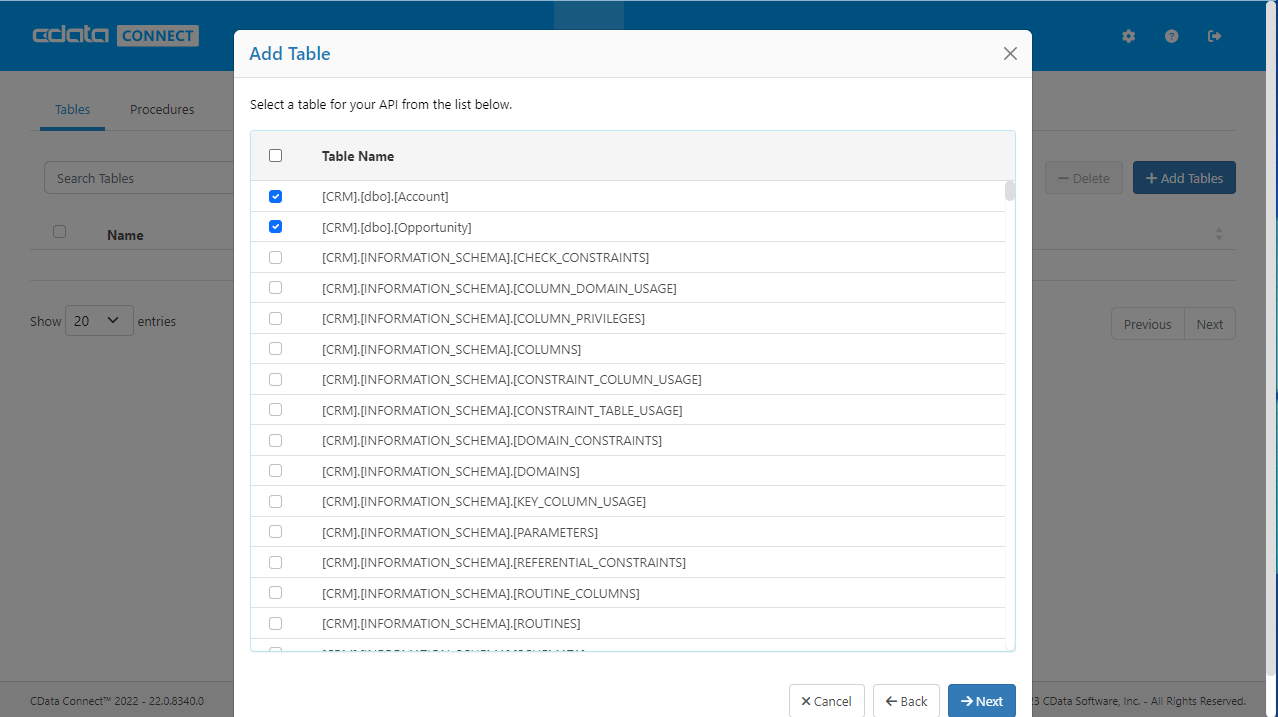
- Select the table(s) you wish to work with and click Next
![Selecting a Table (SQL Server is shown)]()
- (Optional) Edit the resource to select specific fields and more
- Save the settings
(Optional) Configure Cross-Origin Resource Sharing (CORS)
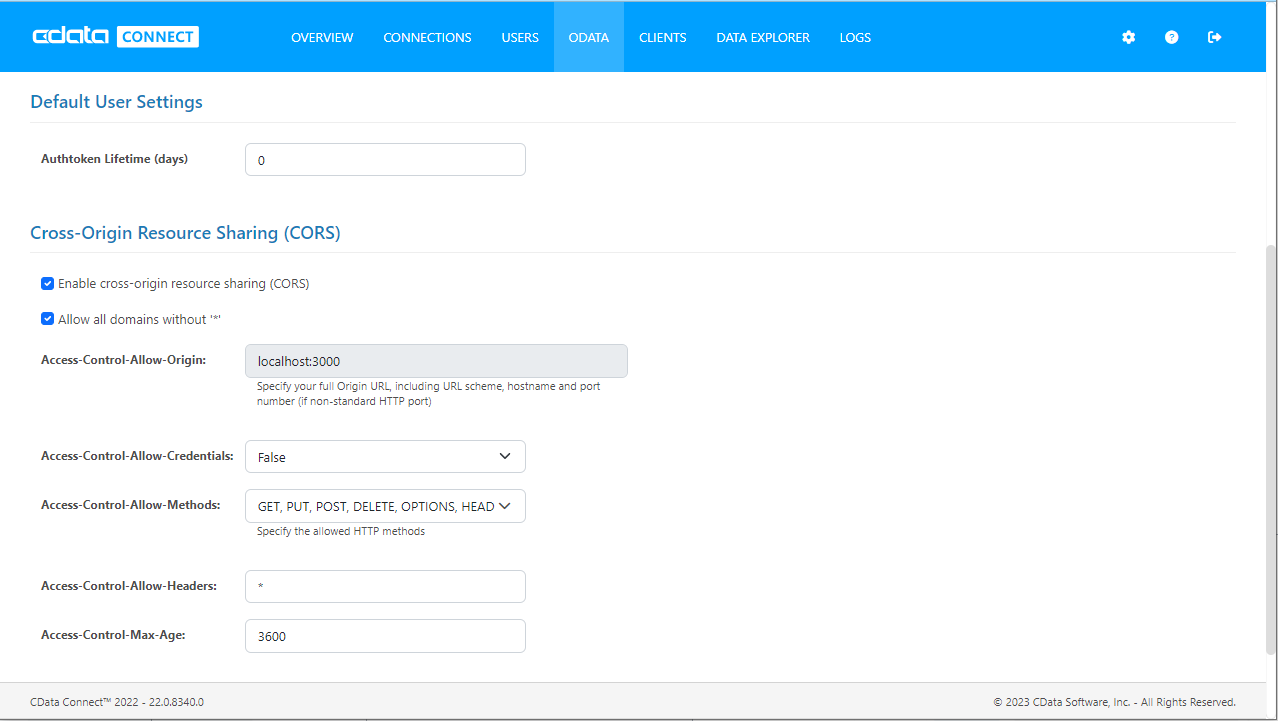
When accessing and connecting to multiple domains from an application such as Ajax, there is a possibility of violating the limitations of cross-site scripting. In that case, configure the CORS settings in OData -> Settings.
- Enable cross-origin resource sharing (CORS): ON
- Allow all domains without '*': ON
- Access-Control-Allow-Methods: GET, PUT, POST, OPTIONS
- Access-Control-Allow-Headers: Authorization
Save the changes to the settings.
Connect to Procore Data from Power Query
Follow the steps below to import tables that can be refreshed on demand:
- Configure the Connect Server to use a version of the OData protocol that is recognized by Power Query. In the Connect Server administration console, click Settings -> Server and change the value of the Default Version property to 3.0.
-
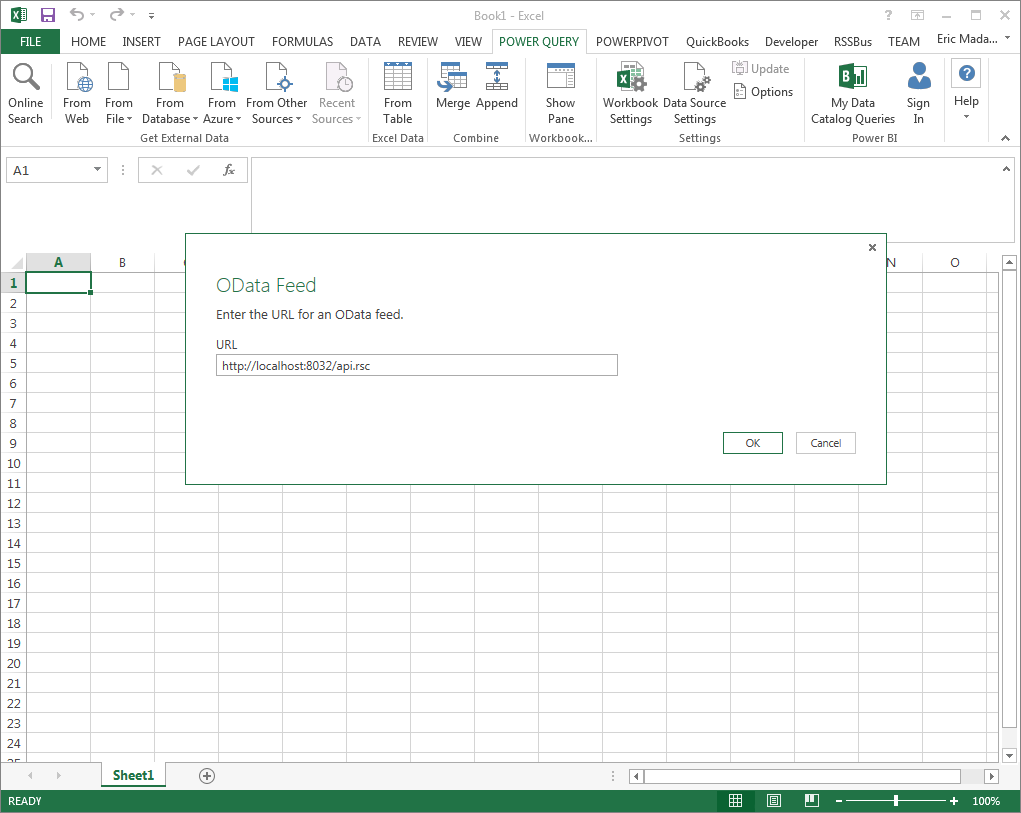
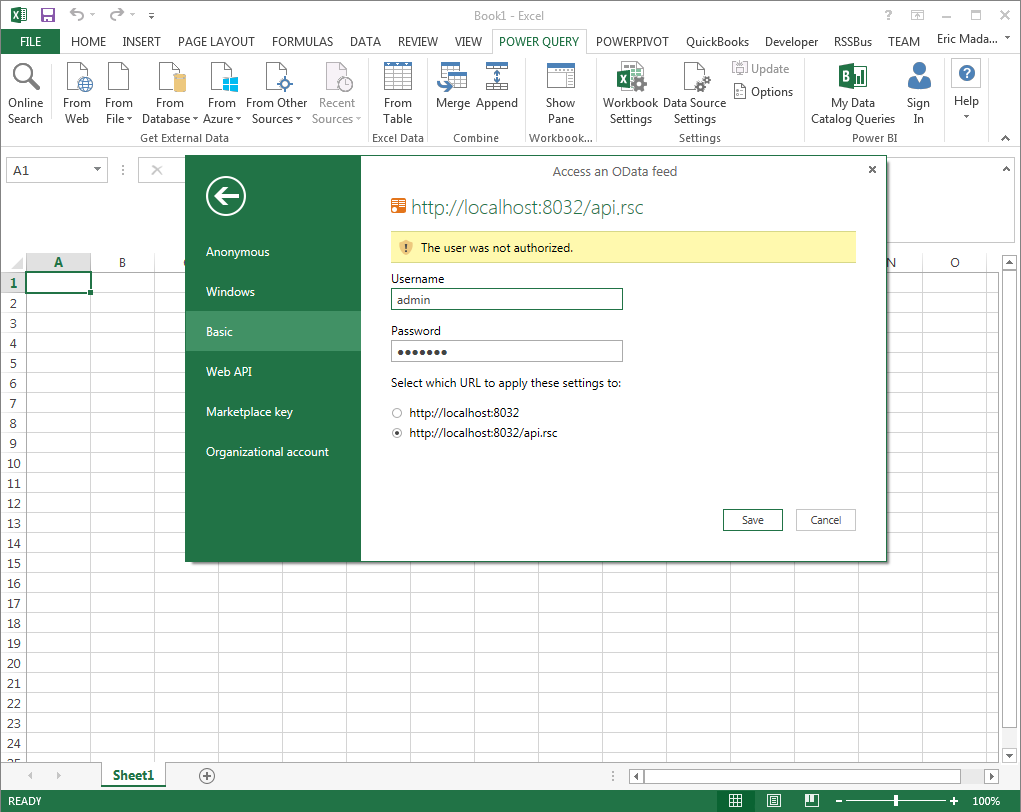
From the ribbon in Excel, click Power Query -> From Other Data Sources -> From OData Feed, and enter the OData URL:
https://your-server:8032/api.rsc![The URL of the OData endpoint to consume in Power Query. (SQL Server is shown.)]()
-
Next, define authentication credentials and set privacy levels. Select Basic authentication and enter the credentials for a user authorized to make requests. Specify the Username field and enter the user's authtoken in the Password field.
![The URL to authenticate to and credentials. (SQL Server is shown.)]()
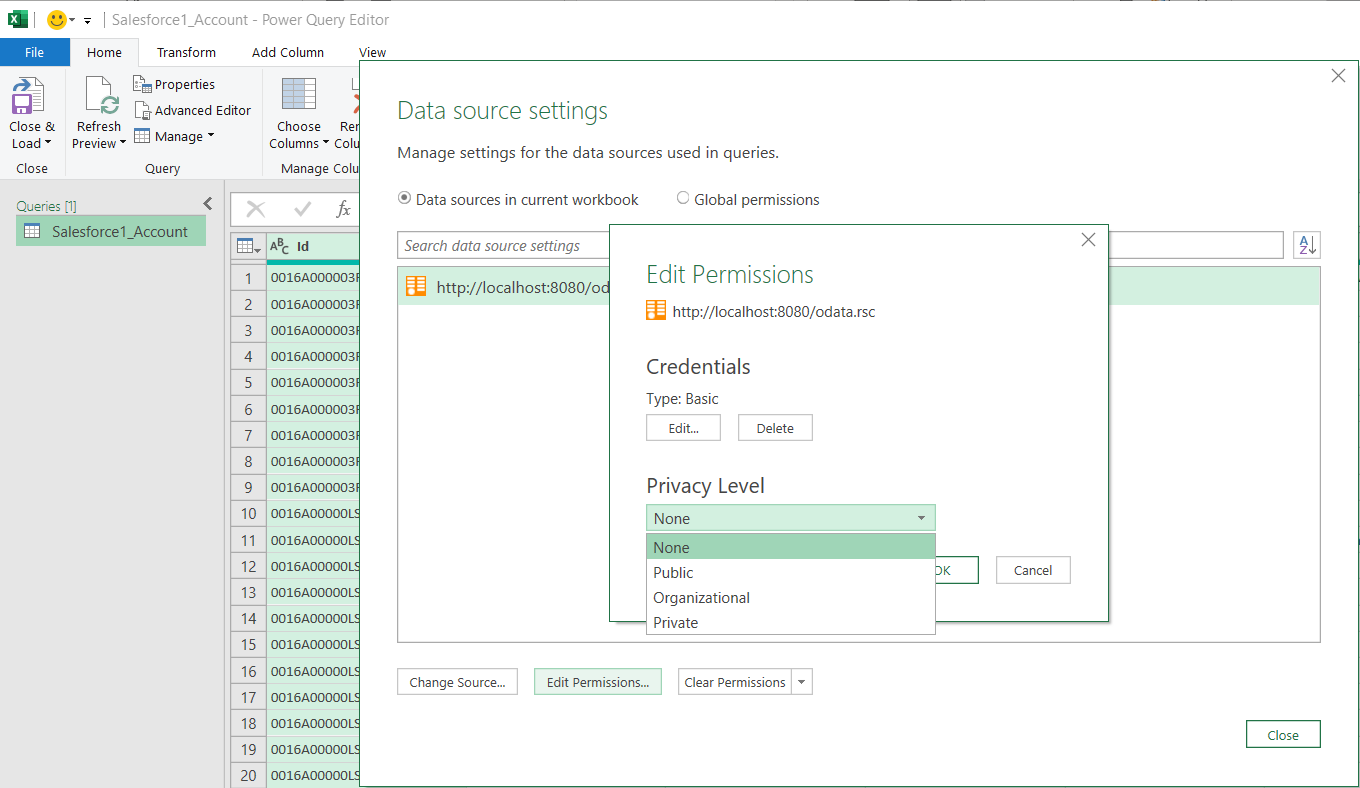
To change the authentication scheme that Power Query will use, click Power Query -> Data Source Settings. Select the OData feed from the list and then click "Edit Permissions..." Select the privacy level from the menu.
![The URL to authenticate to and credentials. (SQL Server is shown.)]()
-
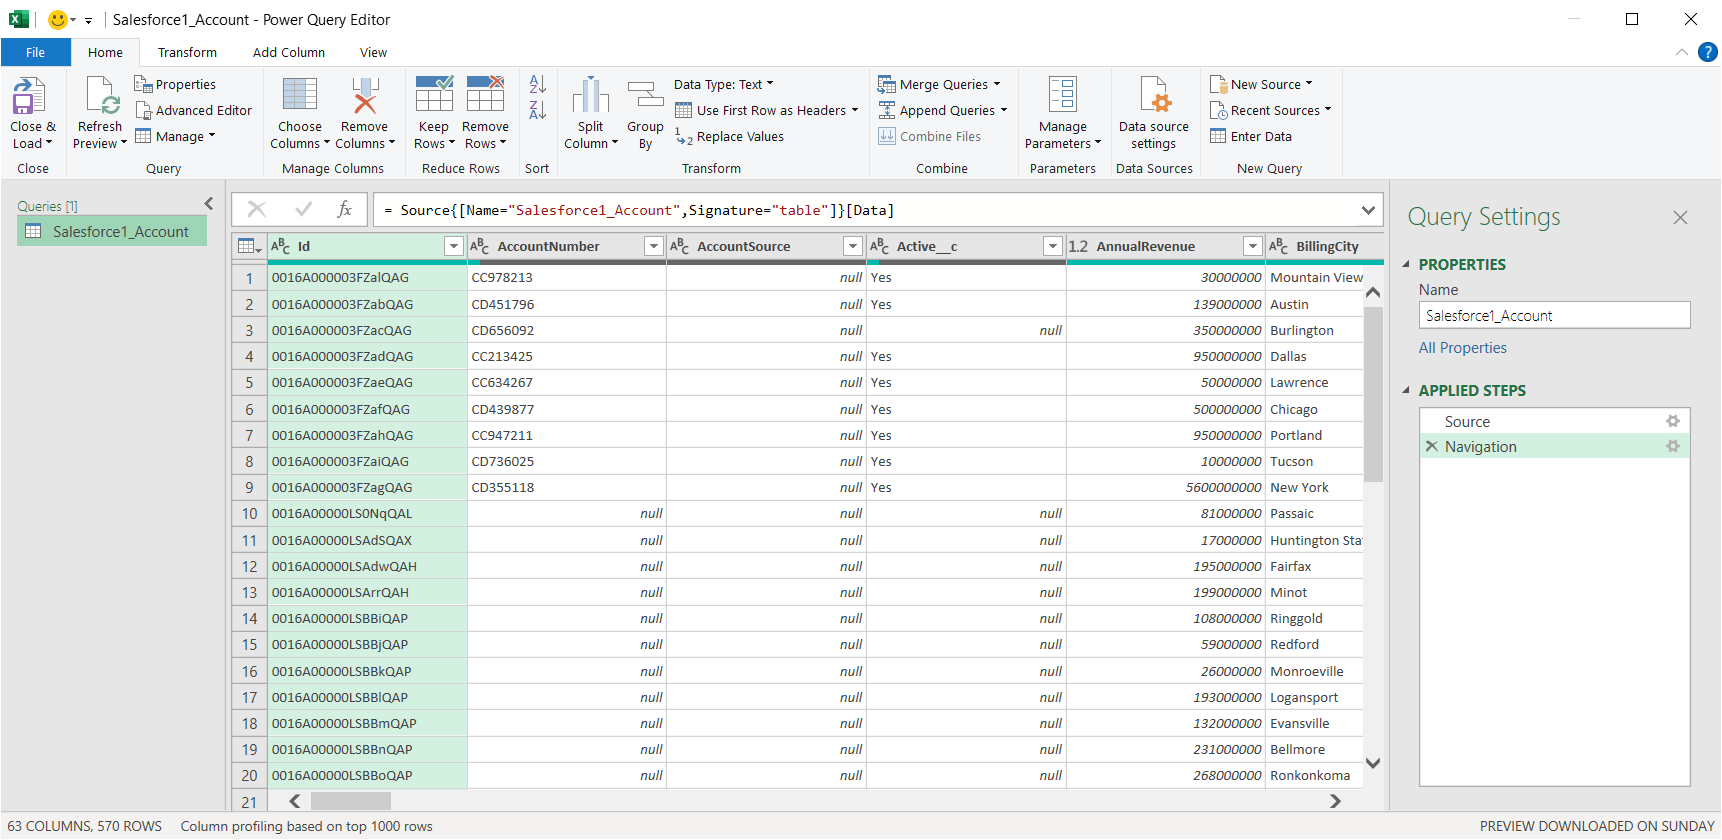
You can now access Procore data in Power Query. In the Navigator expand the node for the OData feed, right-click a table, and click Edit to open the Query Editor. This will display the table data.
![Tables loaded in Power Query. (SQL Server is shown.)]()
Free Trial & More Information
If you are interested in connecting to your Procore data (or data from any of our other supported data sources) from Power Query, sign up for a free trial of CData Connect Server today! For more information on Connect Server and to see what other data sources we support, refer to our CData Connect page.


