Discover how a bimodal integration strategy can address the major data management challenges facing your organization today.
Get the Report →Access Live Okta Data in AWS Lambda (with IntelliJ IDEA)
Connect to live Okta data in AWS Lambda using IntelliJ IDEA and the CData JDBC Driver to build the function.
AWS Lambda is a compute service that lets you build applications that respond quickly to new information and events. AWS Lambda functions can work with live Okta data when paired with the CData JDBC Driver for Okta. This article describes how to connect to and query Okta data from an AWS Lambda function built with Maven in IntelliJ.
With built-in optimized data processing, the CData JDBC Driver offers unmatched performance for interacting with live Okta data. When you issue complex SQL queries to Okta, the driver pushes supported SQL operations, like filters and aggregations, directly to Okta and utilizes the embedded SQL engine to process unsupported operations client-side (often SQL functions and JOIN operations). In addition, its built-in dynamic metadata querying allows you to work with and analyze Okta data using native data types.
Gather Connection Properties and Build a Connection String
Download the CData JDBC Driver for Okta installer, unzip the package, and run the JAR file to install the driver. Then gather the required connection properties.
To connect to Okta, set the Domain connection string property to your Okta domain.
You will use OAuth to authenticate with Okta, so you need to create a custom OAuth application.
Creating a Custom OAuth Application
From your Okta account:
- Sign in to your Okta developer edition organization with your administrator account.
- In the Admin Console, go to Applications > Applications.
- Click Create App Integration.
- For the Sign-in method, select OIDC - OpenID Connect.
- For Application type, choose Web Application.
- Enter a name for your custom application.
- Set the Grant Type to Authorization Code. If you want the token to be automatically refreshed, also check Refresh Token.
- Set the callback URL:
- For desktop applications and headless machines, use http://localhost:33333 or another port number of your choice. The URI you set here becomes the CallbackURL property.
- For web applications, set the callback URL to a trusted redirect URL. This URL is the web location the user returns to with the token that verifies that your application has been granted access.
- In the Assignments section, either select Limit access to selected groups and add a group, or skip group assignment for now.
- Save the OAuth application.
- The application's Client Id and Client Secret are displayed on the application's General tab. Record these for future use. You will use the Client Id to set the OAuthClientId and the Client Secret to set the OAuthClientSecret.
- Check the Assignments tab to confirm that all users who must access the application are assigned to the application.
- On the Okta API Scopes tab, select the scopes you wish to grant to the OAuth application. These scopes determine the data that the app has permission to read, so a scope for a particular view must be granted for the driver to have permission to query that view. To confirm the scopes required for each view, see the view-specific pages in Data Model < Views in the Help documentation.
NOTE: To use the JDBC driver in an AWS Lambda function, you will need a license (full or trial) and a Runtime Key (RTK). For more information on obtaining this license (or a trial), contact our sales team.
Built-in Connection String Designer
For assistance constructing the JDBC URL, use the connection string designer built into the Okta JDBC Driver. Double-click the JAR file or execute the jar file from the command line.
java -jar cdata.jdbc.okta.jar

Fill in the connection properties (including the RTK) and copy the connection string to the clipboard.
Create a Project in IntelliJ
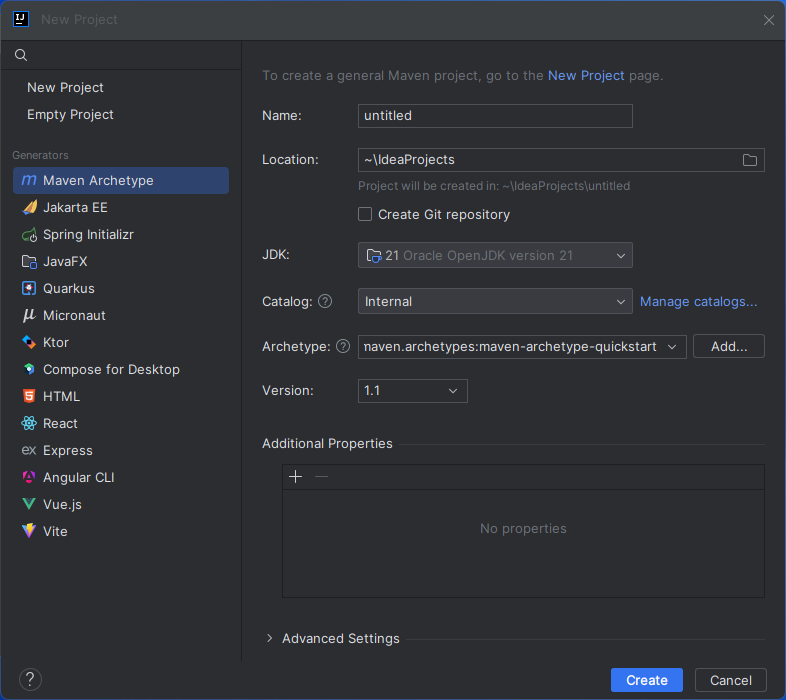
- In IntelliJ IDEA, click New Project.
- Select "Maven Archetype" from the Generators
- Name the project and select "maven.archetypes:maven-archetype-quickstart" Archetype.
- Click "Create"
![]()
Install the CData JDBC Driver for Okta JAR File
Use the following Maven command from the project's root folder to install JAR file in the project.
mvn install:install-file -Dfile="PATH/TO/CData JDBC Driver for Okta 20XX/lib/cdata.jdbc.okta.jar" -DgroupId="org.cdata.connectors" -DartifactId="cdata-okta-connector" -Dversion="23" -Dpackaging=jar
Add Dependencies
Within the Maven project's pom.xml file, add AWS and the CData JDBC Driver for Okta as dependencies (within the <dependencies> element) using the following XML.
- AWS
<dependency> <groupId>com.amazonaws</groupId> <artifactId>aws-lambda-java-core</artifaceId> <version>1.2.2</version> <!--Replace with the actual version--> </dependency> - CData JDBC Driver for Okta
<dependency>
   <groupId>org.cdata.connectors</groupId>
   <artifactId>cdata-okta-connector</artifaceId>
   <version>23</version> <!--Replace with the actual version-->
</dependency>
Create an AWS Lambda Function
For this sample project, we create two source files: CDataLambda.java and CDataLambdaTest.java.
Lambda Function Definition
- Update CDataLambda to implement the RequestHandler interface from the AWS Lambda SDK. You will need to add the handleRequest method, which performs the following tasks when the Lambda function is triggered:
- Constructs a SQL query using the input.
- Sets up AWS credentials and S3 configuration to store OAuth credentials.
- Registers the CData JDBC driver for Okta.
- Establishes a connection to Okta using JDBC.
- Executes the SQL query on Okta.
- Prints the results to the console.
- Returns an output message.
- Add the following import statements to the Java class:
import java.sql.Connection;
import java.sql.DriverManager;
import java.sql.ResultSet;
import java.sql.ResultSetMetaData;
import java.sql.SQLException;
import java.sql.Statement;
Replace the body of the handleRequest method with the code below. Be sure to fill in the connection string in the DriverManager.getConnection method call.
String query = "SELECT * FROM " + input;

// Set your AWS credentials
String awsAccessKey = "YOUR_AWS_ACCESS_KEY";
String awsSecretKey = "YOUR_AWS_SECRET_KEY";
String awsRegion = "YOUR_AWS_REGION";

// AWS S3 Configuration
AmazonS3 s3Client = AmazonS3ClientBuilder.standard()
		.withRegion(awsRegion)
		.withCredentials(new AWSStaticCredentialProvider(new BasicAWSCredentials(awsAccessKey, awsSecretKey)))
		.build();
String bucketName = "MY_AWS_BUCKET";
String oauthSettings = "S:3//"+ bucketName + "/OAuthSettings.txt";

String oauthConnection = "InitiateOAuth=REFRESH;" +
		"OAuthSettingsLocation=" + oauthSettings = ";"

try {
	Class.forName("cdata.jdbc.okta.OktaDriver");
	cdata.jdbc.okta.OktaDriver driver = new cdata.jdbc.okta.OktaDriver();
	DriverManager.registerDriver(driver);
} catch (SQLException ex) {
} catch (ClassNotFoundException e) {
	throw new RuntimeException(e);
}

Connection connection = null;

try {
	connection = DriverManager.getConnection("jdbc:cdata:okta:RTK=52465...;Domain=dev-44876464.okta.com;" + oauthConnection + "");
} catch (SQLException ex) {
	context.getLogger().log("Error getting connection: " + ex.getMessage());
} catch (Exception ex) {
	context.getLogger().log("Error: " + ex.getMessage());
}

if(connection != null)
{
	context.getLogger().log("Connected Successfully!\n");
}

ResultSet resultSet = null;
try
{
	//executing query
	Statement stmt = connection.createStatement();
	resultSet = stmt.executeQuery(query);

	ResultSetMetaData metaData = resultSet.getMetaData();
	int numCols = metaData.getColumnCount();

	//printing the results
	while(resultSet.next())
	{
		for(int i = 1; i <= numCols; i++)
		{
			System.out.printf("%-25s", (resultSet.getObject(i) != null) ? resultSet.getObject(i).toString().replaceAll("\n", "") : null );
		}
		System.out.print("\n");
	}
}
catch (SQLException ex)
{
	System.out.println("SQL Exception: " + ex.getMessage());
}
catch (Exception ex)
{
	System.out.println("General exception: " + ex.getMessage());
}

return "query: " + query + " complete";
Deploy and Run the Lambda Function
Once you build the function in Intellij, you are ready to deploy the entire Maven project as a single JAR file.
- In IntelliJ, use the mvn install command to build the SNAPSHOT JAR file.
- Create a new function in AWS Lambda (or open an existing one).
- Name the function, select an IAM role, and set the timeout value to a high enough value to ensure the function completes (depending on the result size of your query).
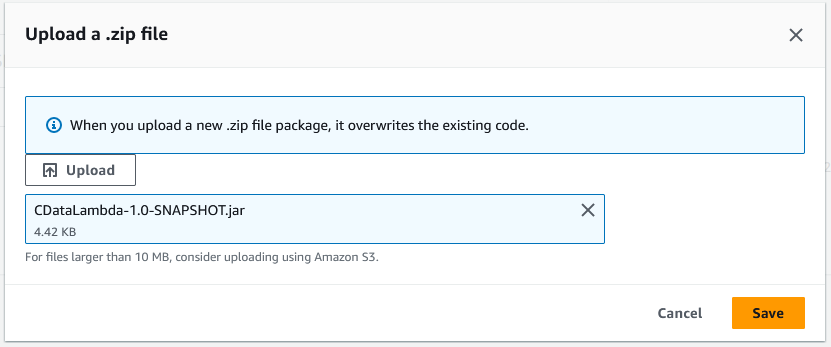
- Click "Upload from" -> ".zip file" and select your SNAPSHOT JAR file.
![Uploading the SNAPSHOT JAR file.]()
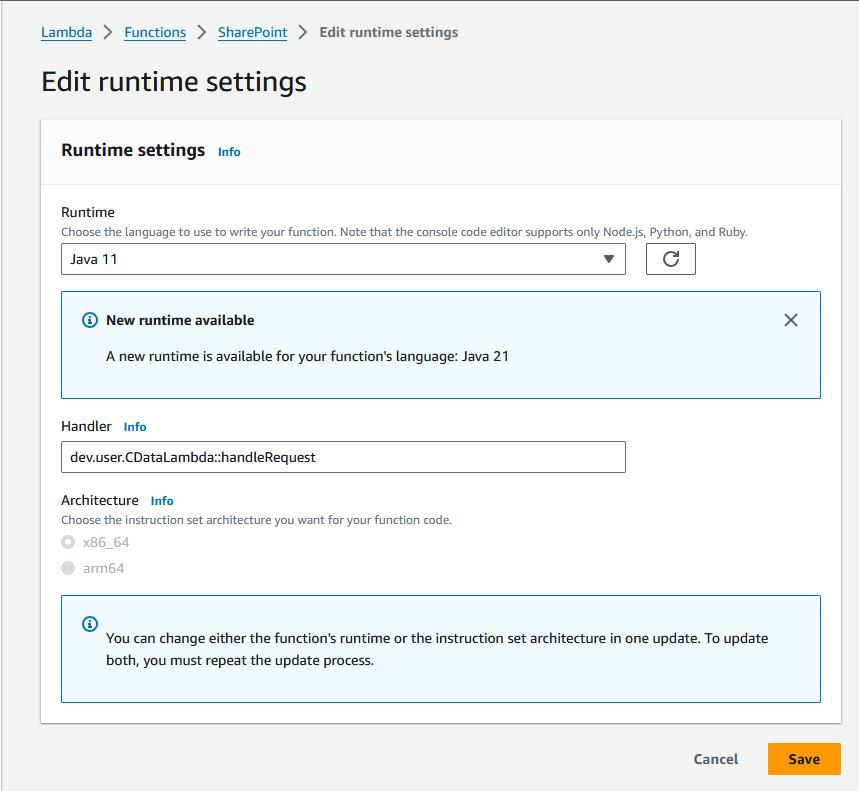
- In the "Runtime settings" section, click "Edit" and set Handler to your "handleRequest" method (e.g. package.class::handleRequest)
![Configuring the runtime handler.]()
- You can now test the function. Set the "Event JSON" field to a table name and click, click "Test"
![Viewing the results.]()
Free Trial & More Information
Download a free, 30-day trial of the CData JDBC Driver for Okta and start working with your live Okta data in AWS Lambda. Reach out to our Support Team if you have any questions.


