Discover how a bimodal integration strategy can address the major data management challenges facing your organization today.
Get the Report →Configure a Receive Location for the CData BizTalk Adapter for Okta
Pull Okta data in BizTalk using the CData BizTalk Adapter for Okta. Use receive locations to execute SQL commands and automate actions in Okta.
You can follow the procedure in this article to connect to Okta data, configure a static one-way receive location, and use it to perform a simple test: retrieving Okta data and writing it to an XML file.
A receive location can execute SQL commands and create BizTalk messages that contain the results. If you want to execute updategram commands, use a send port.
Create the Receive Port
To add a receive location to your application, you first need to add a receive port. Receive ports can receive data from multiple receive locations.
- If you have not already done so, open your application in the BizTalk Administration Console.
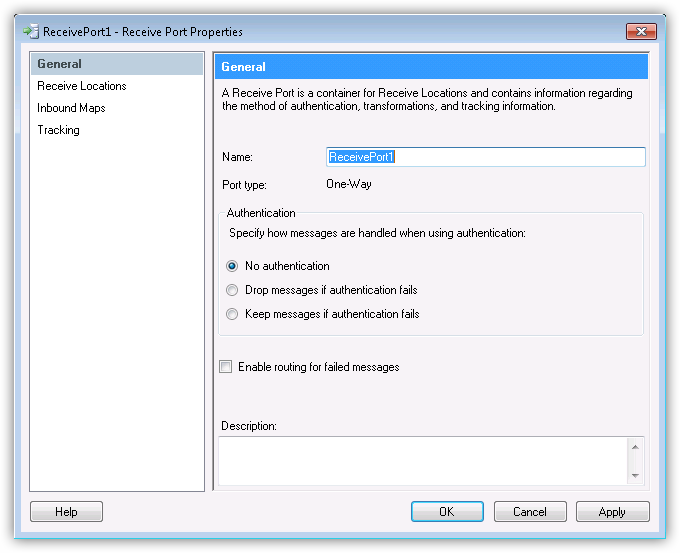
- In your application, right-click Receive Ports and click New -> Static One-Way Receive Port. The Receive Port Properties dialog is displayed.
- In the Name menu, enter a name for the receive port.
Create the Receive Location
After you create the receive port, create the receive location and configure it to use the Okta adapter as its transport type.
- Right-click Receive Locations and click New -> One-Way Receive Location.
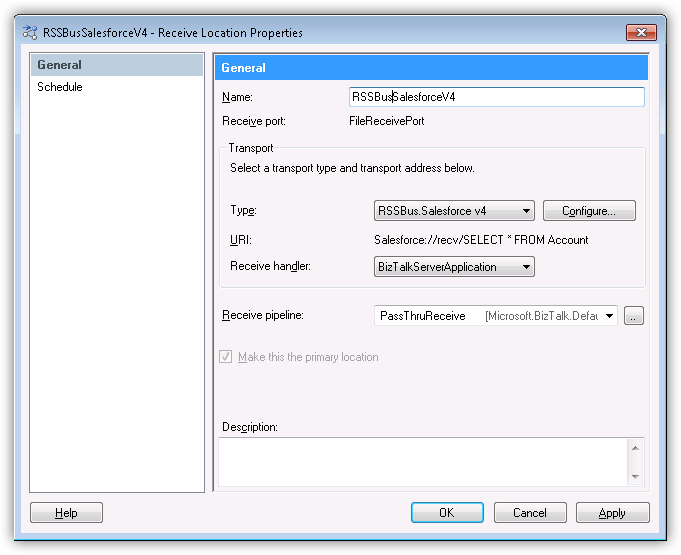
- Select the appropriate receive port of which the new receive location will be a member. The Receive Location Properties dialog is displayed.
- In the Name menu, enter a name for the receive location.
- In the Receive Location properties, select CData.Okta in the Transport Type menu.
- In the Receive pipeline menu, select the default option, PassThruReceive.
Configure the Adapter
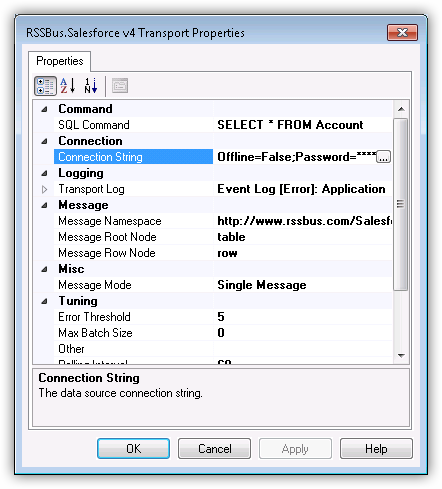
In the Transport Properties dialog, specify the command that the adapter will execute.
- In the receive location properties, click Configure. The Transport Properties dialog for the adapter is displayed.
- In the SQL Command property, enter the command. This example uses
SELECT Id, ProfileFirstName FROM Users WHERE Status = 'Active'
Configure the Connection String
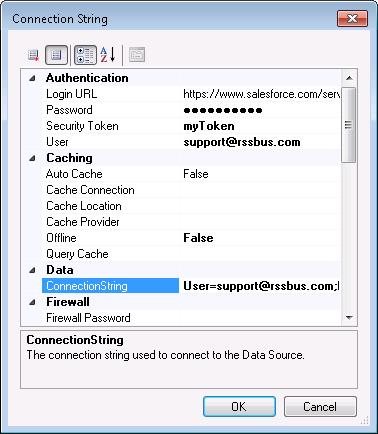
Set credentials and other connection properties in the Connection String Options dialog.
- In the receive location properties, click Configure. The adapter properties dialog is displayed.
- Click the button in the Connection String property.
- Click the box in the Connection String property. The Connection String Options dialog is displayed.
- Enter connection properties. Below is a typical connection string:
Domain=dev-44876464.okta.com;InitiateOAuth=GETANDREFRESHTo connect to Okta, set the Domain connection string property to your Okta domain.
You will use OAuth to authenticate with Okta, so you need to create a custom OAuth application.
Creating a Custom OAuth Application
From your Okta account:
- Sign in to your Okta developer edition organization with your administrator account.
- In the Admin Console, go to Applications > Applications.
- Click Create App Integration.
- For the Sign-in method, select OIDC - OpenID Connect.
- For Application type, choose Web Application.
- Enter a name for your custom application.
- Set the Grant Type to Authorization Code. If you want the token to be automatically refreshed, also check Refresh Token.
- Set the callback URL:
- For desktop applications and headless machines, use http://localhost:33333 or another port number of your choice. The URI you set here becomes the CallbackURL property.
- For web applications, set the callback URL to a trusted redirect URL. This URL is the web location the user returns to with the token that verifies that your application has been granted access.
- In the Assignments section, either select Limit access to selected groups and add a group, or skip group assignment for now.
- Save the OAuth application.
- The application's Client Id and Client Secret are displayed on the application's General tab. Record these for future use. You will use the Client Id to set the OAuthClientId and the Client Secret to set the OAuthClientSecret.
- Check the Assignments tab to confirm that all users who must access the application are assigned to the application.
- On the Okta API Scopes tab, select the scopes you wish to grant to the OAuth application. These scopes determine the data that the app has permission to read, so a scope for a particular view must be granted for the driver to have permission to query that view. To confirm the scopes required for each view, see the view-specific pages in Data Model < Views in the Help documentation.
- Click Test Connection to verify the connection values and test connectivity.
Refer to the help documentation for a description of the various properties and their functions.
Use a Send Port to Write Data to an XML File
The Static One-Way Receive Location is now ready for use with a send port: A send port must be associated with the BizTalk message that is created by the receive location. To write data to a file, create a file send port.
- In the BizTalk Administration console, right-click Send Ports -> New -> Static One-Way Send Port.
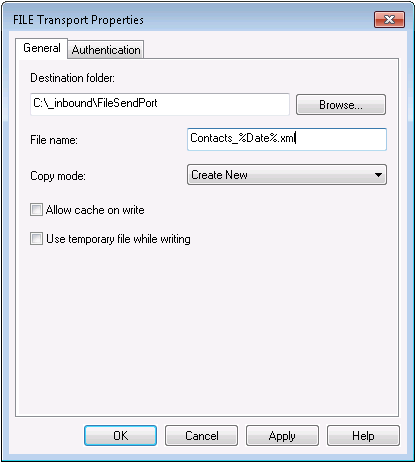
Enter a name for the send port at the top of the configuration window and select FILE from the Type menu.
![Send Port configuration. (Salesforce is shown.)]()
- Configure a destination folder; this will be the location where the files are created on disk.
For the file name, a macro can be used to easily identify what day the file was created. By default, %MessageId%.xml is used. However, this is not a very user-friendly name, as it is a randomly generated BizTalk Id. To produce a file in the format Users_yyyy-MM-dd.xml, enter Users_%Date%.xml.
Note: For additional information regarding macros, visit the BizTalk Configuration section in the help documentation.
![Destination folder configuration. (Salesforce is shown.)]()
- Click OK. The URI field should now contain a value.
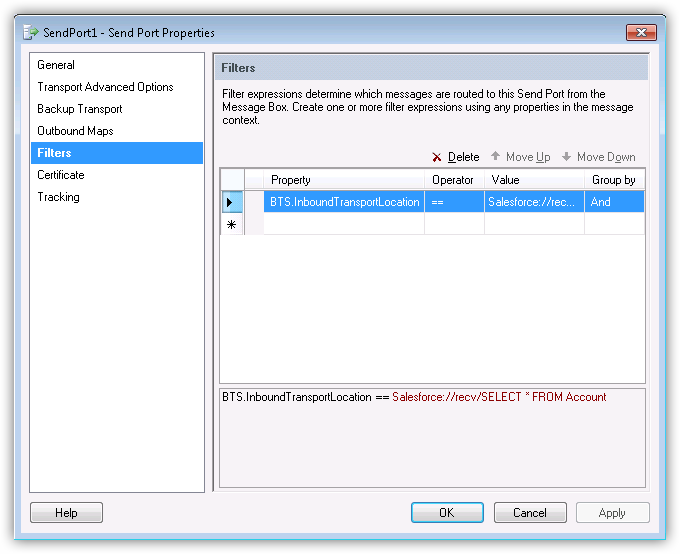
- Click Filters in the left-hand side of the configuration screen for the send port.
- Set the following properties:
- Property: Select "BTS.InboundTransportLocation" from the menu.
- Operator: Select "==" from the menu.
- Value: Enter the URI of the receive location. The URI is shown in the receive location properties.
- Operator: Select "==" from the menu.
- Property: Select "BTS.InboundTransportLocation" from the menu.
You can now use the send port to write files that have been sent from the receive location.
Enlist and Enable the Locations and Ports
The final step is to enlist the send port and enable the receive location: Right-click the send port and click Enlist. Then right-click the receive location and click Enable.
Note: Enable the receive location last: This makes sure the file gets picked up for writing by the send port.
Troubleshooting
To check if errors are occurring, expand "Event Viewer (Local)" in the navigation tree in the Administration Console. Expand Windows Logs and click Applications.
The log will include error messages for all applications on the system, so it is important to check that the source of the error message is "CData BizTalk Okta Receive Adapter". Details of the error message should provide insight into why the error is occurring. For guidance on resolving the error, contact [email protected].


