Discover how a bimodal integration strategy can address the major data management challenges facing your organization today.
Get the Report →How to connect PolyBase to Harvest
Use CData drivers and PolyBase to create an external data source in SQL Server 2019 with access to live Harvest data.
PolyBase for SQL Server allows you to query external data by using the same Transact-SQL syntax used to query a database table. When paired with the CData API Driver for ODBC, you get access to your Harvest data directly alongside your SQL Server data. This article describes creating an external data source and external tables to grant access to live Harvest data using T-SQL queries.
NOTE: PolyBase is only available on SQL Server 19 and above, and only for Standard SQL Server.
The CData ODBC drivers offer unmatched performance for interacting with live Harvest data using PolyBase due to optimized data processing built into the driver. When you issue complex SQL queries from SQL Server to Harvest, the driver pushes down supported SQL operations, like filters and aggregations, directly to Harvest and utilizes the embedded SQL engine to process unsupported operations (often SQL functions and JOIN operations) client-side. And with PolyBase, you can also join SQL Server data with Harvest data, using a single query to pull data from distributed sources.
Connect to Harvest
If you have not already, first specify connection properties in an ODBC DSN (data source name). This is the last step of the driver installation. You can use the Microsoft ODBC Data Source Administrator to create and configure ODBC DSNs. To create an external data source in SQL Server using PolyBase, configure a System DSN (CData Harvest Sys is created automatically).
Start by setting the Profile connection property to the location of the Harvest Profile on disk (e.g. C:\profiles\Harvest.apip). Next, set the ProfileSettings connection property to the connection string for Harvest (see below).
Harvest API Profile Settings
To authenticate to Harvest, you can use either Token authentication or the OAuth standard. Use Basic authentication to connect to your own data. Use OAuth to allow other users to connect to their data.
Using Token Authentication
To use Token Authentication, set the APIKey to your Harvest Personal Access Token in the ProfileSettings connection property. In addition to APIKey, set your AccountId in ProfileSettings to connect.
Using OAuth Authentication
First, register an OAuth2 application with Harvest. The application can be created from the "Developers" section of Harvest ID.
After setting the following connection properties, you are ready to connect:
- ProfileSettings: Set your AccountId in ProfileSettings.
- AuthScheme: Set this to OAuth.
- OAuthClientId: Set this to the client ID that you specified in your app settings.
- OAuthClientSecret: Set this to the client secret that you specified in your app settings.
- CallbackURL: Set this to the Redirect URI that you specified in your app settings.
- InitiateOAuth: Set this to GETANDREFRESH. You can use InitiateOAuth to manage how the driver obtains and refreshes the OAuthAccessToken.
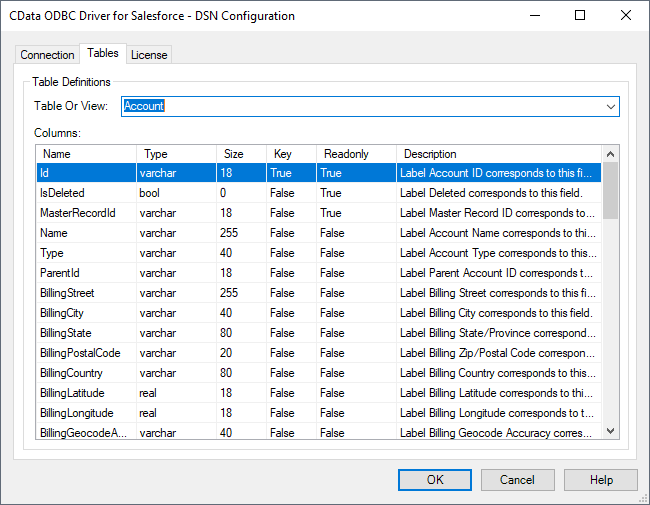
Click "Test Connection" to ensure that the DSN is connected to Harvest properly. Navigate to the Tables tab to review the table definitions for Harvest.
Create an External Data Source for Harvest Data
After configuring the connection, you need to create a master encryption key and a credential database for the external data source.
Creating a Master Encryption Key
Execute the following SQL command to create a new master key, 'ENCRYPTION,' to encrypt the credentials for the external data source.
CREATE MASTER KEY ENCRYPTION BY PASSWORD = 'password';
Creating a Credential Database
Execute the following SQL command to create credentials for the external data source connected to Harvest data.
NOTE: Since Harvest does not require a User or Password to authenticate, you may use whatever values you wish for IDENTITY and SECRET.
CREATE DATABASE SCOPED CREDENTIAL api_creds
WITH IDENTITY = 'username', SECRET = 'password';
Create an External Data Source for Harvest
Execute a CREATE EXTERNAL DATA SOURCE SQL command to create an external data source for Harvest with PolyBase:
- Set the LOCATION parameter , using the DSN and credentials configured earlier.
For Harvest, set SERVERNAME to the URL or address for your server (e.g. 'localhost' or '127.0.0.1' for local servers; the remote URL for remote servers). Leave PORT empty. PUSHDOWN is set to ON by default, meaning the ODBC Driver can leverage server-side processing for complex queries.
CREATE EXTERNAL DATA SOURCE cdata_api_source
WITH (
  LOCATION = 'odbc://SERVER_URL',
  CONNECTION_OPTIONS = 'DSN=CData Harvest Sys',
  -- PUSHDOWN = ON | OFF,
  CREDENTIAL = api_creds
);
Create External Tables for Harvest
After creating the external data source, use CREATE EXTERNAL TABLE statements to link to Harvest data from your SQL Server instance. The table column definitions must match those exposed by the CData API Driver for ODBC. You can refer to the Tables tab of the DSN Configuration Wizard to see the table definition.

Sample CREATE TABLE Statement
The statement to create an external table based on a Harvest Invoices would look similar to the following:
CREATE EXTERNAL TABLE Invoices(
  Id [nvarchar](255) NULL,
  ClientName [nvarchar](255) NULL,
  ...
) WITH (
  LOCATION='Invoices',
  DATA_SOURCE=cdata_api_source
);
Having created external tables for Harvest in your SQL Server instance, you are now able to query local and remote data simultaneously. Thanks to built-in query processing in the CData ODBC Driver, you know that as much query processing as possible is being pushed to Harvest, freeing up local resources and computing power. Download a free, 30-day trial of the ODBC Driver for Harvest and start working with live Harvest data alongside your SQL Server data today.


