Discover how a bimodal integration strategy can address the major data management challenges facing your organization today.
Get the Report →Connect to Dynamics NAV Data in NetBeans
Connect to Dynamics NAV data in NetBeans with the data source configuration wizard.
The CData JDBC Driver for Dynamics NAV integrates connectivity to live Dynamics NAV data in IDEs that support JDBC. The JDBC standard enables you to use built-in data access wizards and other tools supporting rapid development. This article shows how to connect to Dynamics NAV data in NetBeans. You will create a connection and edit and save Dynamics NAV data in the Table Editor.
Create a JDBC Data Source for Dynamics NAV in NetBeans
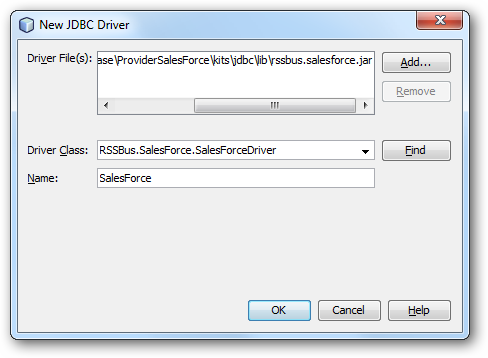
To create the JDBC data source, expand the Database node in the Service window, right-click the Drivers node, and select New Driver. In the New Driver wizard that results, enter the following information:
- Driver File(s): Click Add and, in the file explorer dialog that appears, select the cdata.jdbc.dynamicsnav.jar file. The driver JAR is located in the lib subfolder of the installation directory.
- Driver Class: Click Find to search for the driver class inside the JAR. Then select cdata.jdbc.dynamicsnav.DynamicsNAVDriver from the menu.
- Name: Enter the name for the driver.

Define Connection Parameters
Follow the steps below to define required connection properties:
In the Service window, right-click the Database node and click New Connection.
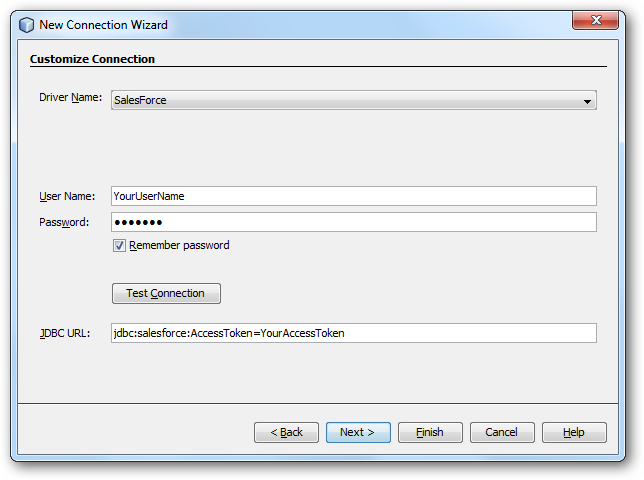
In the New Connection Wizard, enter the following connection properties:
- Driver Name: In the menu, select the CData JDBC Driver for Dynamics NAV.
- User Name: Enter the username. This can also be defined in the JDBC URL.
- Password: Enter the password. This can also be defined in the JDBC URL.
JDBC URL: Specify the JDBC URL.
Before you can connect, OData Services will need to be enabled on the server. Once OData Services are enabled, you will be able to query any Services that are published on the server.
The User and Password properties, under the Authentication section, must be set to valid Dynamics NAV user credentials. In addition, you will need to specify a URL to a valid Dynamics NAV server organization root and a ServerInstance. If there is not a Service Default Company for the server, you will need to set the Company as well.
Built-in Connection String Designer
For assistance in constructing the JDBC URL, use the connection string designer built into the Dynamics NAV JDBC Driver. Either double-click the JAR file or execute the jar file from the command-line.
java -jar cdata.jdbc.dynamicsnav.jarFill in the connection properties and copy the connection string to the clipboard.
![Using the built-in connection string designer to generate a JDBC URL (Salesforce is shown.)]()
A typical JDBC URL is the following:
jdbc:dynamicsnav:http://myserver:7048;User=myserver\Administrator;Password=admin;ServerInstance=DYNAMICSNAV71;

Query Dynamics NAV Data
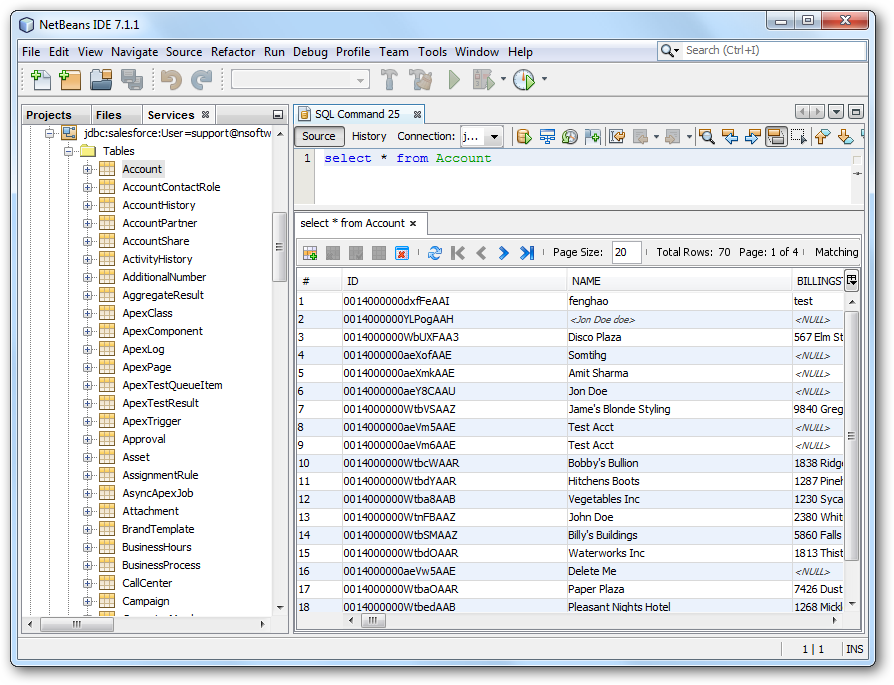
To connect to Dynamics NAV data, right-click the connection in the Database node and click Connect. After the connection is established, you can expand it to discover schema information.
To load a table in the Data Views window, right-click the table and then click View Data. You can also insert, update, or delete records in the Data Views window.


