Discover how a bimodal integration strategy can address the major data management challenges facing your organization today.
Get the Report →Create SSAS Tabular Models from Cvent Data
How to build a SQL Server Analysis Service Tabular Model from Cvent data using CData drivers.
SQL Server Analysis Services (SSAS) is an analytical data engine used in decision support and business analytics. It provides enterprise-grade semantic data models for business reports and client applications, such as Power BI, Excel, Reporting Services reports, and other data visualization tools. When paired with the CData ODBC Driver for Cvent, you can create a tabular model from Cvent data for deeper and faster data analysis.
Create a Connection to Cvent Data
If you have not already, first specify connection properties in an ODBC DSN (data source name). This is the last step of the driver installation. You can use the Microsoft ODBC Data Source Administrator to create and configure ODBC DSNs.
Before you can authenticate to Cvent, you must create a workspace and an OAuth application.
Creating a Workspace
To create a workspace:
- Sign into Cvent and navigate to App Switcher (the blue button in the upper right corner of the page) >> Admin.
- In the Admin menu, navigate to Integrations >> REST API.
- A new tab launches for Developer Management. Click on Manage API Access in the new tab.
- Create a Workspace and name it. Select the scopes you would like your developers to have access to. Scopes control what data domains the developer can access.
- Choose All to allow developers to choose any scope, and any future scopes added to the REST API.
- Choose Custom to limit the scopes developers can choose for their OAuth apps to selected scopes. To access all tables exposed by the driver, you need to set the following scopes:
event/attendees:read event/attendees:write event/contacts:read event/contacts:write event/custom-fields:read event/custom-fields:write event/events:read event/events:write event/sessions:delete event/sessions:read event/sessions:write event/speakers:delete event/speakers:read event/speakers:write budget/budget-items:read budget/budget-items:write exhibitor/exhibitors:read exhibitor/exhibitors:write survey/surveys:read survey/surveys:write
Creating an OAuth Application
After you have set up a Workspace and invited them, developers can sign up and create a custom OAuth app. See the Creating a Custom OAuth Application section in the Help documentation for more information.
Connecting to Cvent
After creating an OAuth application, set the following connection properties to connect to Cvent:
- InitiateOAuth: GETANDREFRESH. Used to automatically get and refresh the OAuthAccessToken.
- OAuthClientId: The Client ID associated with the OAuth application. You can find this on the Applications page in the Cvent Developer Portal.
- OAuthClientSecret: The Client secret associated with the OAuth application. You can find this on the Applications page in the Cvent Developer Portal.
Creating a Data Source for Cvent
Start by creating a new Analysis Services Tabular Project in Visual Studio. Next create a Data Source for Cvent in the project.
- In the Tabular Model Explorer, right-click Data Sources and select "New Data Source"
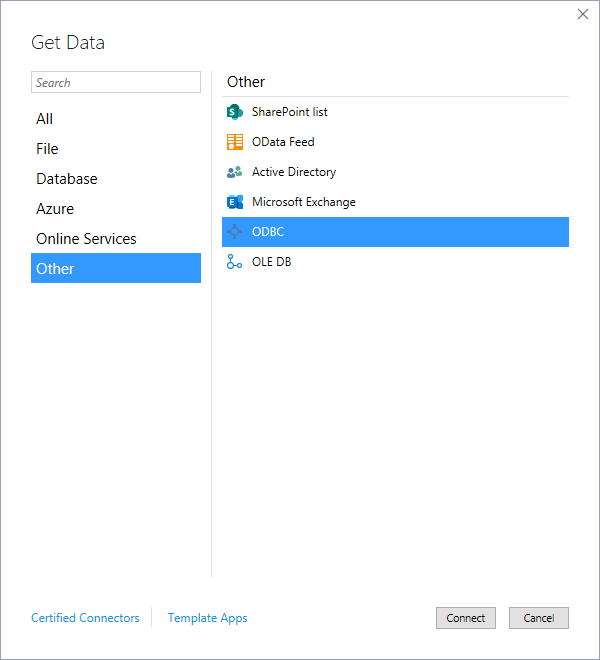
- Select "ODBC" from the Other tab and click "Connect"
![Selecting ODBC as the connector]()
- Select the DSN you previously configured
![Selecting the DSN (Salesforce is shown)]()
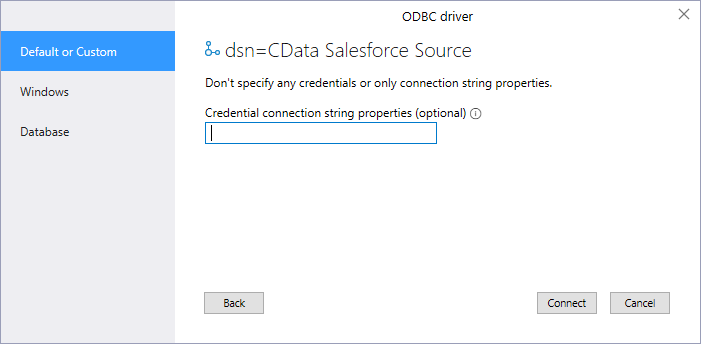
- Choose "Default or Custom" as the authentication option and click "Connect"
![Connecting to the DSN (Salesforce is shown)]()
Add Tables & Relationships
After creating the data source you are ready to import tables and define the relationships between the tables.
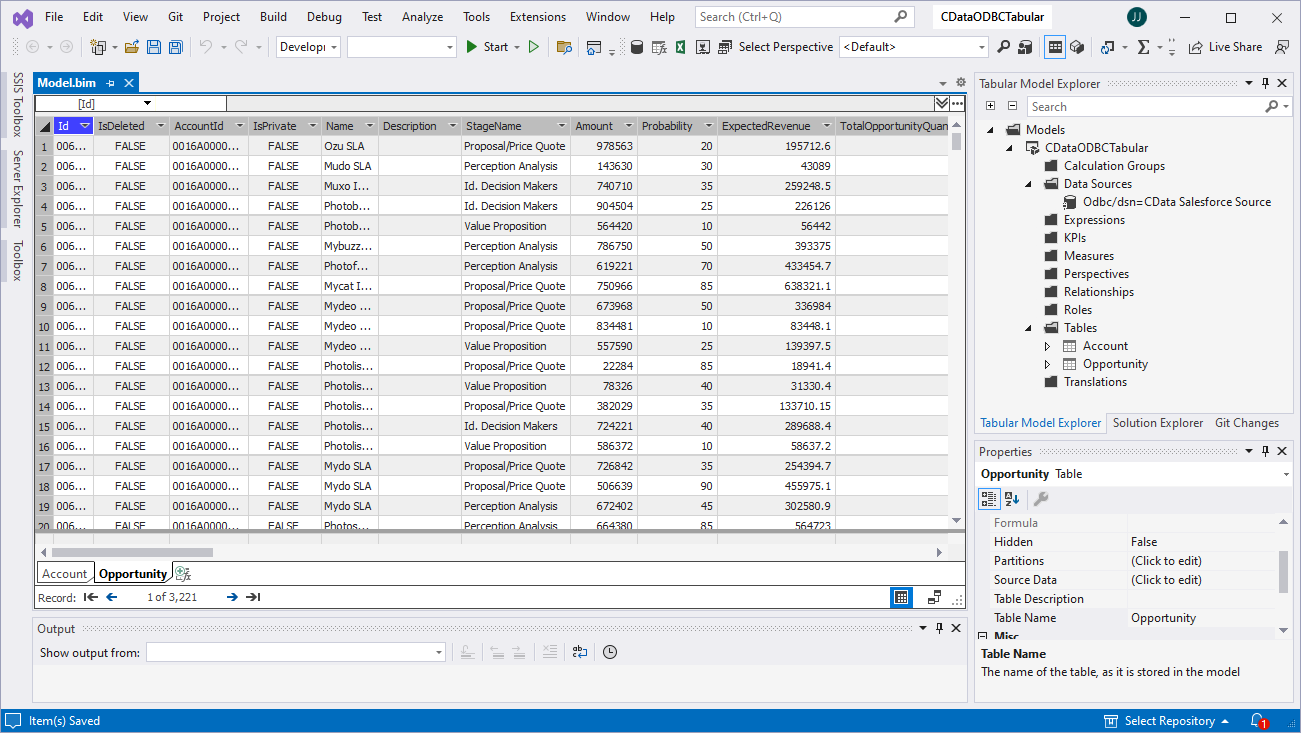
- Right-click the new data source, click "Import New Tables" and select the tables to import
![Importing the tables (Salesforce is shown)]()
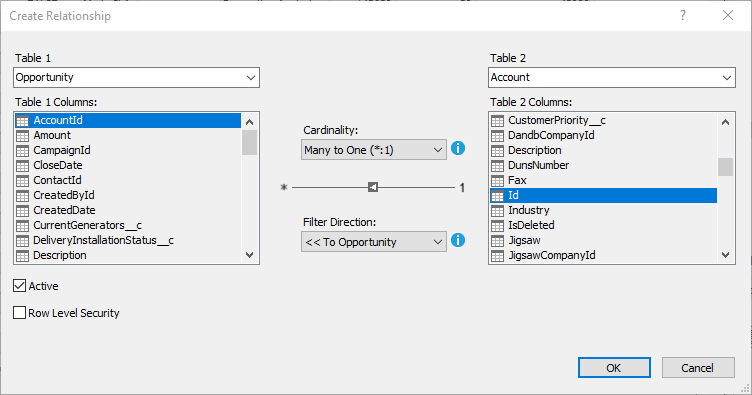
- After importing the tables, right-click "Relationships" and click "Create Relationships"
- Select table(s), and choose the foreign keys, cardinality, and filter direction
![Configuring relationships between tables (Salesforce is shown)]()
Create Measures
After importing the tables and defining the relationships, you are ready to create measures.
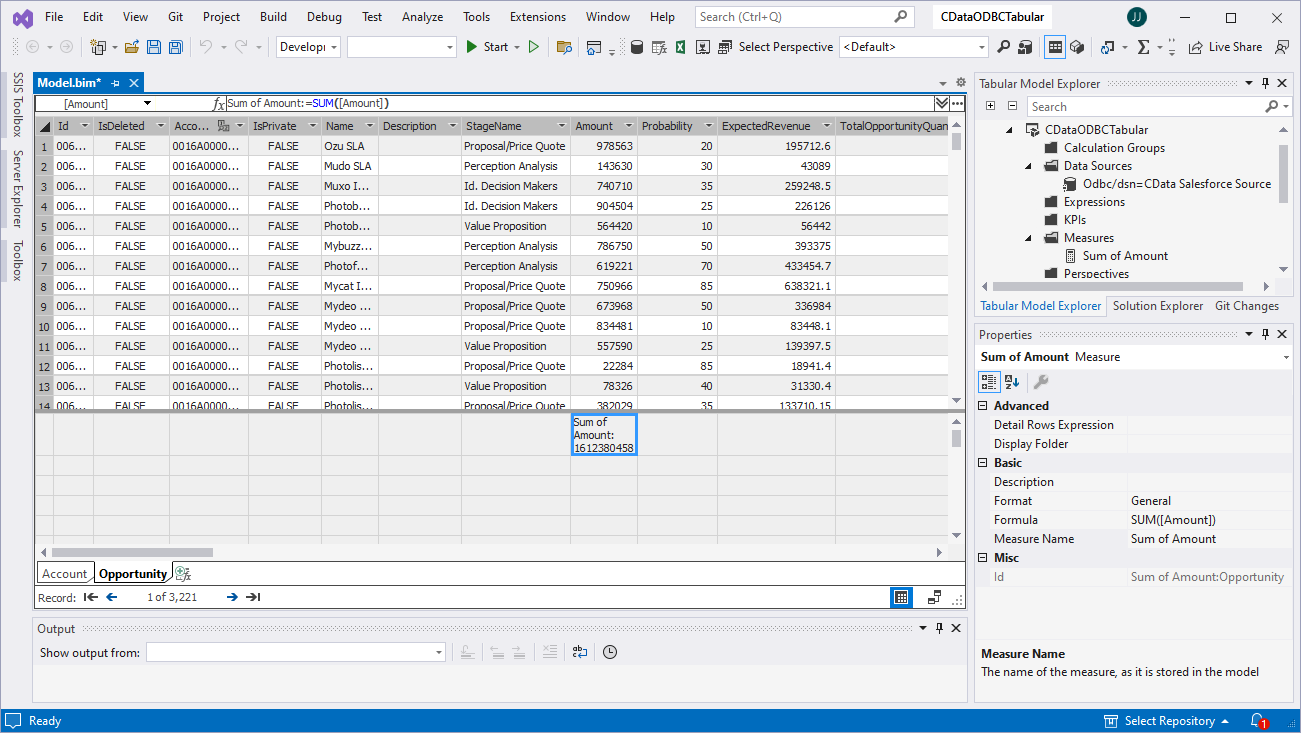
- Select the column in the table for which you wish to create a measure
- In the Extensions menu -> click "Columns" -> "AutoSum" and select your aggregation method
![Creating measures (Salesforce is shown)]()
Deploy the Model
Once you create measures, you are ready to deploy the model. Configure the target server and database by right-clicking the project found in the Solution Explorer and selecting "Properties." Configure the "Deployment Server" properties and click "OK."
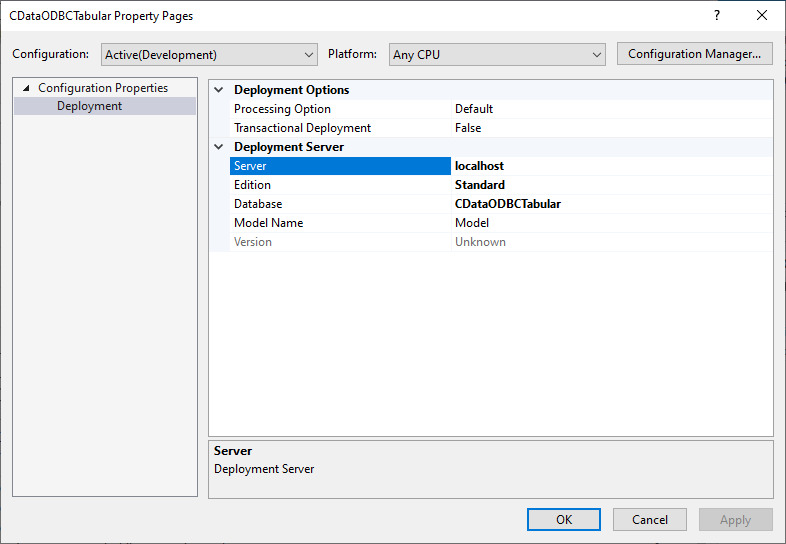
After configuring the deployment server, open the "Build" menu and click "Deploy Solution." You now have a tabular model for Cvent data in your SSAS instance, ready to be analyzed, reported, and viewed. Get started with a free, 30-day trial of the CData ODBC Driver for Cvent.
