Discover how a bimodal integration strategy can address the major data management challenges facing your organization today.
Get the Report →Connect to Clio Data in RunMyProcess through Connect Server
Use CData Connect Server to create an OData API for Clio and connect to Clio data in Akorbi Digital RunMyProcess.
Akorbi Digital RunMyProcess makes it easy to create applications for complex business processes, such as budget application and contract management. CData Connect creates a virtual database for Clio and can be used to generate an OData API (natively consumable in RunMyProcess) for Clio. By pairing RunMyProcess with the CData Connect Server, you get direct connectivity to all your SaaS and cloud-based Big Data and NoSQL sources - no need to migrate your data or write your own integrations. Simply connect to Connect Server from RunMyProcess as you would any other REST service and get instant, live access to your Clio data.
In this article, we walk through connecting to Clio from CData Connect and accessing Clio data through an OData feed in RunMyProcess.
Configuring Connect Server
To work with live Clio data in RunMyProcess, we need to connect to Clio from Connect Server, provide user access to the new virtual database, and create OData endpoints for the Clio data.
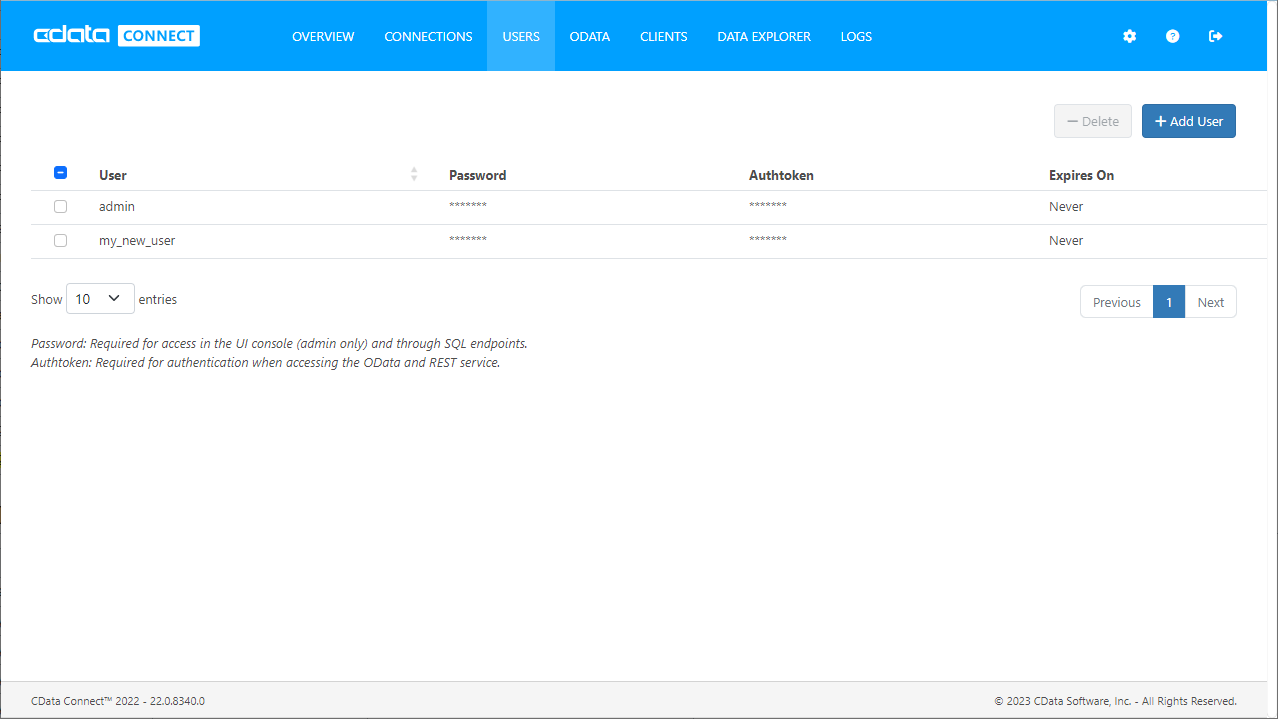
Add a Connect Server User
Create a User to connect to Clio from RunMyProcess through Connect Server.
- Click Users -> Add
- Configure a User
![Creating a new user]()
- Click Save Changes and make note of the Authtoken for the new user
![Connect Server users]()
Connect to Clio from Connect Server
CData Connect Server uses a straightforward, point-and-click interface to connect to data sources and generate APIs.
- Open Connect Server and click Connections
![Adding a connection]()
- Select "Clio" from Available Data Sources
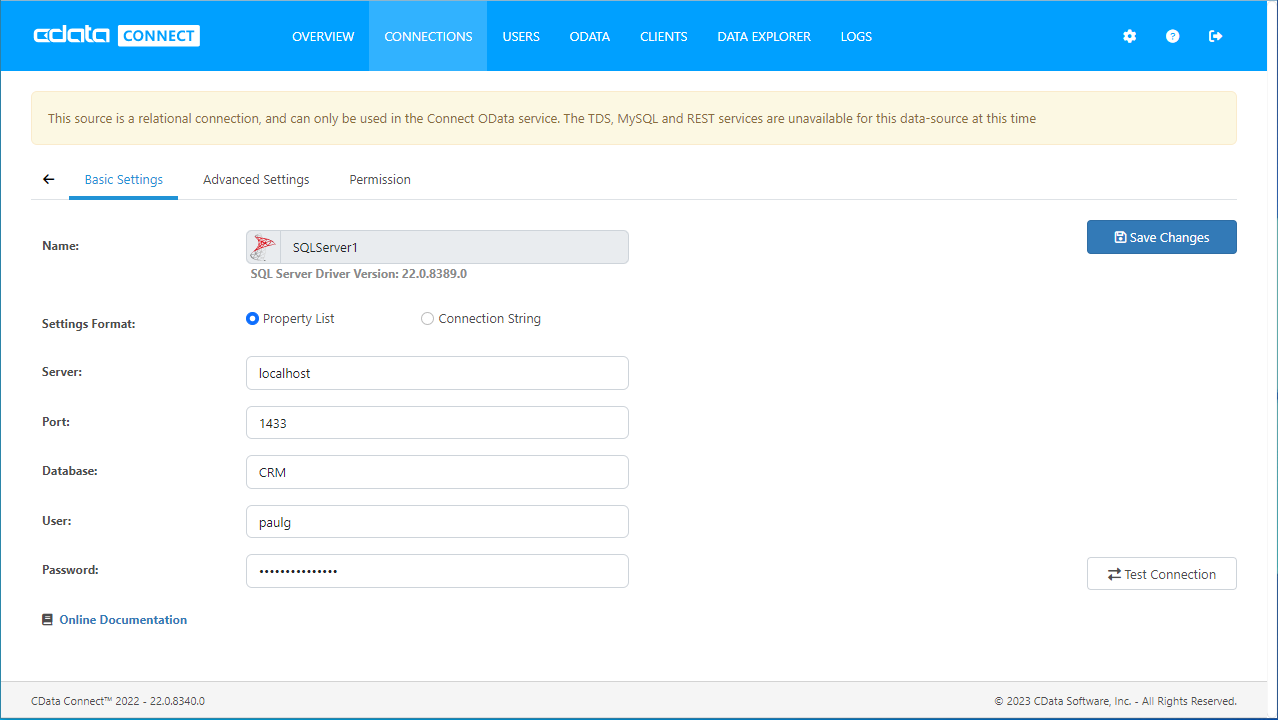
- Enter the necessary authentication properties to connect to Clio
Start by setting the Profile connection property to the location of the Clio Profile on disk (e.g. C:\profiles\Clio.apip). Next, set the ProfileSettings connection property to the connection string for Clio (see below).
Clio API Profile Settings
Clio uses OAuth-based authentication.
First, register an OAuth application with Clio. You can do so by logging to your Developer Account and clicking the Add button. Enter details and select the scope of your application here - these details will be shown to Clio users when they're asked to authorize your application. Your Oauth application will be assigned a client id (key) and a client secret (secret). Additionally you will need to set the Region in ProfileSettings connection property.
After setting the following connection properties, you are ready to connect:
- AuthScheme: Set this to OAuth.
- InitiateOAuth: Set this to GETANDREFRESH. You can use InitiateOAuth to manage the process to obtain the OAuthAccessToken.
- OAuthClientId: Set this to the client_id that is specified in you app settings.
- OAuthClientSecret: Set this to the client_secret that is specified in you app settings.
- CallbackURL: Set this to the Redirect URI that is specified in your app settings.
- Region: Set this in ProfileSettings to your Clio geographic region. Defaults to app.clio.com.
![Configuring a connection (SQL Server is shown).]()
- Click Save Changes
- Click Privileges -> Add and add the new user (or an existing user) with the appropriate permissions (SELECT is all that is required for RunMyProcess).
Add Clio OData Endpoints in Connect Server
After connecting to Clio, create OData Endpoints for the desired table(s).
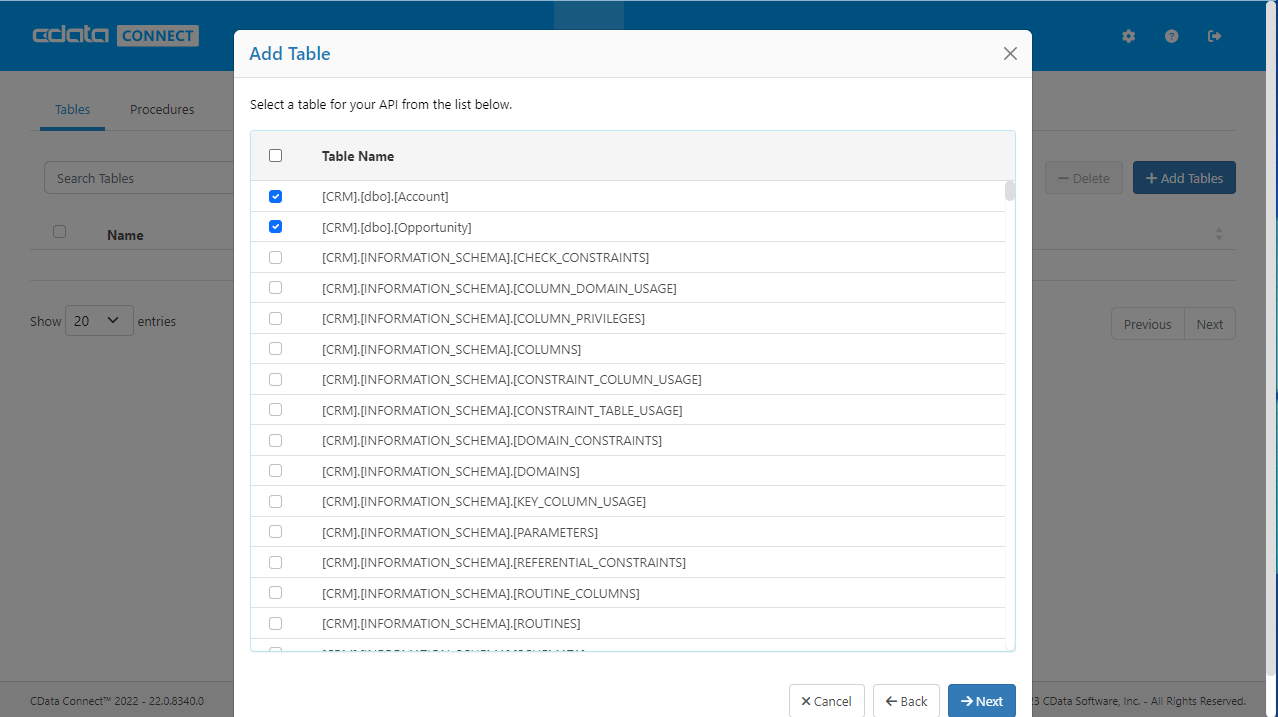
- Click OData -> Tables -> Add Tables
- Select the Clio database
- Select the table(s) you wish to work with and click Next
![Selecting a Table (SQL Server is shown)]()
- (Optional) Edit the resource to select specific fields and more
- Save the settings
(Optional) Configure Cross-Origin Resource Sharing (CORS)
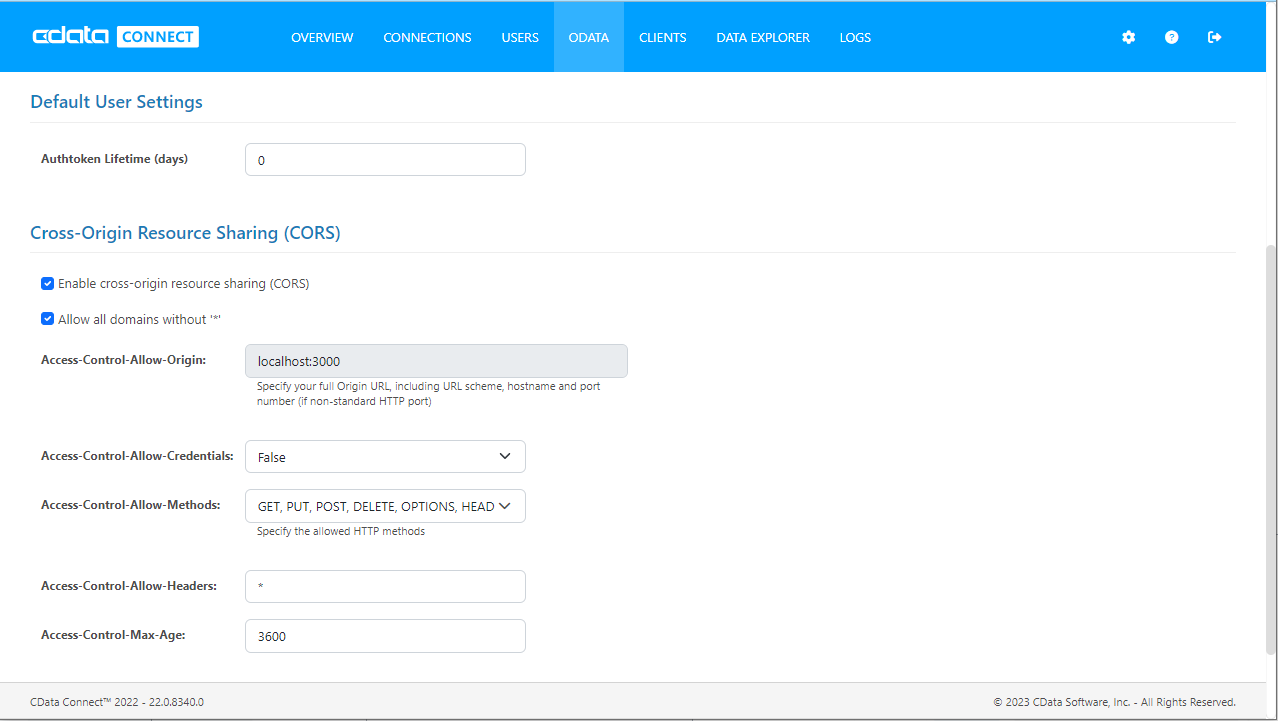
When accessing and connecting to multiple domains from an application, such as Ajax, you might violate the limitations of cross-site scripting. In that case, configure the CORS settings in OData -> Settings.
- Enable cross-origin resource sharing (CORS): ON
- Allow all domains without '*': ON
- Access-Control-Allow-Methods: GET, PUT, POST, OPTIONS
- Access-Control-Allow-Headers: Authorization
Save the changes to the settings.
Sample URLs for OData Feeds
Once you have configured a connection to Clio, created a user, and created OData endpoints in Connect Server, you can access OData feeds for Clio data. Below, you will see the URLs to access tables and the list of tables. For information on accessing the tables, you can navigate to the API page for Connect Server (click the API link on the top right of Connect Server Web page). For the URLs, you will need the URL of Connect Server, likely in the form: CONNECT_SERVER_URL/. Since we are working with Angular, we will append the @json parameter to the end of URLs that do not return JSON data by default.
| Table | URL | |
|---|---|---|
| Entity (table) List | CONNECT_SERVER_URL/api.rsc/ | |
| Metadata for table Bills | CONNECT_SERVER_URL/api.rsc/Bills/$metadata?@json | |
| Bills | CONNECT_SERVER_URL/api.rsc/API_Bills |
As with standard OData feeds, if you wish to limit the fields returned, you can add a $select parameter to the query, along with other standard OData URL parameters, such as $filter, $orderby, $skip, and $top. See the help documentation for more information on supported OData queries.
Retrieve Clio Data from RunMyProcess DigitalSuite Studio
With the connection to Clio and OData endpoints created, we are ready to add Clio data to RunMyProcess for retrieval.
Create a Provider
- Log into RunMyProcess and open DigitalSuite Studio.
- Click Resources to bring up the Resources page, then select then the CONNECTORS tab.
![Connectors page]()
- Click the + (New Provider) button to create a new provider, choose the project to use, then click Confirm.
![Create a new provider]()
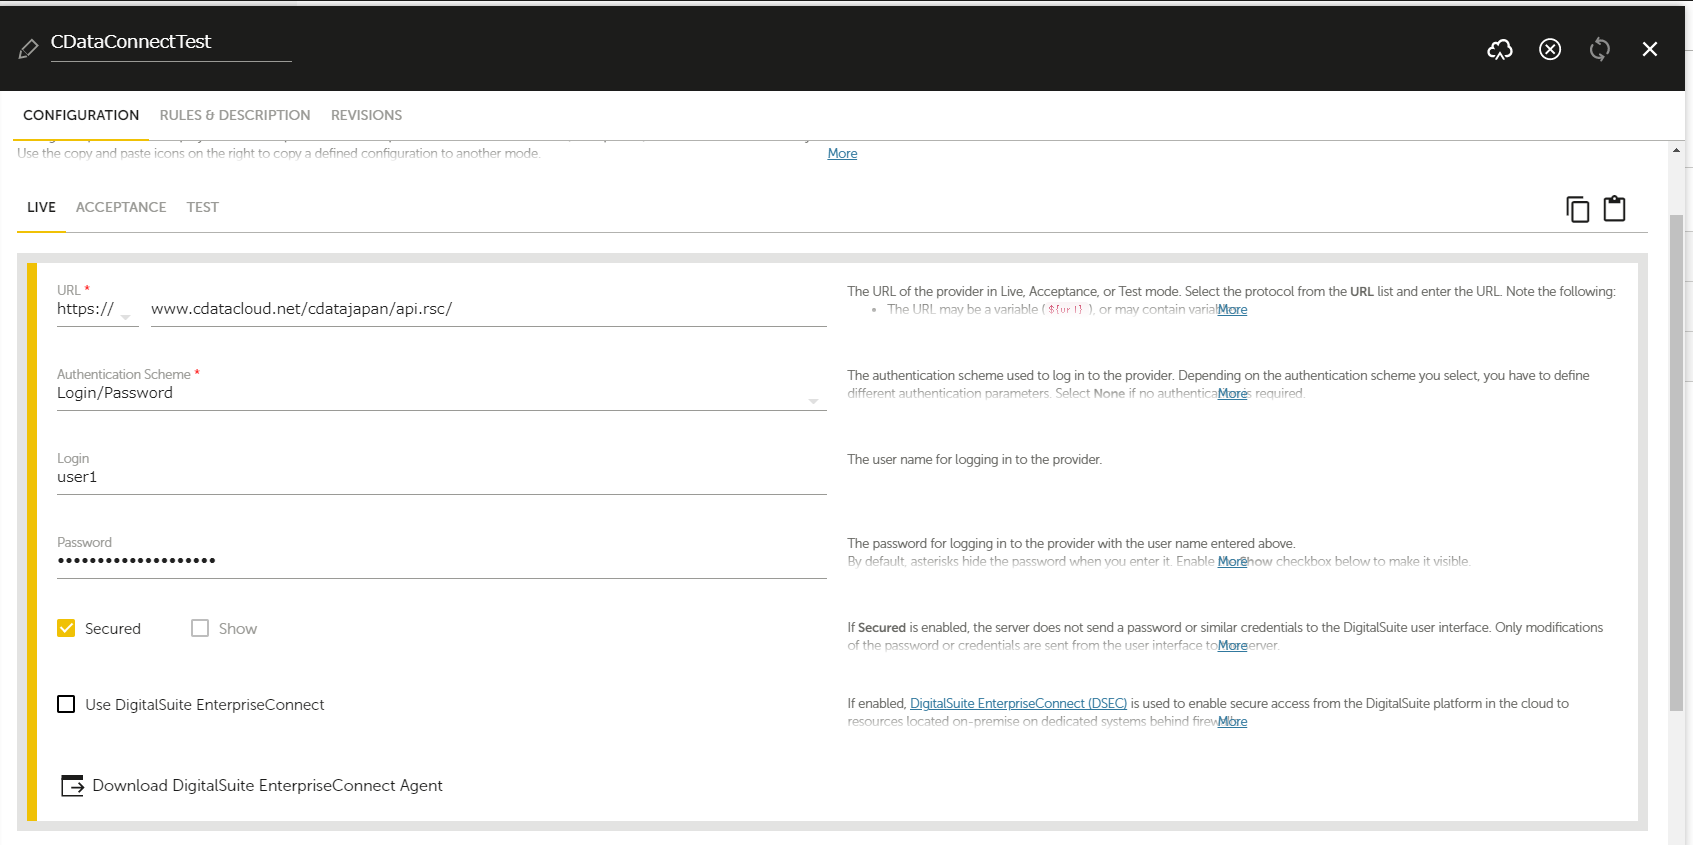
- In the provider settings page, configure the following properties.
- URL:Set the OData endpoint in the CData Connect Endpoints page.e.g. CONNECT_SERVER_URL/api.rsc/
- Authentication Schema:Select Login/Password.
- Login:Specify the CData Connect User name configured above.
- Password:Specify the Authtoken of the user.
![Selecting a connector]()
- Fill in the same properties in the ACCEPTANCE and TEST tabs. Note: You can copy the configured settings by clicking 'Copy this configuration button,' then pasting the content in the new tab by clicking 'Paste previously copied configuration.'
- Click Save to save the properties.
Retrieve Clio Data by Creating a Connector
- In the CONNECTORS tab, click the button with three dots to create the provider, then select Add connector from the menu.
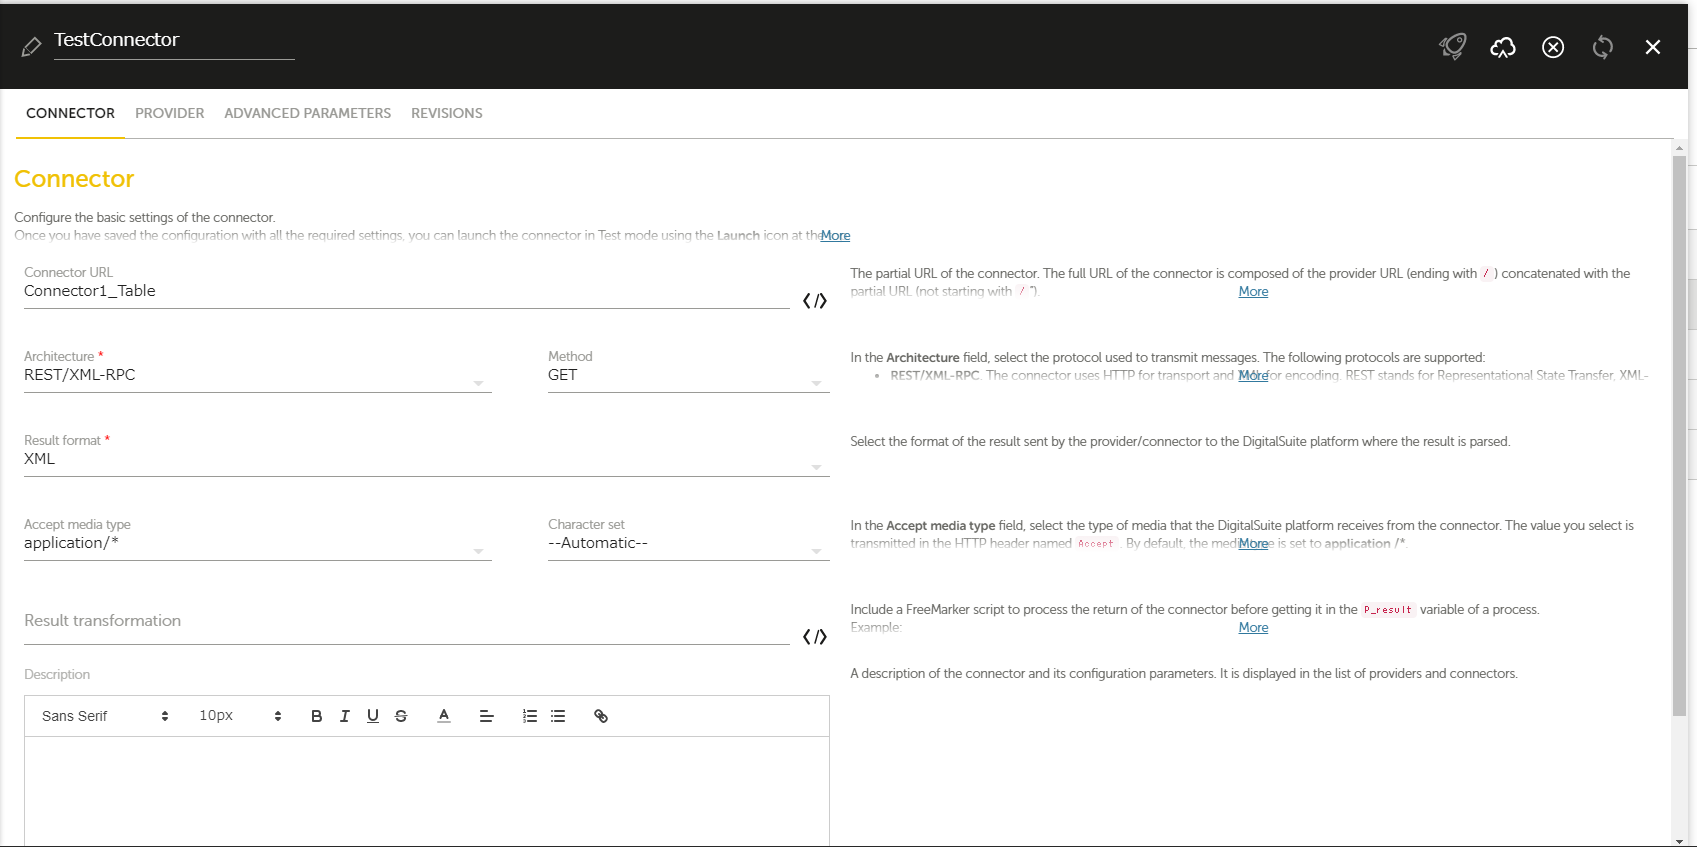
- In the following page, set Connector URL to the OData endpoint configured in Connect Server.e.g. odataendpoint/
![Connector settings page]()
- Click Save then Launch to test the connector execution. Click Launch test to execute. The process is successful if you get the JSON response of your configured table information.
![Execution test page]()
More Information & Free Trial
Now, you have created a provider and connector to retrieve Clio data. For more information on creating OData feeds from Clio (and more than 200 other data sources), visit the Connect Server page. Sign up for a free trial and start working with live Clio data in RunMyProcess.


