Discover how a bimodal integration strategy can address the major data management challenges facing your organization today.
Get the Report →How to connect to Bitbucket Data from Google Apps Script
Use CData Connect Server to access Bitbucket data in Google Apps Script.
Google Apps Script gives you the ability to create custom functionality within your Google documents, including Google Sheets, Google Docs, and more. With CData Connect Server, you get a SQL Server interface for any of the 200+ sources supported by CData, including Bitbucket. The SQL Server protocol is natively supported through the JDBC service in Google Apps Script, so by utilizing Connect Server, you gain access to live Bitbucket data within your Google documents.
This article shows how to create a virtual database for Bitbucket in Connect Server and provides sample scripting for processing Bitbucket data in a Google Spreadsheet.
Our script only reads data from a specified table, but you can easily extend the script to incorporate update functionality.
CData Connect Server provides a pure SQL Server interface for Bitbucket, allowing you to easily build reports from live Bitbucket data in Apps Script — without replicating the data to a natively supported database. As you build visualizations, Apps Script generates SQL queries to gather data. Using optimized data processing out of the box, CData Connect Server pushes all supported SQL operations (filters, JOINs, etc) directly to Bitbucket, leveraging server-side processing to quickly return the requested Bitbucket data.
Create a Virtual SQL Server Database for Bitbucket Data
CData Connect Server uses a straightforward, point-and-click interface to connect to data sources and generate APIs.
-
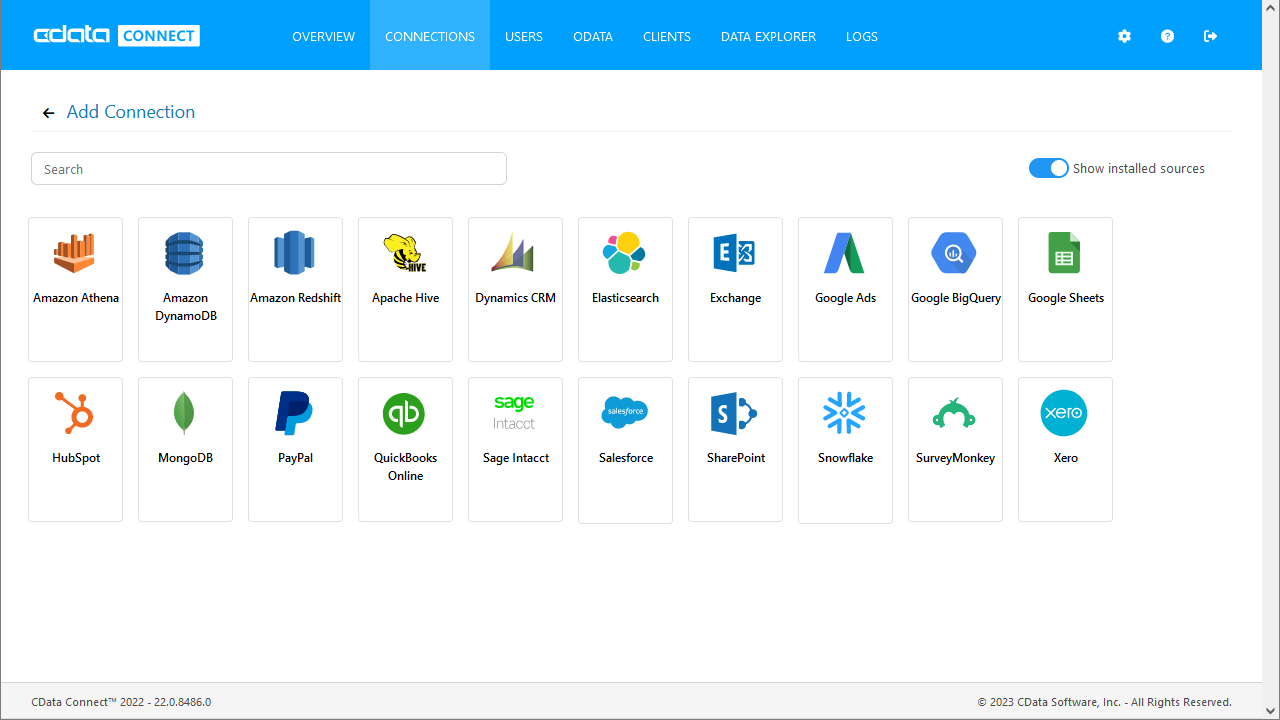
Login to Connect Server and click Connections.
![Adding a connection]()
- Select "Bitbucket" from Available Data Sources.
-
Enter the necessary authentication properties to connect to Bitbucket.
For most queries, you must set the Workspace. The only exception to this is the Workspaces table, which does not require this property to be set, as querying it provides a list of workspace slugs that can be used to set Workspace. To query this table, you must set Schema to 'Information' and execute the query SELECT * FROM Workspaces>.
Setting Schema to 'Information' displays general information. To connect to Bitbucket, set these parameters:
- Schema: To show general information about a workspace, such as its users, repositories, and projects, set this to Information. Otherwise, set this to the schema of the repository or project you are querying. To get a full set of available schemas, query the sys_schemas table.
- Workspace: Required if you are not querying the Workspaces table. This property is not required for querying the Workspaces table, as that query only returns a list of workspace slugs that can be used to set Workspace.
Authenticating to Bitbucket
Bitbucket supports OAuth authentication only. To enable this authentication from all OAuth flows, you must create a custom OAuth application, and set AuthScheme to OAuth.
Be sure to review the Help documentation for the required connection properties for you specific authentication needs (desktop applications, web applications, and headless machines).
Creating a custom OAuth application
From your Bitbucket account:
- Go to Settings (the gear icon) and select Workspace Settings.
- In the Apps and Features section, select OAuth Consumers.
- Click Add Consumer.
- Enter a name and description for your custom application.
- Set the callback URL:
- For desktop applications and headless machines, use http://localhost:33333 or another port number of your choice. The URI you set here becomes the CallbackURL property.
- For web applications, set the callback URL to a trusted redirect URL. This URL is the web location the user returns to with the token that verifies that your application has been granted access.
- If you plan to use client credentials to authenticate, you must select This is a private consumer. In the driver, you must set AuthScheme to client.
- Select which permissions to give your OAuth application. These determine what data you can read and write with it.
- To save the new custom application, click Save.
- After the application has been saved, you can select it to view its settings. The application's Key and Secret are displayed. Record these for future use. You will use the Key to set the OAuthClientId and the Secret to set the OAuthClientSecret.
![Configuring a connection (SQL Server is shown).]()
- Click Save Changes
- Click Privileges -> Add and add the new user (or an existing user) with the appropriate permissions.
With the virtual database created, you are ready to connect to Bitbucket data from Apps Script.
Connect to Bitbucket Data with Apps Script
At this point, you should have configured a virtual database for Bitbucket in Connect Server. All that is left now is to use Google Apps Script to access Connect Server and work with your Bitbucket data in Google Sheets.
In this section, you will create a script (with a menu option to call the script) to populate a spreadsheet with Bitbucket data. We have created a sample script and explained the different parts. You can view the raw script at the end of the article.
1. Create an Empty Script
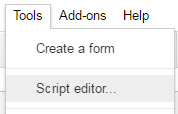
To create a script for your Google Sheet, click Tools Script editor from the Google Sheets menu:

2. Declare Class Variables
Create a handful of class variables to be available for any functions created in the script.
//replace the variables in this block with real values as needed
var address = 'CONNECT_SERVER_URL:port';
var user = 'CONNECT_USER';
var userPwd = 'CONNECT_PASSWORD';
var db = 'bitbucketdb';
var serverSslCert = '-----BEGIN CERTIFICATE-----
...
-----END CERTIFICATE-----';
var clientSslCert = '-----BEGIN CERTIFICATE-----
...
-----END CERTIFICATE-----';
var clientSslKey  = '-----BEGIN CERTIFICATE-----
...
-----END CERTIFICATE-----';

var dbUrl = 'jdbc:sqlserver://' + address + '/' + db + '?useSSL=true';
3. Add a Menu Option
This function adds a menu option to your Google Sheet, allowing you to use the UI to call your function.
function onOpen() {
  var spreadsheet = SpreadsheetApp.getActive();
  var menuItems = [
    {name: 'Write data to a sheet', functionName: 'connectToBitbucketData'}
  ];
  spreadsheet.addMenu('Bitbucket Data', menuItems);
}

4. Write a Helper Function
This function is used to find the first empty row in a spreadsheet.
/*
 * Finds the first empty row in a spreadsheet by scanning an array of columns
 * @return The row number of the first empty row.
 */
function getFirstEmptyRowByColumnArray(spreadSheet, column) {
  var column = spreadSheet.getRange(column + ":" + column);
  var values = column.getValues(); // get all data in one call
  var ct = 0;
  while ( values[ct] && values[ct][0] != "" ) {
    ct++;
  }
  return (ct+1);
}
5. Write a Function to Write Bitbucket Data to a Spreadsheet
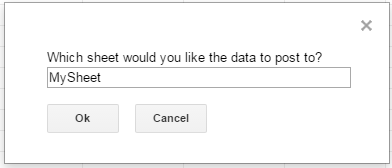
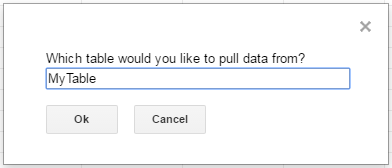
The function below writes the Bitbucket data, using the Google Apps Script JDBC functionality to connect to Connect Server, SELECT data, and populate a spreadsheet. When the script is run, two input boxes will appear:
The first one asks the user to input the name of a sheet to hold the data (if the spreadsheet does not exist, the function creates it).

The second asks the user to input the name of a Bitbucket table to read. If an invalid table is chosen, an error message appears and the function is exited.

Note, while the function is designed for use as a menu option, you can extend it for use as a spreadsheet formula.
/*
 * Reads data from a specified Bitbucket 'table' and writes it to the specified sheet.
 *    (If the specified sheet does not exist, it is created.)
 */
function connectToBitbucketData() {
  var thisWorkbook = SpreadsheetApp.getActive();

  //select a sheet and create it if it does not exist
  var selectedSheet = Browser.inputBox('Which sheet would you like the data to post to?',Browser.Buttons.OK_CANCEL);
  if (selectedSheet == 'cancel')
    return;

  if (thisWorkbook.getSheetByName(selectedSheet) == null)
    thisWorkbook.insertSheet(selectedSheet);
  var resultSheet = thisWorkbook.getSheetByName(selectedSheet);
  var rowNum = 2;

  //select a Bitbucket 'table'
  var table = Browser.inputBox('Which table would you like to pull data from?',Browser.Buttons.OK_CANCEL);
  if (table == 'cancel')
    return;

  var conn = Jdbc.getConnection(dbUrl, {
    user: user,
    password: userPwd,
    _serverSslCertificate: serverSslCert,
    _clientSslCertificate: clientSslCert,
    _clientSslKey:         clientSslKey
  );

  //confirm that var table is a valid table/view
  var dbMetaData = conn.getMetaData();
  var tableSet = dbMetaData.getTables(null, null, table, null);
  var validTable = false;
  while (tableSet.next()) {
    var tempTable = tableSet.getString(3);
    if (table.toUpperCase() == tempTable.toUpperCase()){
      table = tempTable;
      validTable = true;
      break;
    }
  }
  tableSet.close();
  if (!validTable) {
    Browser.msgBox("Invalid table name: " + table, Browser.Buttons.OK);
    return;
  }

  var stmt = conn.createStatement();

  var results = stmt.executeQuery('SELECT * FROM ' + table);
  var rsmd = results.getMetaData();
  var numCols = rsmd.getColumnCount();

  //if the sheet is empty, populate the first row with the headers
  var firstEmptyRow = getFirstEmptyRowByColumnArray(resultSheet, "A");
  if (firstEmptyRow == 1) {
    //collect column names
    var headers = new Array(new Array(numCols));
    for (var col = 0; col < numCols; col++){
      headers[0][col] = rsmd.getColumnName(col+1);
    }
    resultSheet.getRange(1, 1, headers.length, headers[0].length).setValues(headers);
  } else {
    rowNum = firstEmptyRow;
  }

  //write rows of Bitbucket data to the sheet
  var values = new Array(new Array(numCols));
  while (results.next()) {
    for (var col = 0; col < numCols; col++) {
      values[0][col] = results.getString(col + 1);
    }
    resultSheet.getRange(rowNum, 1, 1, numCols).setValues(values);
    rowNum++;
  }

  results.close();
  stmt.close();
}
When the function is completed, you have a spreadsheet populated with your Bitbucket data, and you can now leverage all of the calculating, graphing, and charting functionality of Google Sheets anywhere you have access to the Internet.
Complete Google Apps Script
//replace the variables in this block with real values as needed
var address = 'CONNECT_SERVER_URL:port';
var user = 'CONNECT_USER';
var userPwd = 'CONNECT_PASSWORD';
var db = 'bitbucketdb';
var serverSslCert = '-----BEGIN CERTIFICATE-----
...
-----END CERTIFICATE-----';
var clientSslCert = '-----BEGIN CERTIFICATE-----
...
-----END CERTIFICATE-----';
var clientSslKey  = '-----BEGIN CERTIFICATE-----
...
-----END CERTIFICATE-----';

var dbUrl = 'jdbc:sqlserver://' + address + '/' + db + '?useSSL=true';

function onOpen() {
  var spreadsheet = SpreadsheetApp.getActive();
  var menuItems = [
    {name: 'Write table data to a sheet', functionName: 'connectToBitbucketData'}
  ];
  spreadsheet.addMenu('Bitbucket Data', menuItems);
}

/*
 * Finds the first empty row in a spreadsheet by scanning an array of columns
 * @return The row number of the first empty row.
 */
function getFirstEmptyRowByColumnArray(spreadSheet, column) {
  var column = spreadSheet.getRange(column + ":" + column);
  var values = column.getValues(); // get all data in one call
  var ct = 0;
  while ( values[ct] && values[ct][0] != "" ) {
    ct++;
  }
  return (ct+1);
}

/*
 * Reads data from a specified 'table' and writes it to the specified sheet.
 *    (If the specified sheet does not exist, it is created.)
 */
function connectToBitbucketData() {
  var thisWorkbook = SpreadsheetApp.getActive();

  //select a sheet and create it if it does not exist
  var selectedSheet = Browser.inputBox('Which sheet would you like the data to post to?',Browser.Buttons.OK_CANCEL);
  if (selectedSheet == 'cancel')
    return;

  if (thisWorkbook.getSheetByName(selectedSheet) == null)
    thisWorkbook.insertSheet(selectedSheet);
  var resultSheet = thisWorkbook.getSheetByName(selectedSheet);
  var rowNum = 2;

  //select a Bitbucket 'table'
  var table = Browser.inputBox('Which table would you like to pull data from?',Browser.Buttons.OK_CANCEL);
  if (table == 'cancel')
    return;

  var conn = Jdbc.getConnection(dbUrl, {
    user: user,
    password: userPwd,
    _serverSslCertificate: serverSslCert,
    _clientSslCertificate: clientSslCert,
    _clientSslKey:         clientSslKey
  );

  //confirm that var table is a valid table/view
  var dbMetaData = conn.getMetaData();
  var tableSet = dbMetaData.getTables(null, null, table, null);
  var validTable = false;
  while (tableSet.next()) {
    var tempTable = tableSet.getString(3);
    if (table.toUpperCase() == tempTable.toUpperCase()){
      table = tempTable;
      validTable = true;
      break;
    }
  }
  tableSet.close();
  if (!validTable) {
    Browser.msgBox("Invalid table name: " + table, Browser.Buttons.OK);
    return;
  }

  var stmt = conn.createStatement();

  var results = stmt.executeQuery('SELECT * FROM ' + table);
  var rsmd = results.getMetaData();
  var numCols = rsmd.getColumnCount();

  //if the sheet is empty, populate the first row with the headers
  var firstEmptyRow = getFirstEmptyRowByColumnArray(resultSheet, "A");
  if (firstEmptyRow == 1) {
    //collect column names
    var headers = new Array(new Array(numCols));
    for (var col = 0; col < numCols; col++){
      headers[0][col] = rsmd.getColumnName(col+1);
    }
    resultSheet.getRange(1, 1, headers.length, headers[0].length).setValues(headers);
  } else {
    rowNum = firstEmptyRow;
  }

  //write rows of Bitbucket data to the sheet
  var values = new Array(new Array(numCols));
  while (results.next()) {
    for (var col = 0; col < numCols; col++) {
      values[0][col] = results.getString(col + 1);
    }
    resultSheet.getRange(rowNum, 1, 1, numCols).setValues(values);
    rowNum++;
  }

  results.close();
  stmt.close();
}


