Discover how a bimodal integration strategy can address the major data management challenges facing your organization today.
Get the Report →Create WooCommerce-Connected Enterprise Applications in OutSystems
Use CData Connect Cloud to connect to WooCommerce Data from OutSystems and build custom enterprise apps using live WooCommerce data.
OutSystems is a low-code platform which provides the tools for companies to developer, deploy, and manage omnichannel enterprise applications. When paired with CData Connect Cloud, you get instant, cloud-to-cloud access to WooCommerce data for business applications. This article shows how to create a virtual database for WooCommerce in Connect Cloud and build a simple app from WooCommerce data in OutSystems.
The CData Connect Cloud provides a pure cloud-to-cloud interface for WooCommerce, allowing you to build reports from live WooCommerce data in OutSystems — without replicating the data to a natively supported database. As you create applications to work with data, OutSystems generates SQL queries to gather data. Using optimized data processing out of the box, CData Connect Cloud pushes all supported SQL operations (filters, JOINs, etc.) directly to WooCommerce, leveraging server-side processing to quickly return the requested WooCommerce data.
Configure WooCommerce Connectivity for OutSystems
Connectivity to WooCommerce from OutSystems is made possible through CData Connect Cloud. To work with WooCommerce data from OutSystems, we start by creating and configuring a WooCommerce connection.
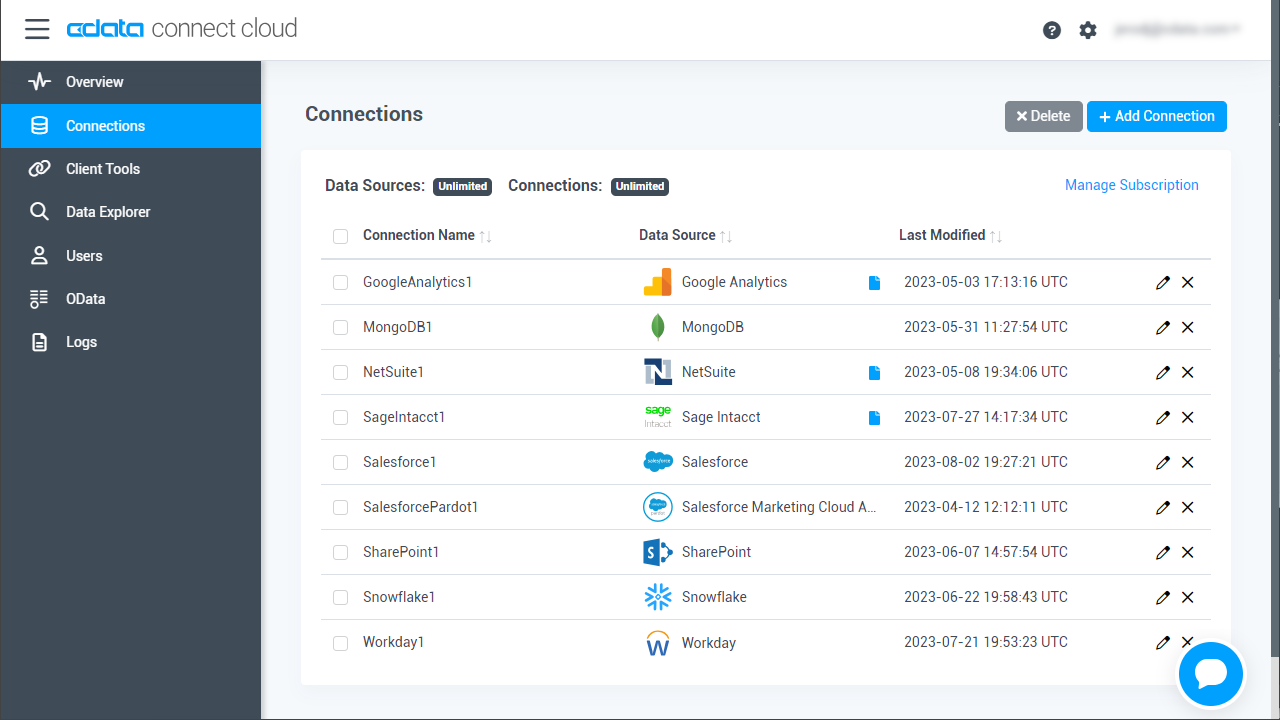
- Log into Connect Cloud, click Connections and click Add Connection
![Adding a Connection]()
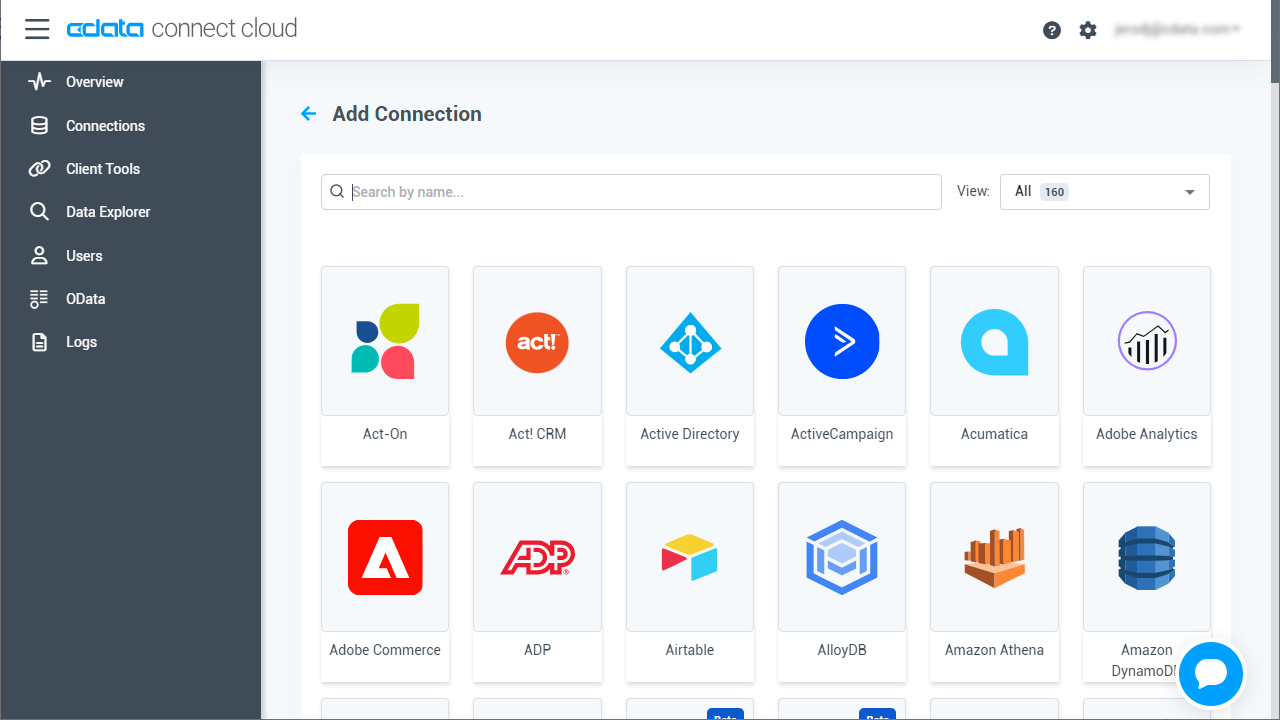
- Select "WooCommerce" from the Add Connection panel
![Selecting a data source]()
-
Enter the necessary authentication properties to connect to WooCommerce.
WooCommerce supports the following authentication methods: one-legged OAuth1.0 Authentication and standard OAuth2.0 Authentication.
Connecting using one-legged OAuth 1.0 Authentication
Specify the following properties (NOTE: the below credentials are generated from WooCommerce settings page and should not be confused with the credentials generated by using WordPress OAuth2.0 plugin):
- ConsumerKey
- ConsumerSecret
Connecting using WordPress OAuth 2.0 Authentication
Add a Personal Access Token
If you are connecting from a service, application, platform, or framework that does not support OAuth authentication, you can create a Personal Access Token (PAT) to use for authentication. Best practices would dictate that you create a separate PAT for each service, to maintain granularity of access.
- Click on your username at the top right of the Connect Cloud app and click User Profile.
- On the User Profile page, scroll down to the Personal Access Tokens section and click Create PAT.
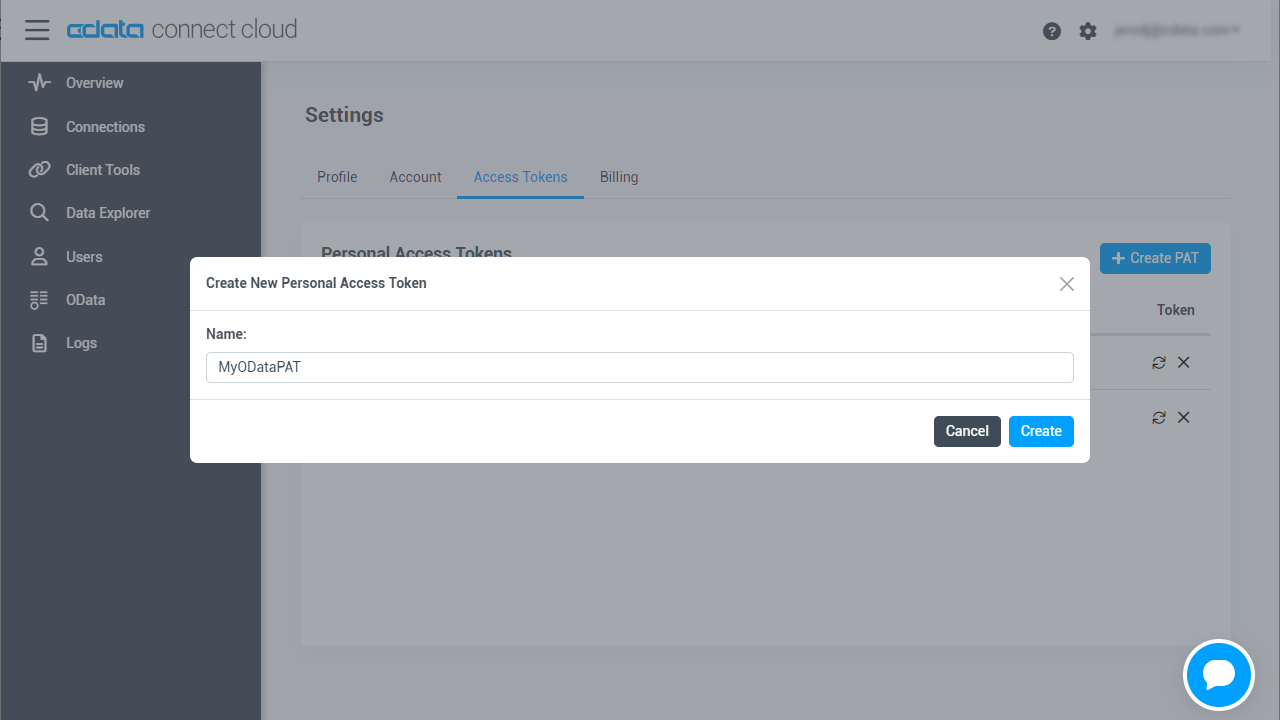
- Give your PAT a name and click Create.
![Creating a new PAT]()
- The personal access token is only visible at creation, so be sure to copy it and store it securely for future use.
With the connection configured, you are ready to connect to WooCommerce data from OutSystems.
Connect to WooCommerce from OutSystems
The steps below outline connecting to CData Connect Cloud from OutSystems to create a new WooCommerce database connection.
- Open OutSystems Service Studio
- Click the gear icon to open Environment Management in the Service Center
![Opening the Service Center]()
- Click Administration and select "Database Connections"
- Click "New Database Connection"
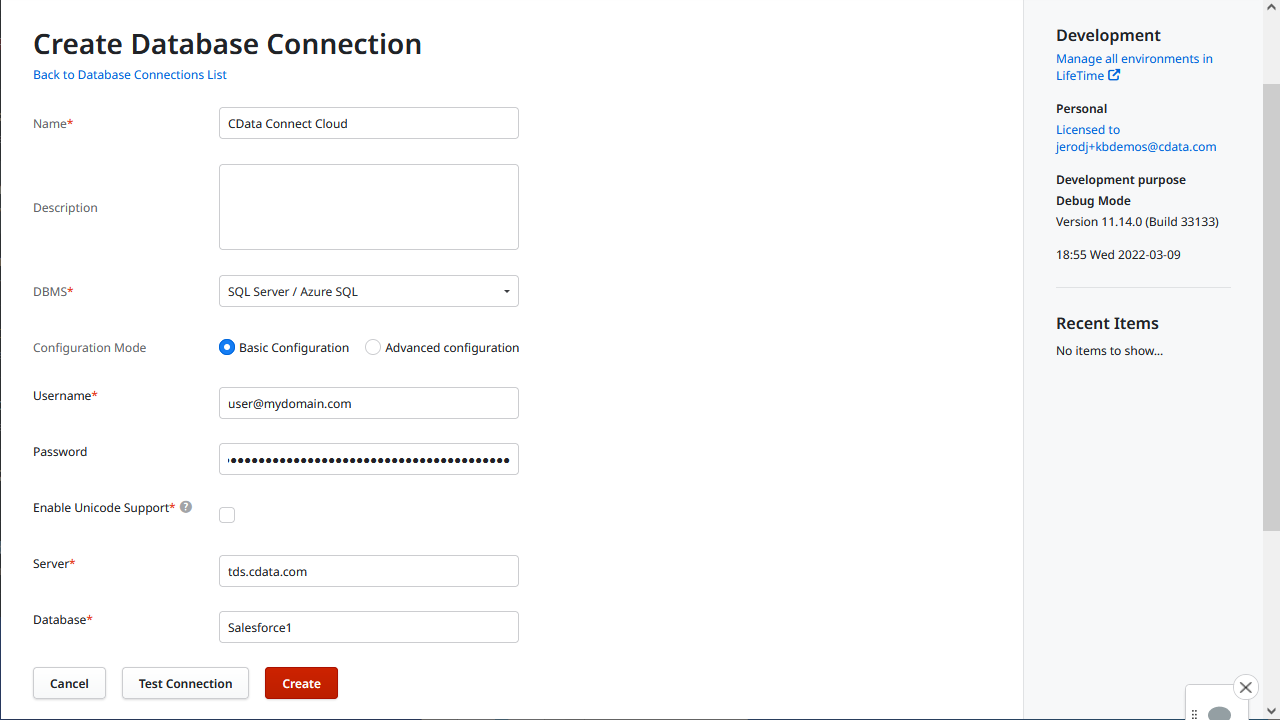
- Configure the database connection:
- Name: name the connection (e.g. CData Connect Cloud WooCommerce)
- DBMS: SQL Server / Azure SQL
- Username: a Connect Cloud user (e.g. user@mydomain.com)
- Password: the PAT for the Connect Cloud user
- Server: tds.cdata.com,14333
- Schema: the name of your WooCommerce connection (e.g. WooCommerce1)
![Connecting to the Connect Cloud]()
- Click "Test Connection"
- Click "Create"
Map WooCommerce Tables or Views to Entities in an Extension Module
Once you create the database connection for WooCommerce, you can create an extension that maps the tables or views to OutSystems entities. If you have not already done so, create an Application in Service Studio.
- Open the Service Studio and open the existing Application
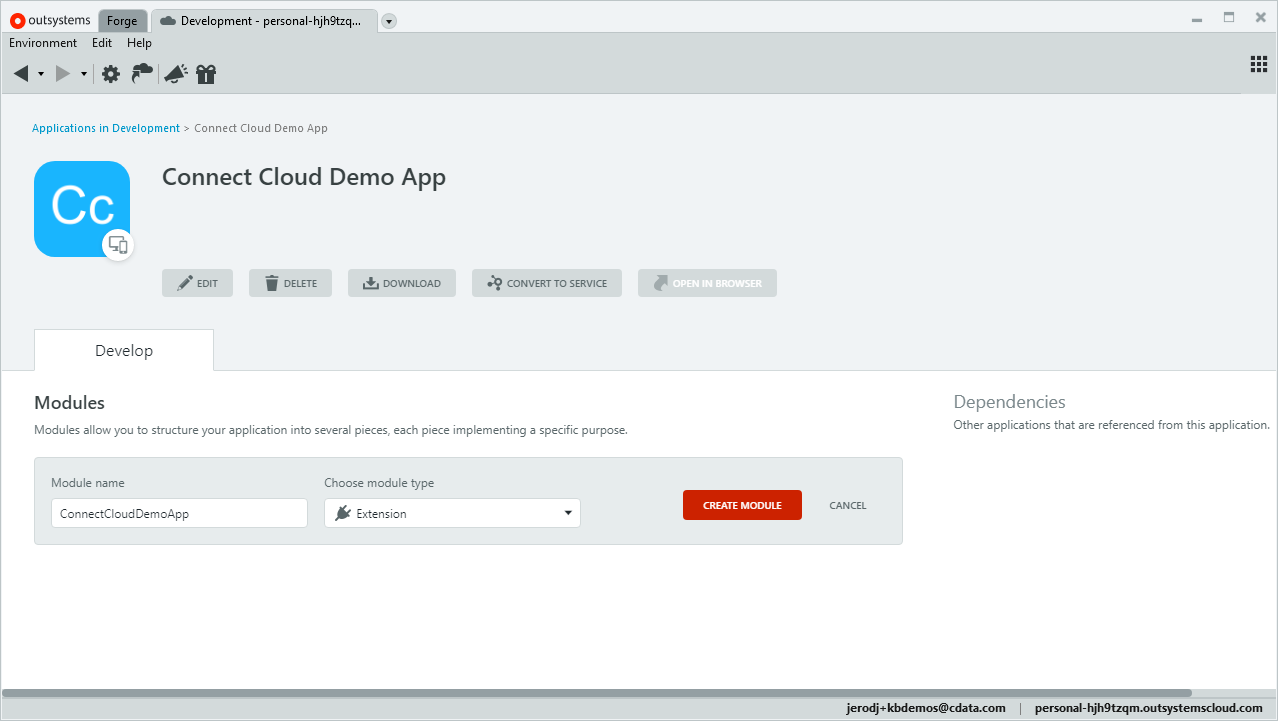
- Click "Add Module," set the "Module Name" (e.g. woocommerce_db_extension), set "Module Type" to "Extension," and click "Create Module"
![Creating a new extension module]()
- In Integration Studio, connect to your environment
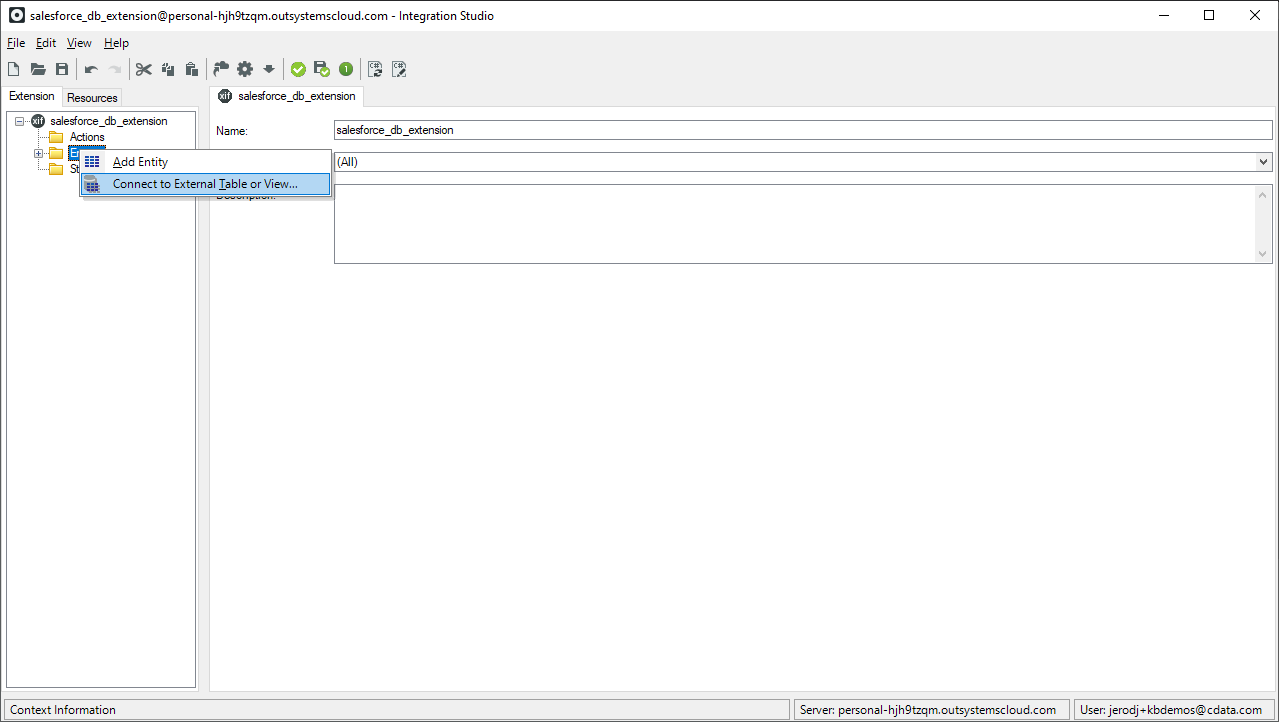
- Right-click "Entities" in the extension tree and select "Connect to External Table or View..."
![Connecting to external tables or views]()
- Follow the steps in the wizard, selecting the tables and views you wish to work with
- In the Integration Studio, click "1-Click Publish"
- In the "1-Click Publish" wizard, click "Configure" when the process completes
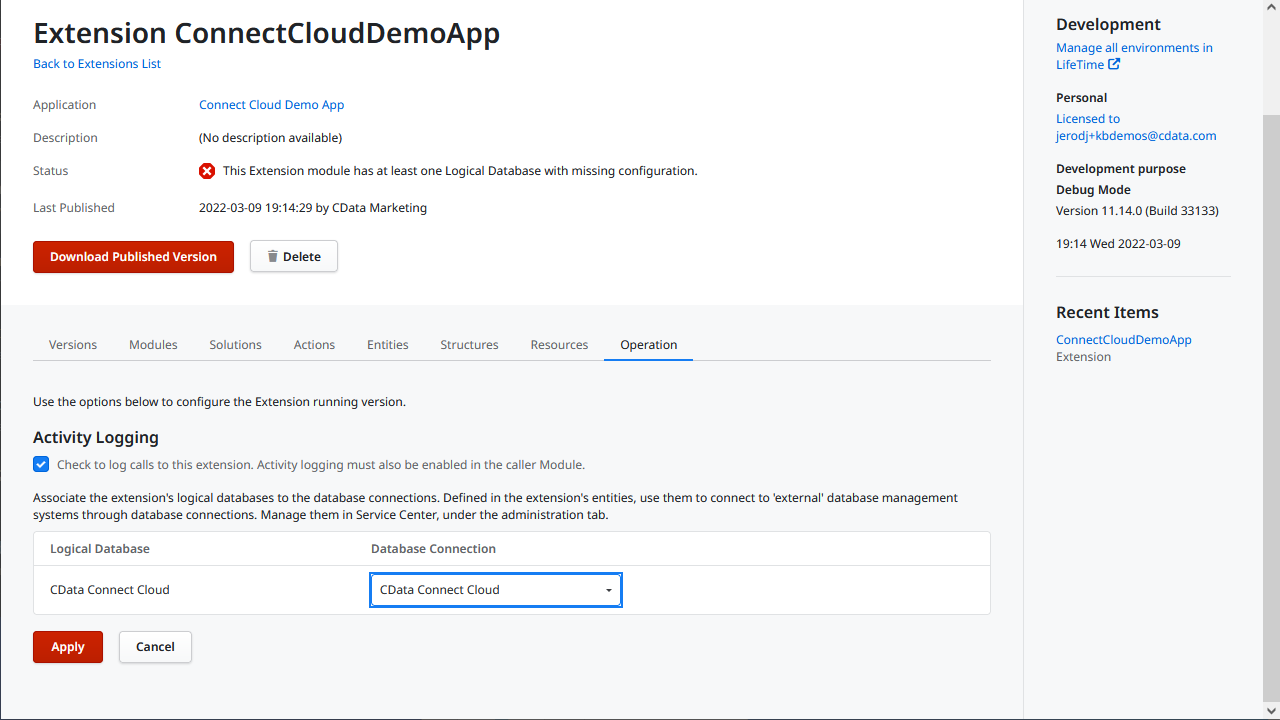
- In the Service Center, associate the logical database name of the extension to the database connection that the extension will use and click "Apply"
![Configuring the external extension]()
- In the Service Center, associate the logical database name of the extension to the database connection that the extension will use and click "Apply"
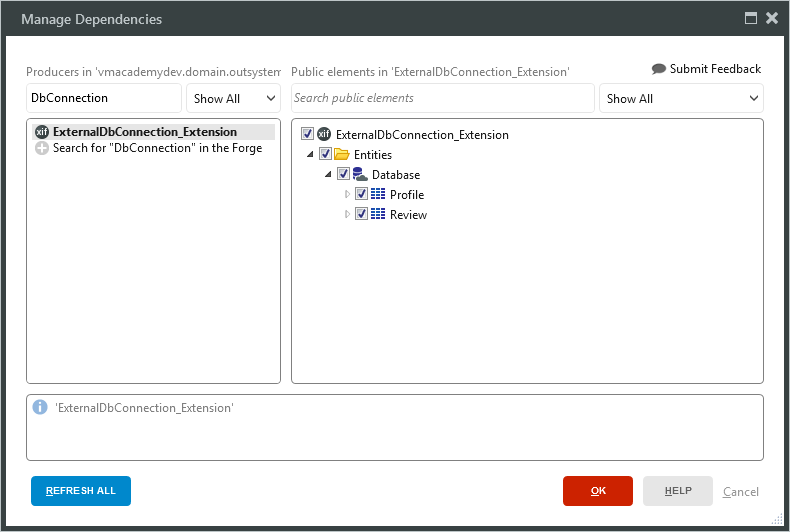
- In your application, click "Manage Dependencies..."
- Add a dependency to the Extension and select the Entities that you will use in your application
![Adding a dependency to the extension]()
At this point, you can access and work with WooCommerce data just like you would with the standard OutSystems entities.
More Information & Free Trial
With Connect Cloud and OutSystems, you can easily build WooCommerce-connected applications. Request a free trial of Connect Cloud and start working with WooCommerce data in OutSystems today.


