Discover how a bimodal integration strategy can address the major data management challenges facing your organization today.
Get the Report →How to Use a Microsoft Access Database to Update Jira Service Desk Data in Real Time
Update Jira Service Desk data by creating a linked table in Microsoft Access with the CData Jira Service Desk ODBC Driver.
CData ODBC drivers connect your data to any database management tool that supports Open Database Connectivity (ODBC). This includes many of the most popular productivity tools, adding new capabilities for document sharing and collaboration. Using the CData ODBC driver for Jira Service Desk, you can update live Jira Service Desk data in Microsoft Access; for example, you can make updates that can be immediately seen by other users.
Connect to Jira Service Desk as an ODBC Data Source
If you have not already, first specify connection properties in an ODBC DSN (data source name). This is the last step of the driver installation. You can use the Microsoft ODBC Data Source Administrator to create and configure ODBC DSNs.
You can establish a connection to any Jira Service Desk Cloud account or Server instance.
Connecting with a Cloud Account
To connect to a Cloud account, you'll first need to retrieve an APIToken. To generate one, log in to your Atlassian account and navigate to API tokens > Create API token. The generated token will be displayed.
Supply the following to connect to data:
- User: Set this to the username of the authenticating user.
- APIToken: Set this to the API token found previously.
Connecting with a Service Account
To authenticate with a service account, you will need to supply the following connection properties:
- User: Set this to the username of the authenticating user.
- Password: Set this to the password of the authenticating user.
- URL: Set this to the URL associated with your JIRA Service Desk endpoint. For example, https://yoursitename.atlassian.net.
Note: Password has been deprecated for connecting to a Cloud Account and is now used only to connect to a Server Instance.
Accessing Custom Fields
By default, the connector only surfaces system fields. To access the custom fields for Issues, set IncludeCustomFields.
Create a Linked Table to Requests Data
Follow the steps below to create a linked table, which enables you to access live Requests data.
- On the External Data tab in Access, click ODBC Database.
![Use the Get External Data wizard to work with ODBC data sources in Access.]()
- Select the option to link to the data source. A linked table will enable you to read from and write data to the Requests table.
![Linked Tables enable you use the live connection to Jira Service Desk that is provided by the driver.]()
Select the CData Jira Service Desk data source from the Machine Data Source tab.
![DSNs listed in the Get External Data wizard.]()
-
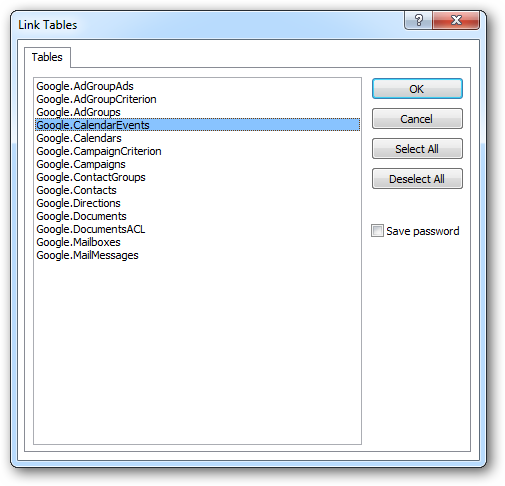
Select the Requests table. For more information on this table, see the "Data Model" chapter in the help documentation.
![Available tables. (Google is shown.)]()
-
Double-click the linked table to make edits. The linked table will always have up-to-date data and any changes will be reflected back to the underlying table.
![A linked table to the live data. (Google is shown.)]()


