Discover how a bimodal integration strategy can address the major data management challenges facing your organization today.
Get the Report →Configure a One-Way Send Port for the CData BizTalk Adapter for Jira Service Desk
Use the adapter for Jira Service Desk with a one-way send port to execute updategrams and data manipulation SQL in BizTalk.
This section provides step-by-step instructions for creating, configuring, and testing a static one-way send port using the CData BizTalk Adapter for Jira Service Desk. You can use static one-way send ports to execute updategrams, SQL commands, and stored procedures. Send ports are useful for operations that modify Jira Service Desk data but do not have any response data. Typically, this would be DELETE or UPDATE SQL commands or updategrams, and occasionally stored procedure operations.
If you want to trigger actions that will return a response, such as executing SELECT commands or retrieving the Id of a record that you have created, use a solicit-response send port.
Create and Configure the One-Way Send Port
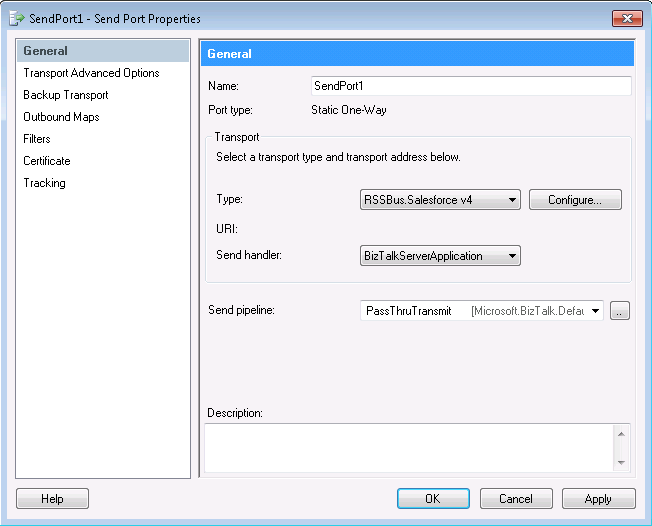
Create a static one-way send port and configure it to use the Jira Service Desk adapter as its transport type.
- If you have not already done so, open your BizTalk application in the BizTalk Administration Console.
- In the node for your BizTalk application, right-click Send Ports and select New -> Static One-Way Send Port. The send port properties dialog is displayed.
- In the Name menu, enter a name for the send port.
- In the Type menu, select CData.JiraServiceDesk.
- In the Send Pipeline menu, select the default option, PassThruTransmit.

Configure the Adapter
Define the command that the adapter will execute in the Transport Properties dialog.
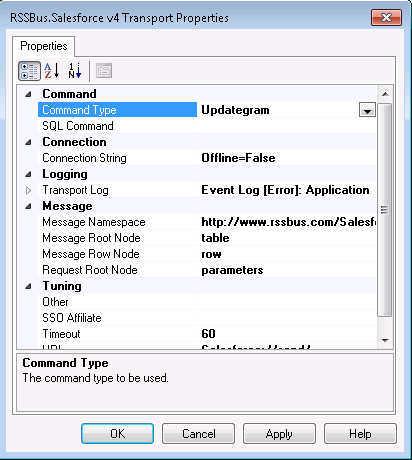
- In the send port properties, click the Configure button. The CData.Jira Service Desk Transport Properties dialog is displayed.
- In the CommandType property, select the command type you want.
- If you want to execute an SQL command, enter the command in the SQL Command box.

Configure the Connection to Jira Service Desk
Configure credentials and other properties required to connect to Jira Service Desk in the Connection String Options dialog.
- In the send port properties dialog, click Configure. The adapter properties dialog is displayed.
- Click the button in the Connection String property.
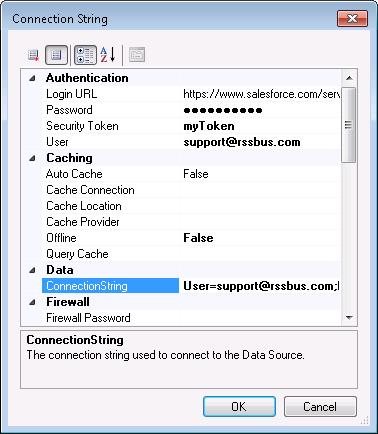
- Click the box in the Connection String property. The Connection String Options dialog is displayed.
- Enter connection properties. Below is a typical connection string:
ApiKey=myApiKey;User=MyUser;InitiateOAuth=GETANDREFRESHYou can establish a connection to any Jira Service Desk Cloud account or Server instance.
Connecting with a Cloud Account
To connect to a Cloud account, you'll first need to retrieve an APIToken. To generate one, log in to your Atlassian account and navigate to API tokens > Create API token. The generated token will be displayed.
Supply the following to connect to data:
- User: Set this to the username of the authenticating user.
- APIToken: Set this to the API token found previously.
Connecting with a Service Account
To authenticate with a service account, you will need to supply the following connection properties:
- User: Set this to the username of the authenticating user.
- Password: Set this to the password of the authenticating user.
- URL: Set this to the URL associated with your JIRA Service Desk endpoint. For example, https://yoursitename.atlassian.net.
Note: Password has been deprecated for connecting to a Cloud Account and is now used only to connect to a Server Instance.
Accessing Custom Fields
By default, the connector only surfaces system fields. To access the custom fields for Issues, set IncludeCustomFields.
- Click Test Connection to verify the values and test connectivity.

After you connect successfully and define the command the adapter will execute, the send port is ready for use. See the following section for an example of using a one-way send port in a simple application. The application reads updategram commands contained in a file and uses a send port to execute the command.
In the example, filters are used to move the messages that contain the updategram from the receive location to the send port. See the following section for more information on filters.
Create Filters to Route BizTalk Messages Through an Application
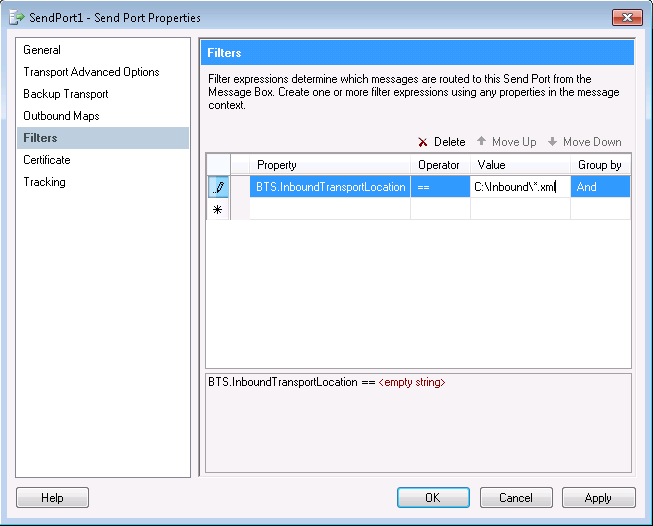
To associate a send port with the messages you want, create a filter rule in the Filters section of the properties for that send port. Messages matching the criteria will be routed to the send port. See the following example to filter on a receive location.
Example: Execute Updategrams with a One-Way Send Port
This section shows how to use a one-way send port in a simple application. The application reads updategram commands contained in a file and executes the commands:
- A one-way receive location picks up the XML document containing the updategram.
- The receive location creates a BizTalk message containing the results of the command.
- A one-way send port filters on the URI of the receive location. The document is routed to the one-way send port.
- The send port executes the updategram command.
As in the preceding example, the followings steps show how to set up a receive location to read updategrams from a file and use a send port to execute the commands:
- Create and configure a static one-way receive location. Use the File transport type. You can follow the same procedure to create and configure a receive location for the CData BizTalk Adapter for Jira Service Desk.
- Create a static one-way send port.
- In the send port properties, click Filters.
- In an empty property, set the following values:
- Property
- Select BTS.InboundTransportLocation from the menu.
- Value
- Enter the URI of the newly created one-way receive location.


