Discover how a bimodal integration strategy can address the major data management challenges facing your organization today.
Get the Report →Connect to Google Cloud Storage Data in CloverDX (formerly CloverETL)
Transfer Google Cloud Storage data using the visual workflow in the CloverDX data integration tool.
The CData JDBC Driver for Google Cloud Storage enables you to use the data transformation components in CloverDX (formerly CloverETL) to work with Google Cloud Storage as sources. In this article, you will use the JDBC Driver for Google Cloud Storage to set up a simple transfer into a flat file. The CData JDBC Driver for Google Cloud Storage enables you to use the data transformation components in CloverDX (formerly CloverETL) to work with Google Cloud Storage as sources. In this article, you will use the JDBC Driver for Google Cloud Storage to set up a simple transfer into a flat file.
Connect to Google Cloud Storage as a JDBC Data Source
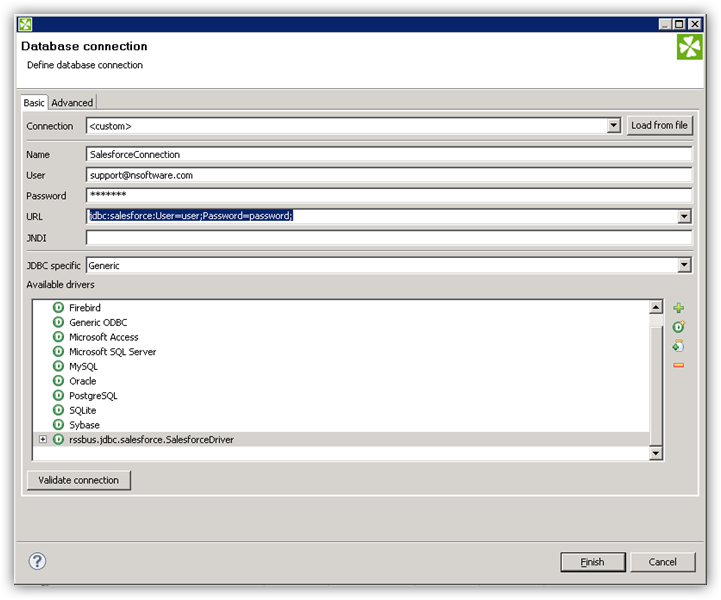
- Create the connection to Google Cloud Storage data. In a new CloverDX graph, right-click the Connections node in the Outline pane and click Connections -> Create Connection. The Database Connection wizard is displayed.
- Click the plus icon to load a driver from a JAR. Browse to the lib subfolder of the installation directory and select the cdata.jdbc.googlecloudstorage.jar file.
- Enter the JDBC URL.
Authenticate with a User Account
You can connect without setting any connection properties for your user credentials. After setting InitiateOAuth to GETANDREFRESH, you are ready to connect.
When you connect, the Google Cloud Storage OAuth endpoint opens in your default browser. Log in and grant permissions, then the OAuth process completes
Authenticate with a Service Account
Service accounts have silent authentication, without user authentication in the browser. You can also use a service account to delegate enterprise-wide access scopes.
You need to create an OAuth application in this flow. See the Help documentation for more information. After setting the following connection properties, you are ready to connect:
- InitiateOAuth: Set this to GETANDREFRESH.
- OAuthJWTCertType: Set this to "PFXFILE".
- OAuthJWTCert: Set this to the path to the .p12 file you generated.
- OAuthJWTCertPassword: Set this to the password of the .p12 file.
- OAuthJWTCertSubject: Set this to "*" to pick the first certificate in the certificate store.
- OAuthJWTIssuer: In the service accounts section, click Manage Service Accounts and set this field to the email address displayed in the service account Id field.
- OAuthJWTSubject: Set this to your enterprise Id if your subject type is set to "enterprise" or your app user Id if your subject type is set to "user".
- ProjectId: Set this to the Id of the project you want to connect to.
The OAuth flow for a service account then completes.
Built-in Connection String Designer
For assistance in constructing the JDBC URL, use the connection string designer built into the Google Cloud Storage JDBC Driver. Either double-click the JAR file or execute the jar file from the command-line.
java -jar cdata.jdbc.googlecloudstorage.jarFill in the connection properties and copy the connection string to the clipboard.
![Using the built-in connection string designer to generate a JDBC URL (Salesforce is shown.)]()
A typical JDBC URL is below:
jdbc:googlecloudstorage:ProjectId='project1';InitiateOAuth=GETANDREFRESH

Query Google Cloud Storage Data with the DBInputTable Component
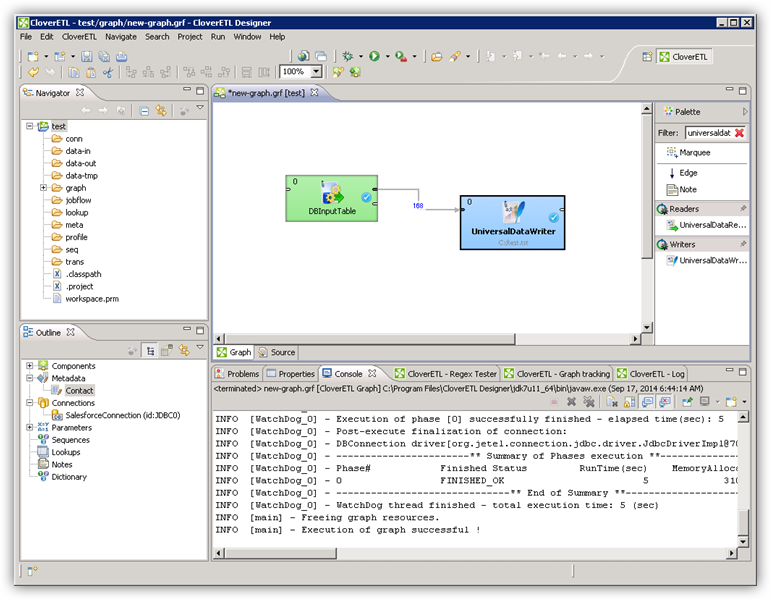
- Drag a DBInputTable from the Readers selection of the Palette onto the job flow and double-click it to open the configuration editor.
- In the DB connection property, select the Google Cloud Storage JDBC data source from the drop-down menu.
- Enter the SQL query. For example:
SELECT Name, OwnerId FROM Buckets WHERE Name = 'TestBucket'
Write the Output of the Query to a UniversalDataWriter
- Drag a UniversalDataWriter from the Writers selection onto the jobflow.
- Double-click the UniversalDataWriter to open the configuration editor and add a file URL.
- Right-click the DBInputTable and then click Extract Metadata.
- Connect the output port of the DBInputTable to the UniversalDataWriter.
- In the resulting Select Metadata menu for the UniversalDataWriter, choose the Buckets table. (You can also open this menu by right-clicking the input port for the UniversalDataWriter.)
- Click Run to write to the file.


