Discover how a bimodal integration strategy can address the major data management challenges facing your organization today.
Get the Report →Integrate Live Azure Data Lake Storage Data into Custom Business Apps Built in Power Apps
Use CData Connect Server to create a virtual SQL Server Database for Azure Data Lake Storage data and integrate live Azure Data Lake Storage data into apps built in Microsoft Power Apps.
Power Apps is a service for building and using custom business apps that connect to your data and work across the web and mobile — without the time and expense of custom software development. When paired with CData Connect Server, you get instant access to Azure Data Lake Storage data from the apps you build using Power Apps. This article shows how to connect to Connect Server from Power Apps and build an app based on live Azure Data Lake Storage data.
CData Connect Server provides a pure SQL interface for Azure Data Lake Storage, allowing you to easily integrate with live Azure Data Lake Storage data in Power Apps — without replicating the data. CData Connect Server looks exactly like a SQL Server database to Power Apps and uses optimized data processing out of the box to push all supported SQL operations (filters, JOINs, etc) directly to Azure Data Lake Storage, leveraging server-side processing to quickly return Azure Data Lake Storage data.
Create a Virtual SQL Database for Azure Data Lake Storage Data
CData Connect Server uses a straightforward, point-and-click interface to connect to data sources and generate APIs.
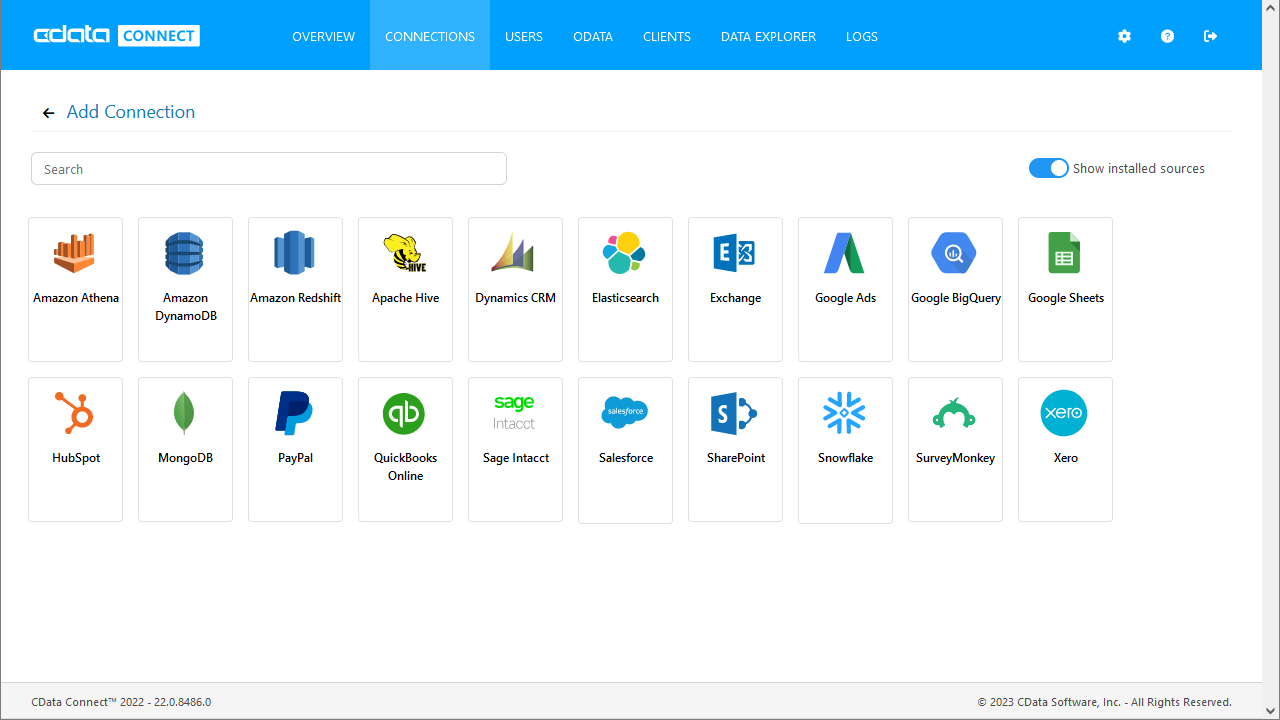
- Login to Connect Server and click Connections.
![Adding a connection]()
- Select "Azure Data Lake Storage" from Available Data Sources.
-
Enter the necessary authentication properties to connect to Azure Data Lake Storage.
Authenticating to a Gen 1 DataLakeStore Account
Gen 1 uses OAuth 2.0 in Azure AD for authentication.
For this, an Active Directory web application is required. You can create one as follows:
To authenticate against a Gen 1 DataLakeStore account, the following properties are required:
- Schema: Set this to ADLSGen1.
- Account: Set this to the name of the account.
- OAuthClientId: Set this to the application Id of the app you created.
- OAuthClientSecret: Set this to the key generated for the app you created.
- TenantId: Set this to the tenant Id. See the property for more information on how to acquire this.
- Directory: Set this to the path which will be used to store the replicated file. If not specified, the root directory will be used.
Authenticating to a Gen 2 DataLakeStore Account
To authenticate against a Gen 2 DataLakeStore account, the following properties are required:
- Schema: Set this to ADLSGen2.
- Account: Set this to the name of the account.
- FileSystem: Set this to the file system which will be used for this account.
- AccessKey: Set this to the access key which will be used to authenticate the calls to the API. See the property for more information on how to acquire this.
- Directory: Set this to the path which will be used to store the replicated file. If not specified, the root directory will be used.
![Configuring a connection (SQL Server is shown).]()
- Click Save Changes
- Click Privileges -> Add and add the new user (or an existing user) with the appropriate permissions.
Connecting to CData Connect Server
To use Connect Server to integrate Azure Data Lake Storage data into your Power Apps, you need a new SQL Server connection:
- Log in to Power Apps
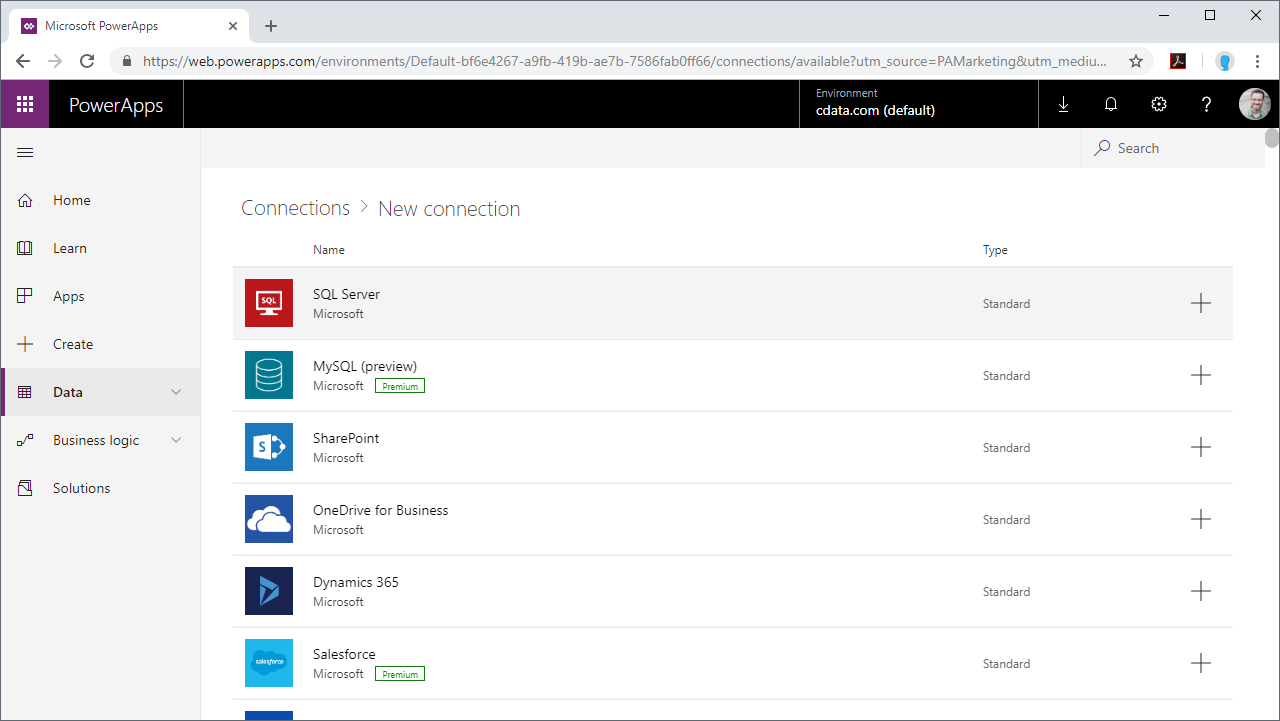
- Click Data -> Connections -> New connection
- Select SQL Server
![Creating a new SQL Server Connection]()
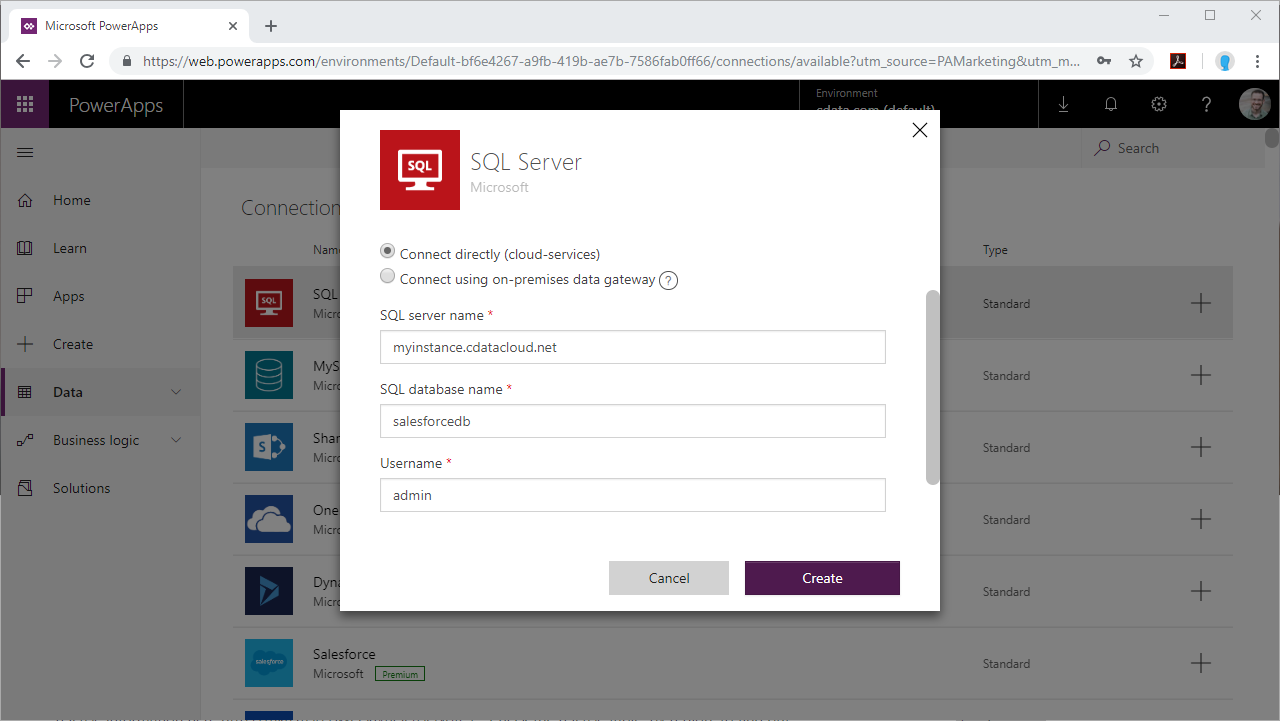
- In the connection wizard:
- Choose to connect directly
- Set SQL server name to the address of your Connect Server instance (CONNECT_SERVER_URL)
- Set SQL database name to the name of the virtual Azure Data Lake Storage database you created earlier (like azuredatalakedb)
- Set the Username and Password and click Create
![Connecting to Connect Server]()
Building a Data-Centric App for Azure Data Lake Storage Data
With the connection to Connect Server configured, you are ready to integrate live Azure Data Lake Storage data into the apps you build in Power Apps.
- Log in to Power Apps
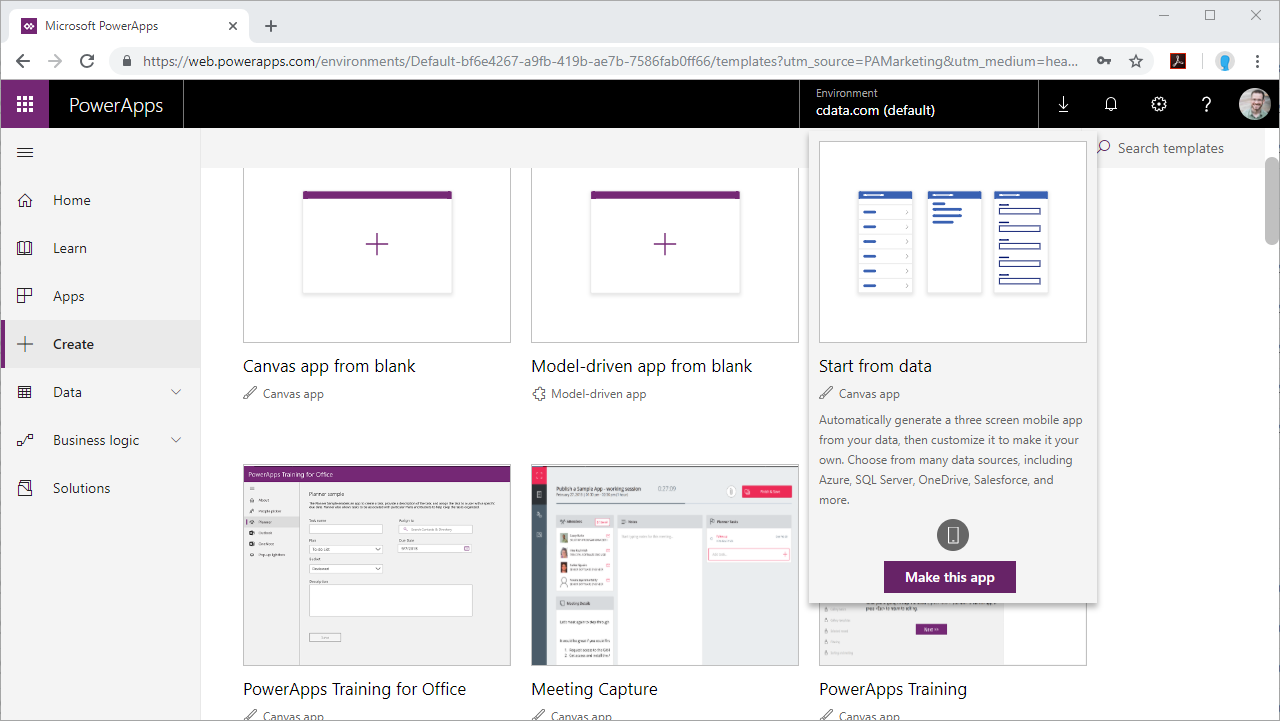
- Click Create, hover over "Start from data" and click Make this app
![Creating a new app from data]()
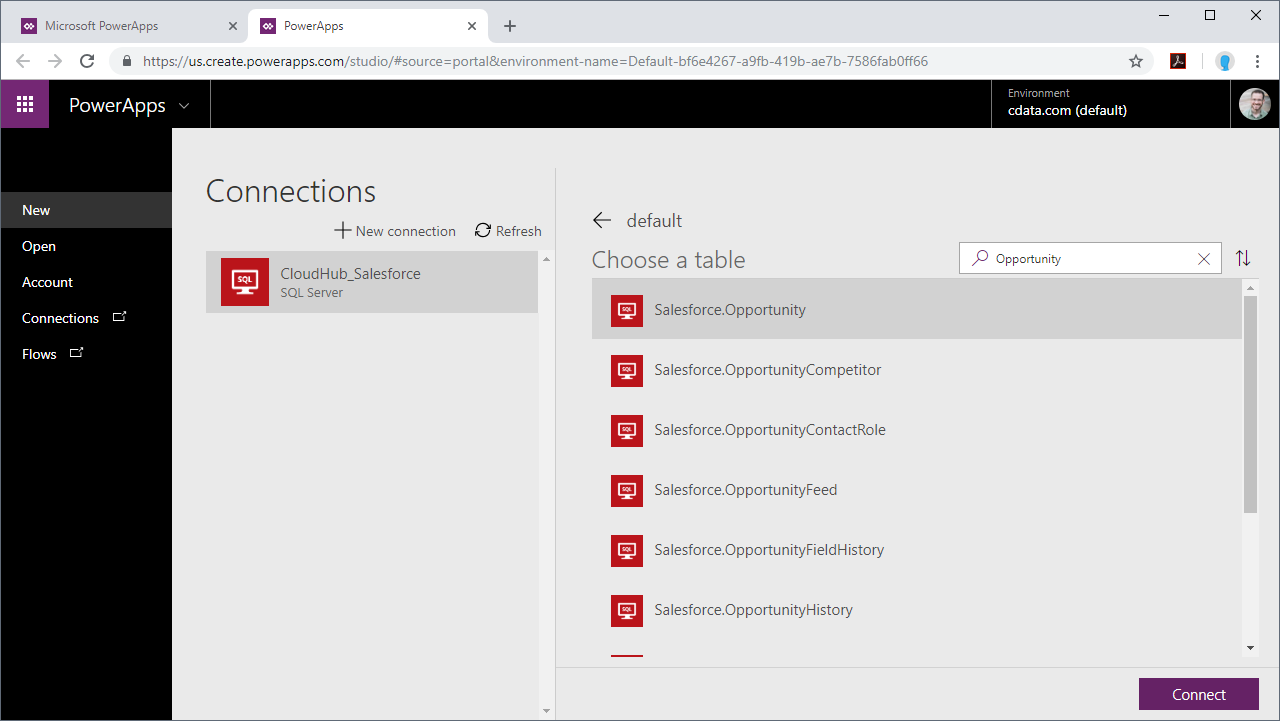
- Select the SQL Server connection you created
- Search for or choose a table to work with
- Click Connect
![Connecting to Azure Data Lake Storage data]()
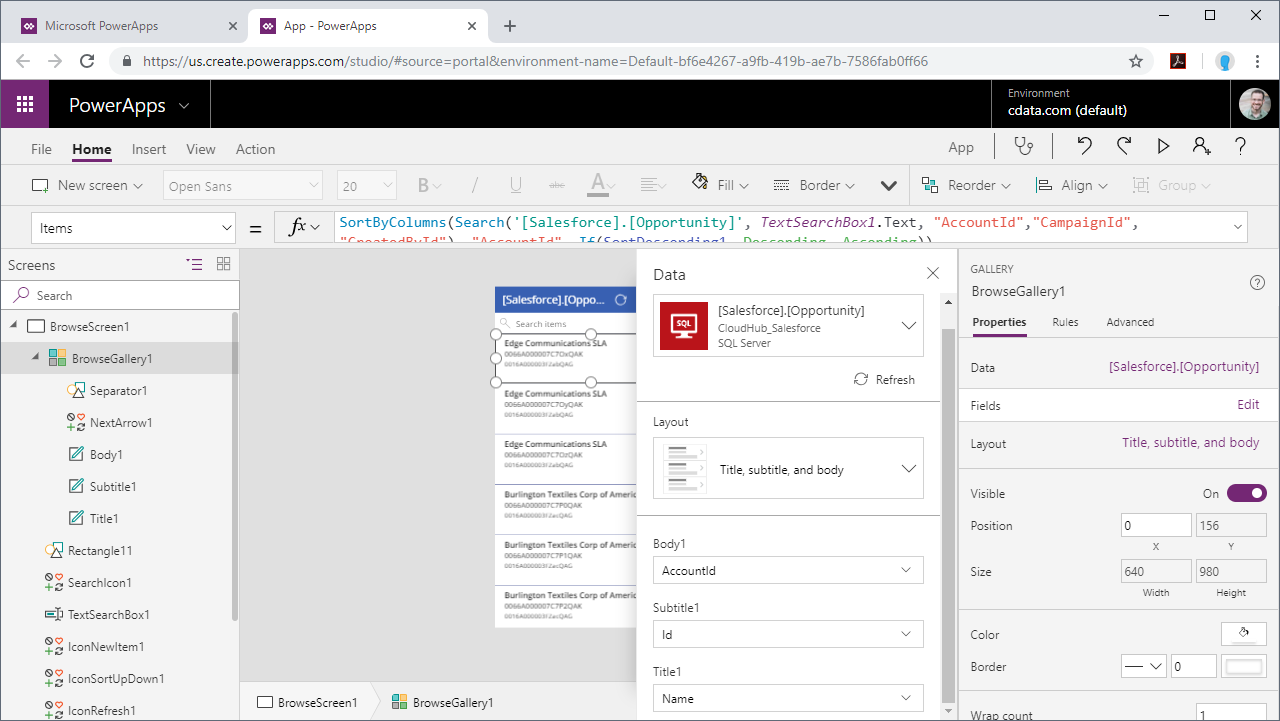
- Customize the newly created app just like you would any other, including changing the layout and setting the fields exposed in BrowseScreen, DetailScreen, and EditScreen
![Customizing the Azure Data Lake Storage data app]()
At this point, you have an app with read access to live Azure Data Lake Storage data that you can save and publish for use within your organization.
SQL Access to Azure Data Lake Storage Data from Applications
Now you have a direct connection to live Azure Data Lake Storage data from Microsoft Power Apps. You can create more connections and apps to drive business — all without replicating Azure Data Lake Storage data.
To get SQL data access to 200+ SaaS, Big Data, and NoSQL sources directly from your applications, see the CData Connect Server.


