Discover how a bimodal integration strategy can address the major data management challenges facing your organization today.
Get the Report →Edit and Search Acumatica External Objects
Use the API Server to securely provide OData feeds of Acumatica data to smart devices and cloud-based applications. Use the API Server and Salesforce Connect to create Acumatica objects that you can access from apps and the dashboard.
The CData API Server, when paired with the (or any of 200+ other ADO.NET Providers), enables you to access Acumatica data from cloud-based applications like the Salesforce console and mobile applications like the Salesforce1 Mobile App. In this article, you will use the API Server and Salesforce Connect to access Acumatica external objects alongside standard Salesforce objects.
Set Up the API Server
Follow the steps below to begin producing secure Acumatica OData services:
Deploy
The API Server runs on your own server. On Windows, you can deploy using the stand-alone server or IIS. On a Java servlet container, drop in the API Server WAR file. See the help documentation for more information and how-tos. You can find guides to deploying the API Server on Azure, Amazon EC2, and Heroku in the CData KB.
Connect to Acumatica
After you deploy the API Server and the , provide authentication values and other connection properties needed to connect to Acumatica by clicking Settings -> Connection and adding a new connection in the API Server administration console.
Set the following connection properties to connect to Acumatica:
- User: Set this to your username.
- Password: Set this to your password.
- Company: Set this to your company.
- Url: Set this to your Acumatica URL, in the format http://{Acumatica ERP instance URL}/entity/{Endpoint name}/{Endpoint version}/.
For example: https://acumatica.com/entity/Default/17.200.001/
See the Getting Started guide in the CData driver documentation for more information.
You can then choose the Acumatica entities you want to allow the API Server access to by clicking Settings -> Resources.
Authorize API Server Users
After determining the OData services you want to produce, authorize users by clicking Settings -> Users. The API Server uses authtoken-based authentication and supports the major authentication schemes. Access can also be restricted based on IP address; by default, only connections to the local machine are allowed. You can authenticate as well as encrypt connections with SSL.
Connect to Acumatica Data as an External Data Source
Follow the steps below to connect to the feed produced by the API Server.
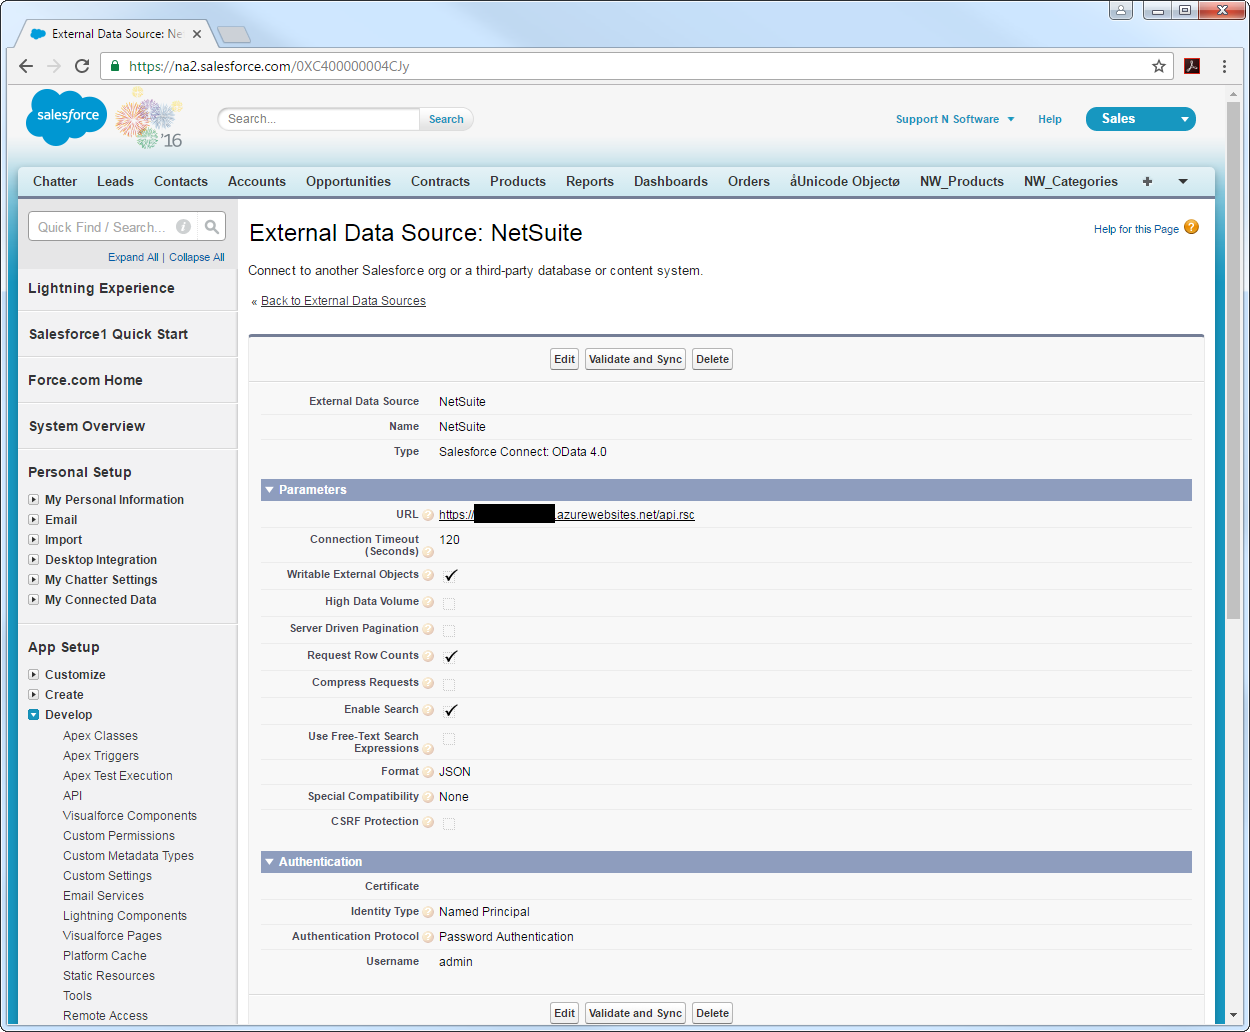
- Log into Salesforce and click Setup -> Develop -> External Data Sources.
- Click New External Data Source.
- Enter values for the following properties:
- External Data Source: Enter a label to be used in list views and reports.
- Name: Enter a unique identifier.
- Type: Select the option "Salesforce Connect: OData 4.0".
URL: Enter the URL to the OData endpoint of the API Server. The format of the OData URL is https://your-server:your-port/api.rsc.
Note that plain-text is suitable for only testing; for production, use TLS.
- Select the Writable External Objects option.
Select JSON in the Format menu.
- In the Authentication section, set the following properties:
- Identity Type: If all members of your organization will use the same credentials to access the API Server, select "Named Principal". If the members of your organization will connect with their own credentials, select "Per User".
- Authentication Protocol: Select Password Authentication to use basic authentication.
- Certificate: Enter or browse to the certificate to be used to encrypt and authenticate communications from Salesforce to your server.
- Username: Enter the username for a user known to the API Server.
- Password: Enter the user's authtoken.

Synchronize Acumatica Objects
After you have created the external data source, follow the steps below to create Acumatica external objects that reflect any changes in the data source. You will synchronize the definitions for the Acumatica external objects with the definitions for Acumatica tables.
- Click the link for the external data source you created.
- Click Validate and Sync.
- Select the Acumatica tables you want to work with as external objects.

Access Acumatica Data as Salesforce Objects
After adding Acumatica data as an external data source and syncing Acumatica tables with Acumatica external objects, you can use the external objects just as you would standard Salesforce objects.
-
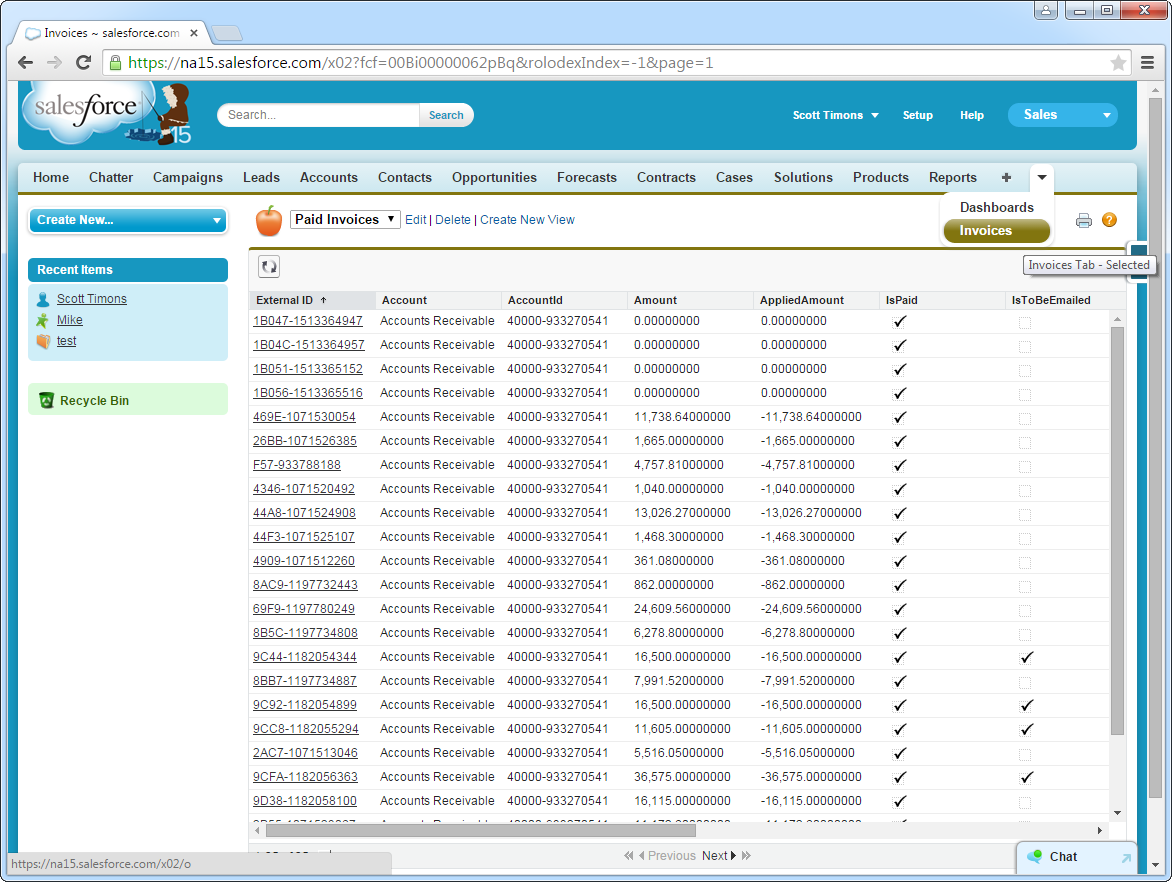
Create a new tab with a filter list view:
![A filtered list view shown on a custom tab. (NetSuite Invoices are shown.)]()
-
Display related lists of Acumatica external objects alongside standard Salesforce objects:
![A related list that shows an indirect lookup relationship, which links a child external object to a parent standard object. (Salesforce accounts and associated NetSuite invoices are shown.)]()
-
Create, read, update, and delete Acumatica objects from tabs on the Salesforce dashboard:
![Editing external objects from the Salesforce dashboard. (NetSuite Employees are shown.)]()
Troubleshooting
You can use the following checklist to avoid typical connection problems:
- Ensure that your server has a publicly accessible IP address. Related to this check, but one layer up, at the operating system layer, you will also need to ensure that your firewall has an opening for the port the API Server is running on. At the application layer, ensure that you have added trusted IP addresses on the Settings -> Security tab of the administration console.
- Ensure that you are using a connection secured by an SSL certificate from a commercial, trusted CA. Salesforce does not currently accept self-signed certificates or internal CAs.
Ensure that the server you are hosting the API Server on is using TLS 1.1 or above. If you are using the .NET API Server, you can accomplish this by using the .NET API Server's embedded server.
If you are using IIS, TLS 1.1 and 1.2 are supported but not enabled by default. To enable these protocols, refer to the how-to on MSDN and the Microsoft technical reference.
If you are using the Java edition, note that TLS 1.2 is enabled by default in Java 8 but not in Java 6 or 7. If you are using these earlier versions, you can refer to this this Oracle how-to.


