Discover how a bimodal integration strategy can address the major data management challenges facing your organization today.
Get the Report →Use CData Sync to Replicate NetSuite Data to Snowflake
NetSuite offers a robust CRM, ERP, and eCommerce platform for businesses large and small, including some internal reporting and visualization features. The reality of business is that you may want to visualize your NetSuite data in external tools and applications or aggregate your NetSuite data with other data in an on-premise or cloud-based data warehouse. With CData Sync, you can easily replicate your NetSuite data to a data warehouse like Snowflake, which opens your data to all of the BI, AI/ML, reporting, and ETL tools, applications, and platforms that can connect to Snowflake.
NetSuite + Snowflake
To replicate your NetSuite data to a Snowflake data warehouse, you need to configure your connection to NetSuite, your connection to Snowflake, and the tables to replicate. Each step is described in detail below.
1. Configure The Connection to NetSuite
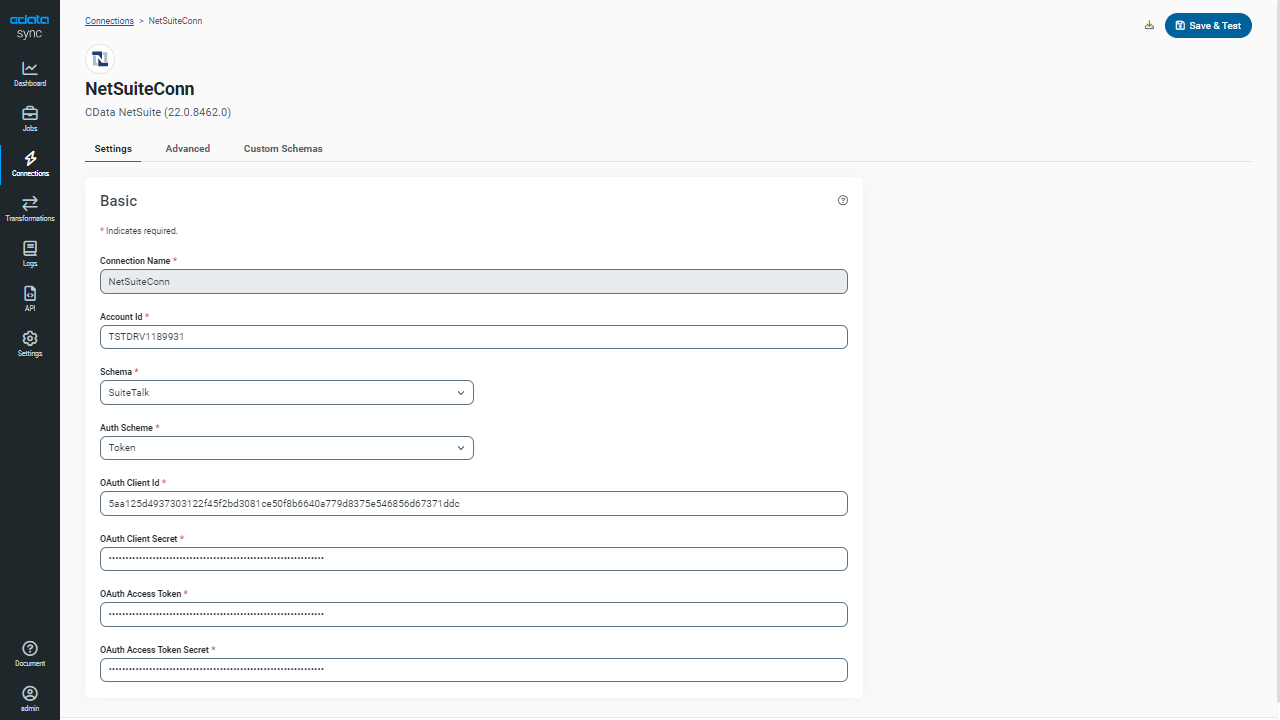
Connecting to any given data source in CData Sync requires knowledge about the service, database, or application, like a server URL or credentials. In many cases, CData Sync uses OAuth to authenticate your account directly with the data source via your web browser. To connect with NetSuite, navigate to the Connections tab, click Add Connection, and select NetSuite from the Source section.
Set the User and Password properties to valid NetSuite user credentials. In addition, set the Account ID property to the ID of a company account that can be accessed by the specified NetSuite user.
2. Configure The Connection to Snowflake
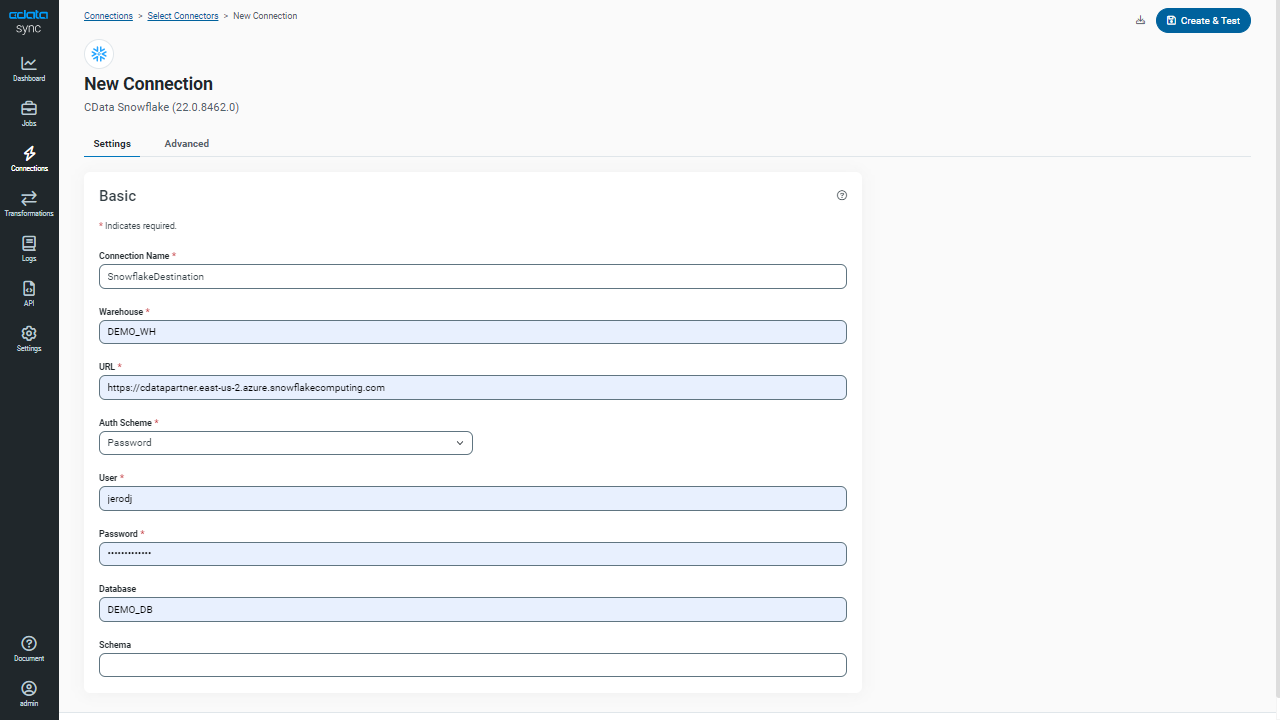
Connecting to any given replication destination is similar to connecting to a data source and requires knowledge about the destination service, database, or application. To configure a connection to Snowflake, navigate to the Connections tab, click Add Connection, and select Snowflake.
Set the User and Password properties to valid Snowflake user credentials. Set Account to the Snowflake account and set URL to the URL of the Snowflake instance (i.e., https://myaccount.snowflakecomputing.com). Last, set Database on the main Settings tab and Warehouse and Schema on the Advanced tab to the corresponding Snowflake values.
3. Select Tables to Replicate and a Replication Interval and Click Run
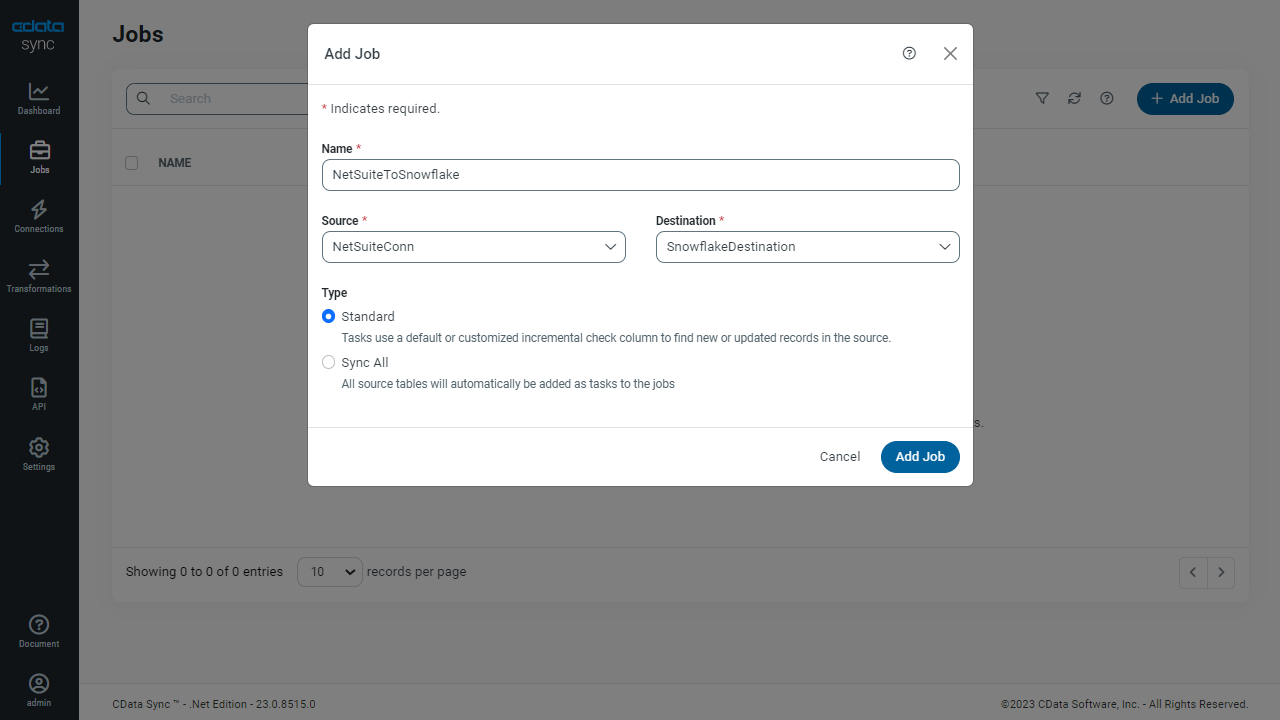
CData Sync uses SQL queries to replicate data, so each entity, folder, bucket, etc. is treated as a table, replicating the columns and rows to the replication database. To create a new replication job, navigate to the Jobs tab and click Add Job. Select the configured NetSuite connection for the Source and the configured Snowflake connection for the Destination. You can choose to replicate entire tables by clicking Add Tables.
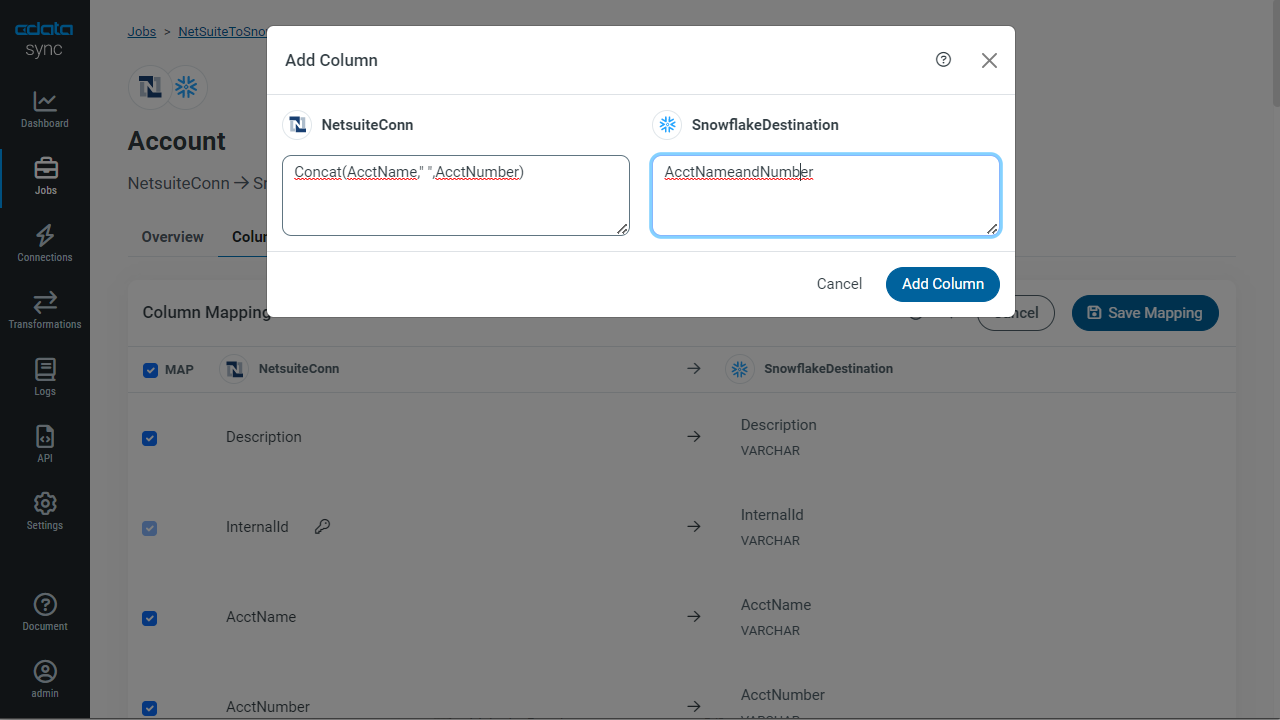
CData Sync also supports extract-transform-load (ETL) functionality. With the Transform feature, you can customize your replication by selecting specific columns (fields), filtering data, creating aggregations, and more to replicate exactly the data you need — even perform operations on the data before it is pushed to the replication destination. For example, using the Transform feature, you can change the name of the replication table and concatenate the fields AcctName and AcctNumber:
In either case, you can initialize the replication by clicking the Run button in the Tables section of the newly configured job. It is worth noting that due to the speed limitations of the NetSuite Web Services, your initial replication can take a significant amount of time. Once the initial replication is complete, set a replication interval for all subsequent replication requests. Since CData Sync performs incremental updates, future replication requests should take significantly less time.
Free Trial & More Information
Now that you have seen how to replicate NetSuite data to Snowflake, visit our CData Sync page to read more information about CData Sync and download a free trial. Start consolidating your enterprise data to a cloud data warehouse today! As always, our world-class Support Team is ready to answer any questions you may have.


