Discover how a bimodal integration strategy can address the major data management challenges facing your organization today.
Get the Report →How to connect to Hive Data from IntelliJ
Integrate connectivity to Hive data with wizards in IntelliJ.
The CData JDBC Driver for Hive enables you to access Hive as a JDBC data source, providing integration with rapid development tools in IDEs. This article shows how to use the data source configuration wizard to connect to Hive data in IntelliJ.
Create a JBDC Data Source for Hive
Follow the steps below to add the driver JAR and define connection properties required to connect to Hive data.
- In the Data Sources window, right-click and then click Add Data Source -> DB Data Source.
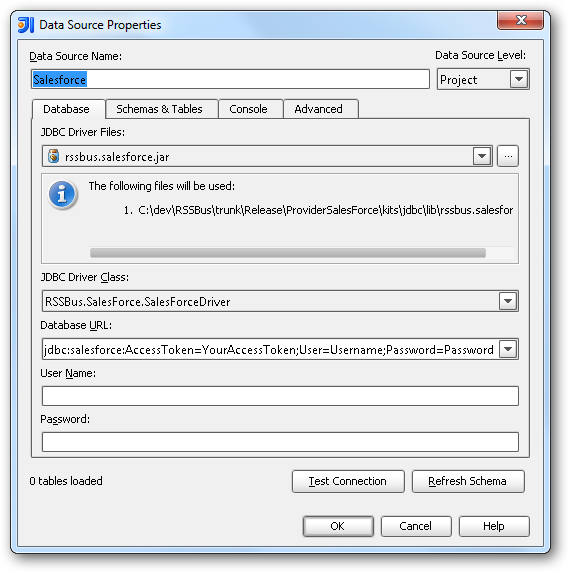
In the Data Source Properties dialog that appears, the following properties are required:
- JDBC Driver Files: Click the button next to this menu to add the JDBC Driver file cdata.jdbc.apachehive.jar, located in the installation directory.
- JDBC Driver Class: In this menu, select cdata.jdbc.apachehive.ApacheHiveDriver from the list.
Database URL: Enter the connection URL in the JDBC URL property. The URL must start with jdbc:apachehive: and includes connection properties separated with semicolons.
Set the Server, Port, TransportMode, and AuthScheme connection properties to connect to Hive.
Built-in Connection String Designer
For assistance in constructing the JDBC URL, use the connection string designer built into the Hive JDBC Driver. Either double-click the JAR file or execute the jar file from the command-line.
java -jar cdata.jdbc.apachehive.jarFill in the connection properties and copy the connection string to the clipboard.
![Using the built-in connection string designer to generate a JDBC URL (Salesforce is shown.)]()
A typical JDBC URL is the following:
jdbc:apachehive:Server=127.0.0.1;Port=10000;TransportMode=BINARY;

Edit and Save Hive Data
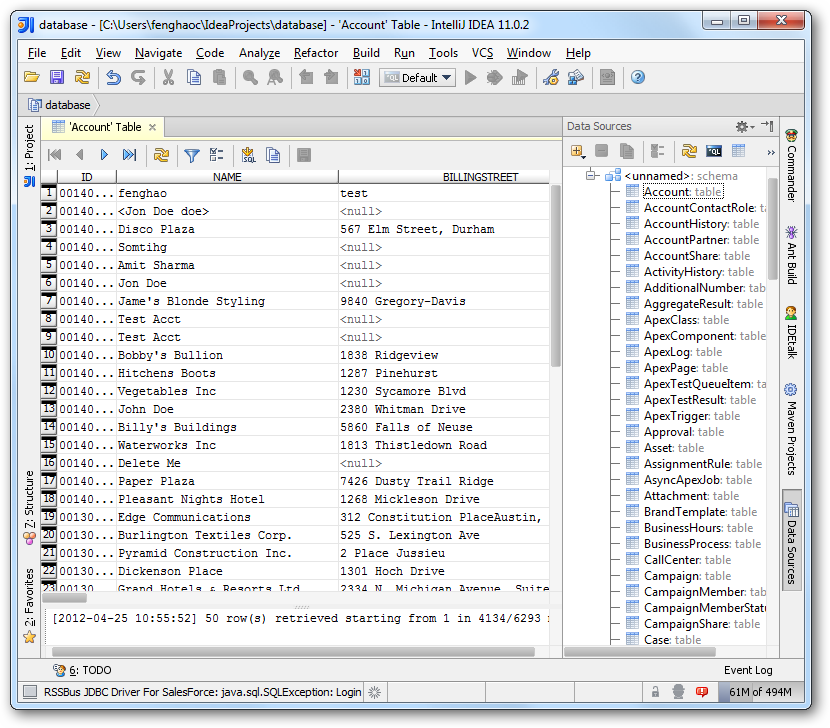
To discover schema information, right-click the data source you just created and click Refresh Tables. To query a table, right-click it and then click Open Tables Editor. You can also modify records in the Table Editor.


