Discover how a bimodal integration strategy can address the major data management challenges facing your organization today.
Get the Report →Visualize AlloyDB Data from Tableau
Use the Tableau Desktop business intelligence tool to connect to AlloyDB data.
With CData Drivers for AlloyDB, you can use data access standards to unlock connectivity to business intelligence tools like Tableau. The CData JDBC Driver for AlloyDB allows you to connect from Tableau on Windows and macOS. This article covers how to discover schemas and query AlloyDB data data in real-time.
NOTE: If you are using Tableau 2020.3 or higher, you can use the CData JDBC Driver for AlloyDB. If you wish to connect to AlloyDB data in Tableau Cloud, you will need to use CData Connect Cloud.
Connect to AlloyDB in Tableau
Before starting Tableau, make sure you've placed the .jar file in the correct folder:
- Windows: C:\Program Files\Tableau\Drivers
- MacOS: ~/Library/Tableau/Drivers
Once your .jar file is in place, establishing a connection is straightforward.
- Start Tableau.
- Under To a Server, select More.
- Select Other Databases (JDBC)
- Enter the JDBC connection string in the URL field.
- Server: The host name or IP of the server hosting the AlloyDB database.
- User: The user which will be used to authenticate with the AlloyDB server.
- Password: The password which will be used to authenticate with the AlloyDB server.
- Database: The database to connect to when connecting to the AlloyDB Server. If this is not set, the user's default database will be used.
- Port: The port of the server hosting the AlloyDB database. This property is set to 5432 by default.
- Select Sign in.
The following connection properties are usually required in order to connect to AlloyDB.
You can also optionally set the following:
Authenticating with Standard Authentication
Standard authentication (using the user/password combination supplied earlier) is the default form of authentication.
No further action is required to leverage Standard Authentication to connect.
Authenticating with pg_hba.conf Auth Schemes
There are additional methods of authentication available which must be enabled in the pg_hba.conf file on the AlloyDB server.
Find instructions about authentication setup on the AlloyDB Server here.
Authenticating with MD5 Authentication
This authentication method must be enabled by setting the auth-method in the pg_hba.conf file to md5.
Authenticating with SASL Authentication
This authentication method must be enabled by setting the auth-method in the pg_hba.conf file to scram-sha-256.
Authenticating with Kerberos
The authentication with Kerberos is initiated by AlloyDB Server when the ∏ is trying to connect to it. You should set up Kerberos on the AlloyDB Server to activate this authentication method. Once you have Kerberos authentication set up on the AlloyDB Server, see the Kerberos section of the help documentation for details on how to authenticate with Kerberos.
Built-in Connection String Designer
For assistance in constructing the JDBC URL, use the connection string designer built into the AlloyDB JDBC Driver. Either double-click the .jar file or execute the .jar file from the command-line.
From Windows:
java -jar 'C:\Program Files\CData[product_name]\lib\cdata.jdbc.alloydb.jar'
From MacOS:
java -jar cdata.jdbc.alloydb.jar
Fill in the connection properties and copy the connection string to the clipboard.

When you configure the JDBC URL, you may also want to set the Max Rows connection property. This will limit the number of rows returned, which is especially helpful for improving performance when designing reports and visualizations.
The following is a sample URL created in the designer:
jdbc:alloydb:User=alloydb;Password=admin;Database=alloydb;Server=127.0.0.1;Port=5432
Discover Schemas and Query Data
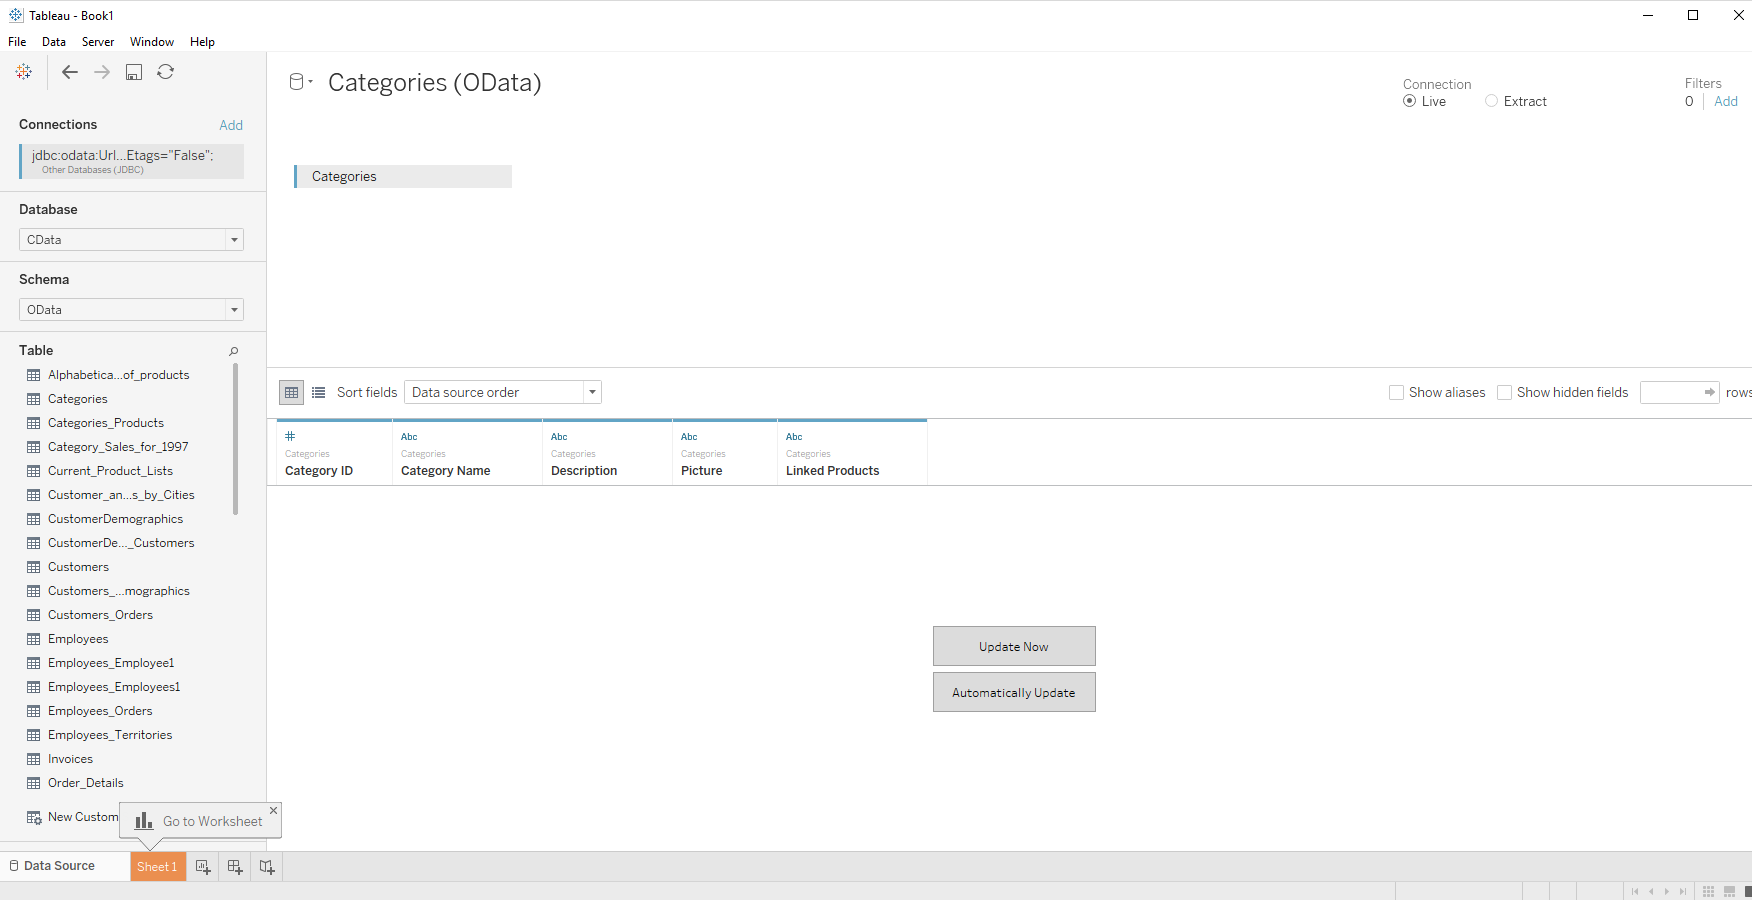
- Select CData from the Database pull-down menu.
- Select CData from the Schema pull-down menu.
- Drag the table onto the join area. You can include multiple tables.
- Select Update Now or Automatically Update. Update Now lets you preview the first 10,000 rows of the data source (or enter the number of rows you want to see in the Rows text box). Automatically Update automatically reflects the changes in the preview area.
- In the Connection menu, select the Live option, so that you skip loading a copy of the data into Tableau and instead work on real-time data.
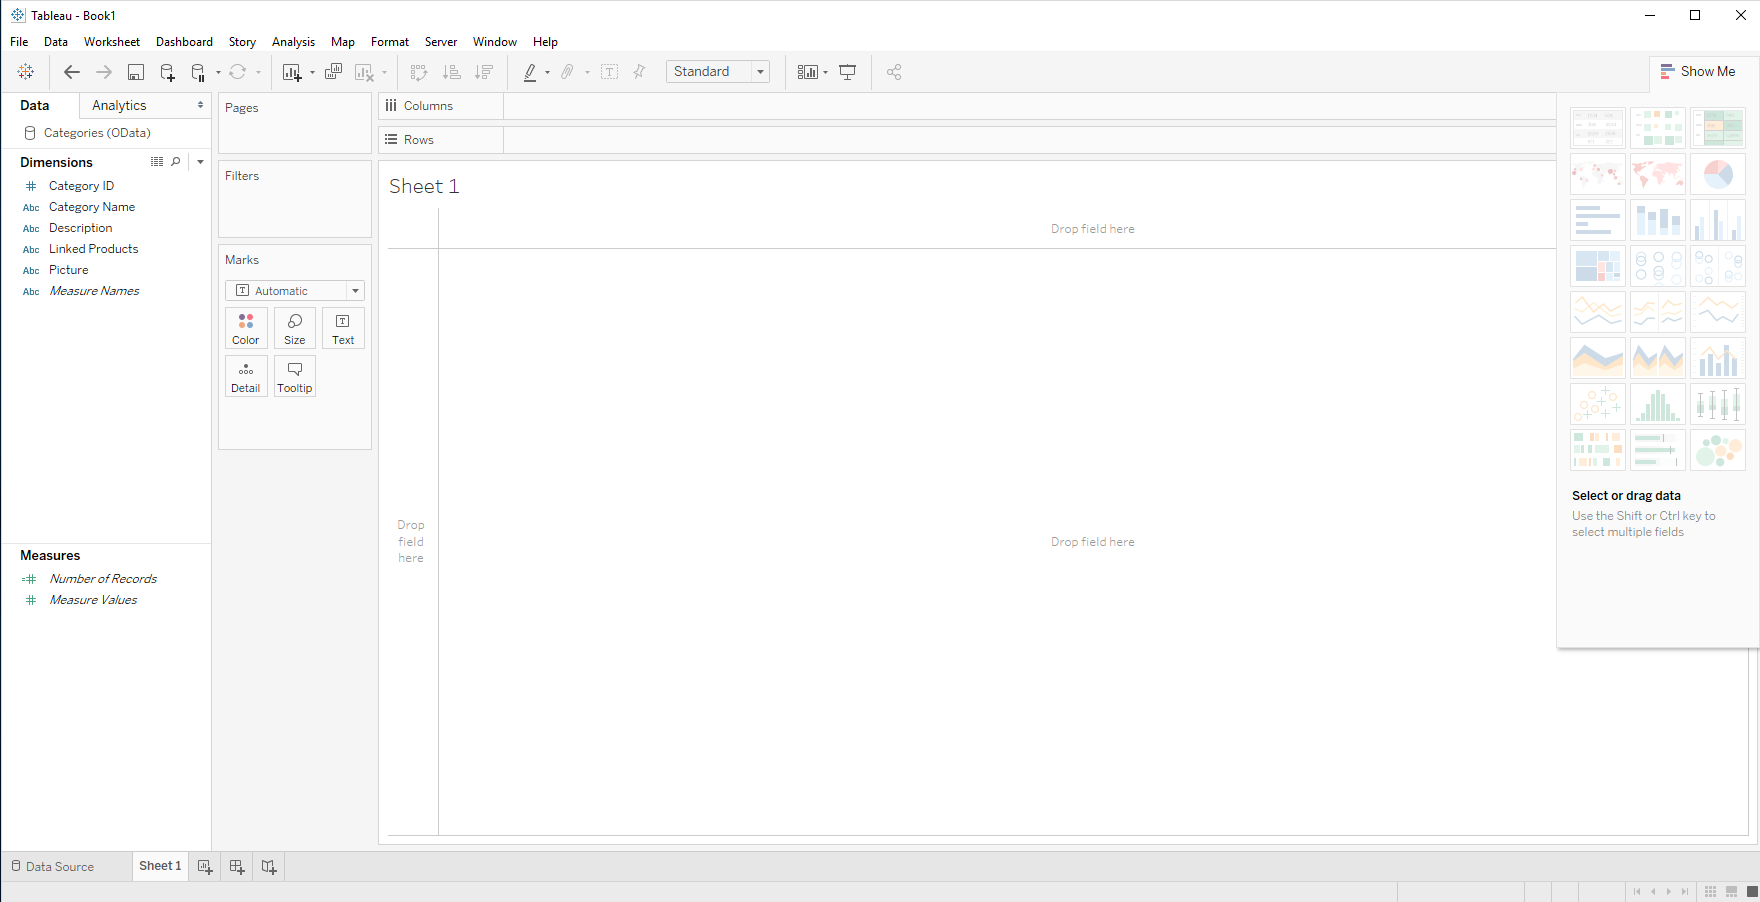
- Click the tab for your worksheet. Columns are listed as Dimensions and Measures, depending on the data type. The CData Driver discovers data types automatically, allowing you to leverage the powerful data processing and visualization features of Tableau.
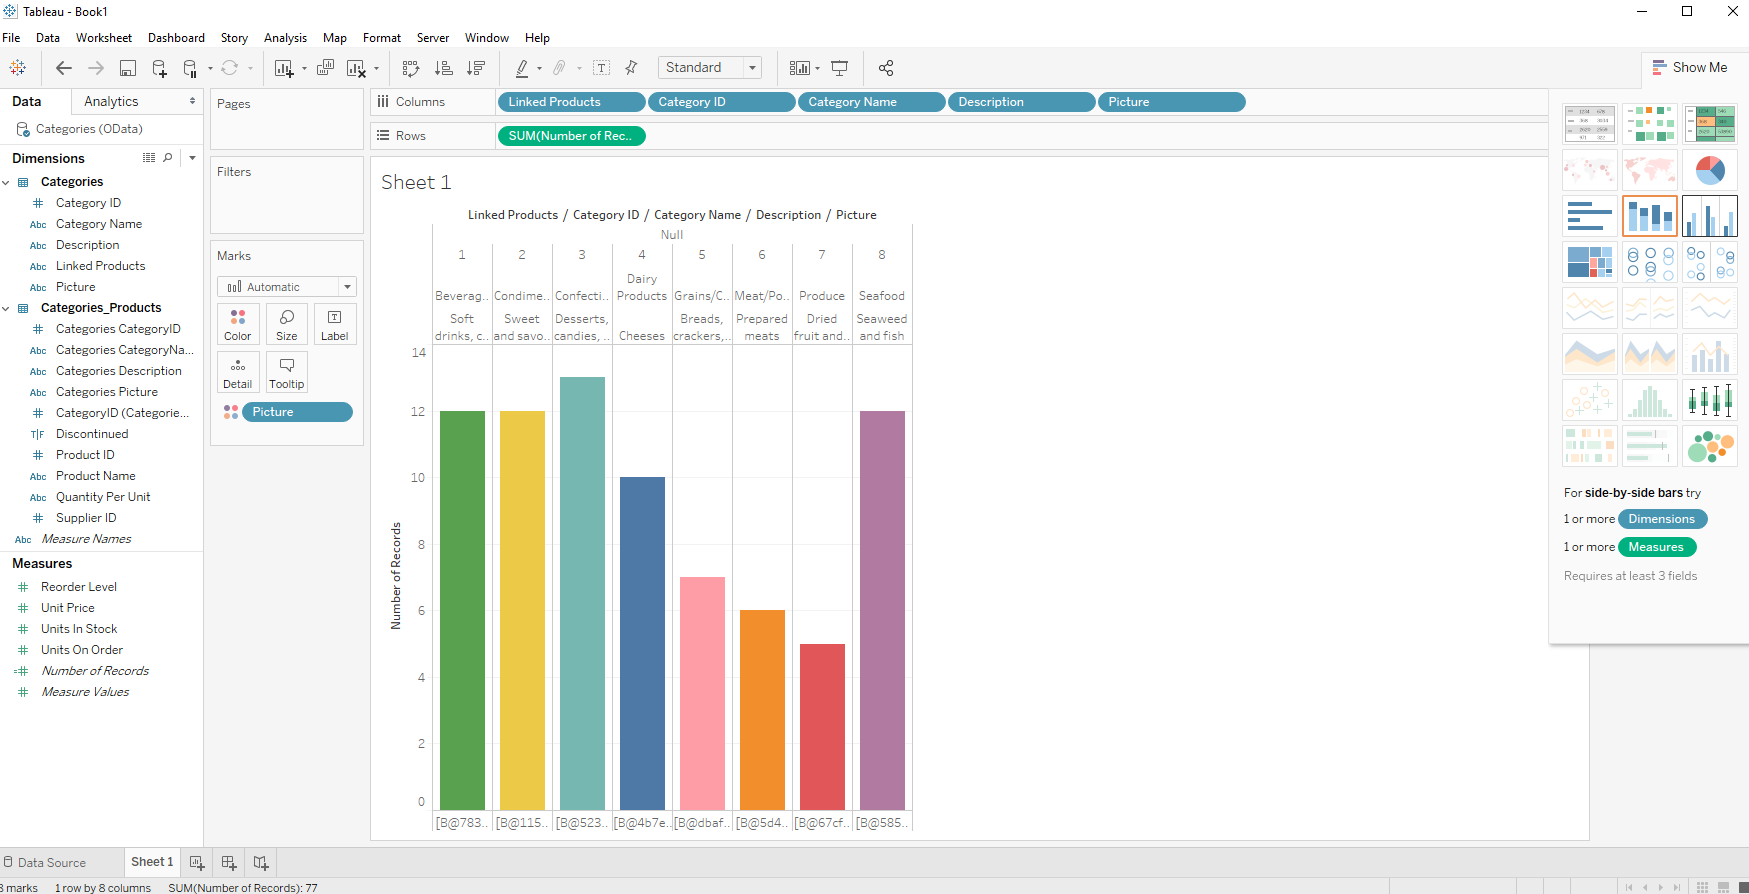
- Click and drag a field from the Dimensions or Measures area to Rows or Columns. Tableau creates column or row headers.
- Select one of the chart types from the Show Me tab. Tableau displays the chart type that you selected.


Using the CData JDBC Driver for AlloyDB with Tableau, you can easily create robust visualizations and reports on AlloyDB data. Download a free, 30-day trial and get started today.


