Discover how a bimodal integration strategy can address the major data management challenges facing your organization today.
Get the Report →


Introducing the CData Connect Cloud Connector for Looker Studio
In a previous article, we talked about how the CData Connect Cloud allows you to access live SaaS, Big Data, and NoSQL sources directly from cloud-based analytics, reporting, and ETL applications, including Looker Studio (formerly Google Data Studio).
Now, connecting to your Connect Cloud instance from Looker Studio is even easier, thanks to the newly published Looker Studio Partner CData Connect Cloud Connector.
In this article, we walk through configuring the CData Connect Cloud Connector and showcase a simple report based on live data from Connect Cloud, with links to a full walk-through and more information.
Configuring the Connect Cloud Connector
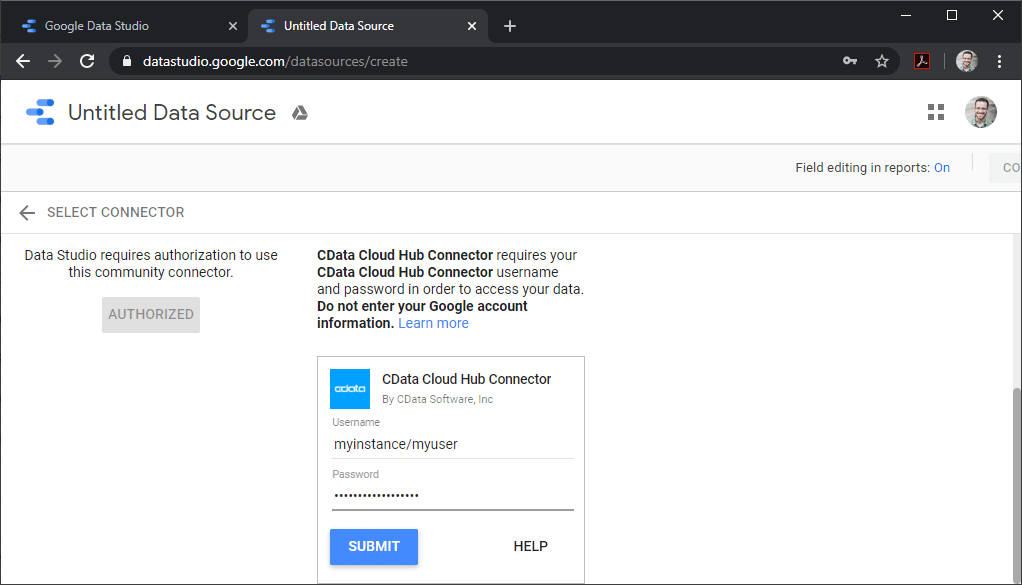
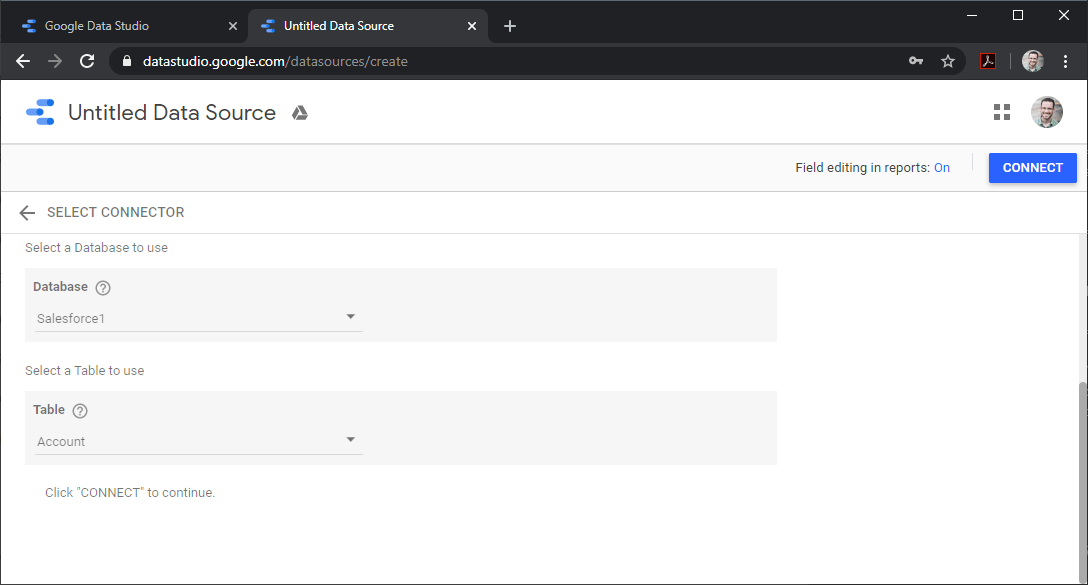
To connect to your Connect Cloud instance from Looker Studio, open Looker Studio, create a new data source using the CData Connect Cloud Connector, and enter your Connect Cloud credentials. Once you authenticate, select a table to display and create a new report/dashboard.
Creating a New Data Source
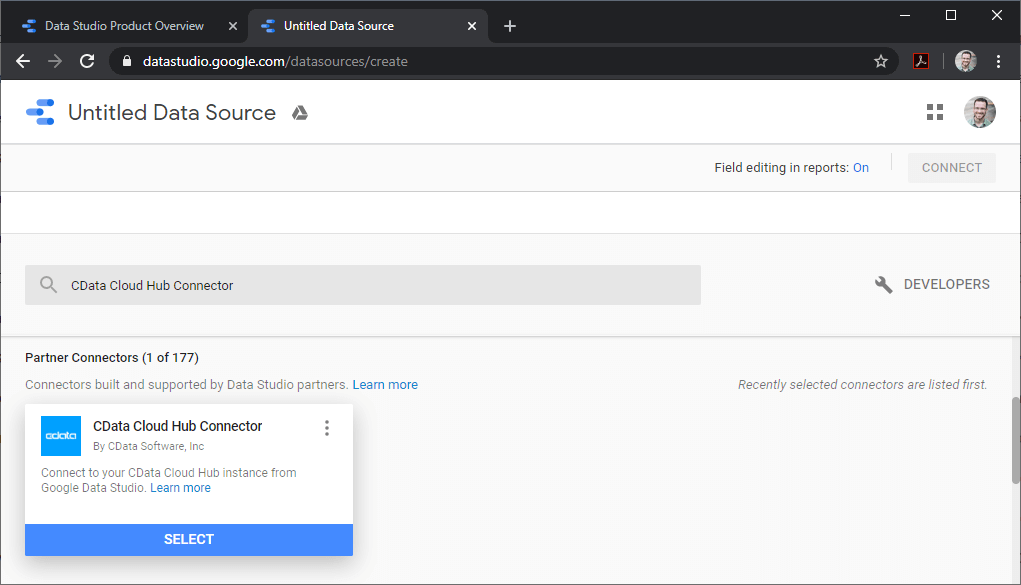
Configuring the Connector
Selecting a Table
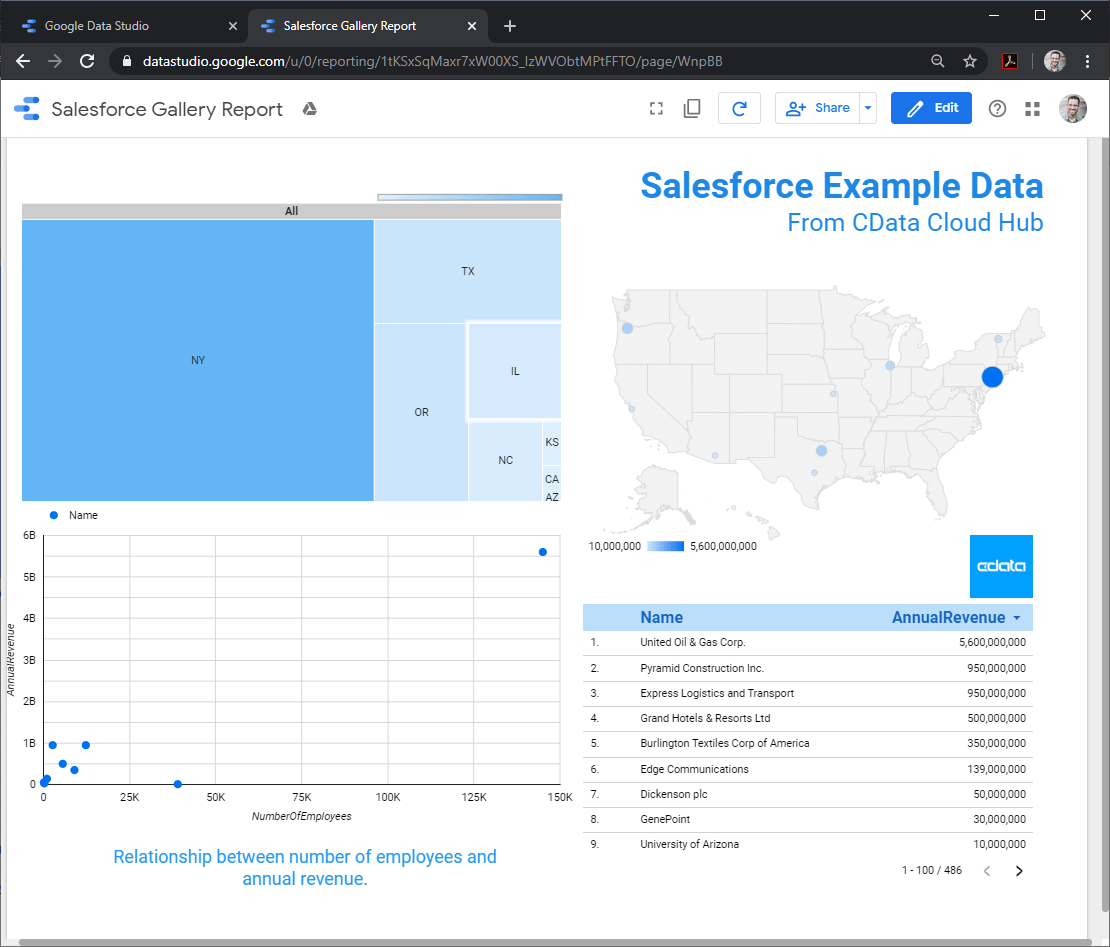
Creating a New Report from Connect Cloud Data
Once connected, creating a report using data from CData Connect Cloud is just like creating a report from any other data source: modify columns, select chart types, and choose fields & dimensions to visualize.
More Information & Free Trial
At this point, you can see how CData Connect Cloud can be used to work with SaaS, Big Data, and NoSQL sources from Looker Studio. Read our Knowledge Base article for detailed information on configuring the Connector. As always, our Support Team is available to answer any questions you might have.
Request a free trial and start working with your Connect Cloud data in Looker Studio today.
Data Connectors
ETL/ ELT Solutions
Cloud & API Connectivity
OEM & Custom Drivers